How to Photograph Sharp Birds in Flight
Capturing sharp photos of birds in flight can be challenging because the first attempts often turn out blurry before you’ve figured out how to freeze motion. Consistently nailing sharp shots is easy once you know the recipe. You have to choose the right shutter speed, the best shooting mode to control shutter speed, lock focus on the eyes, and pan with the bird.
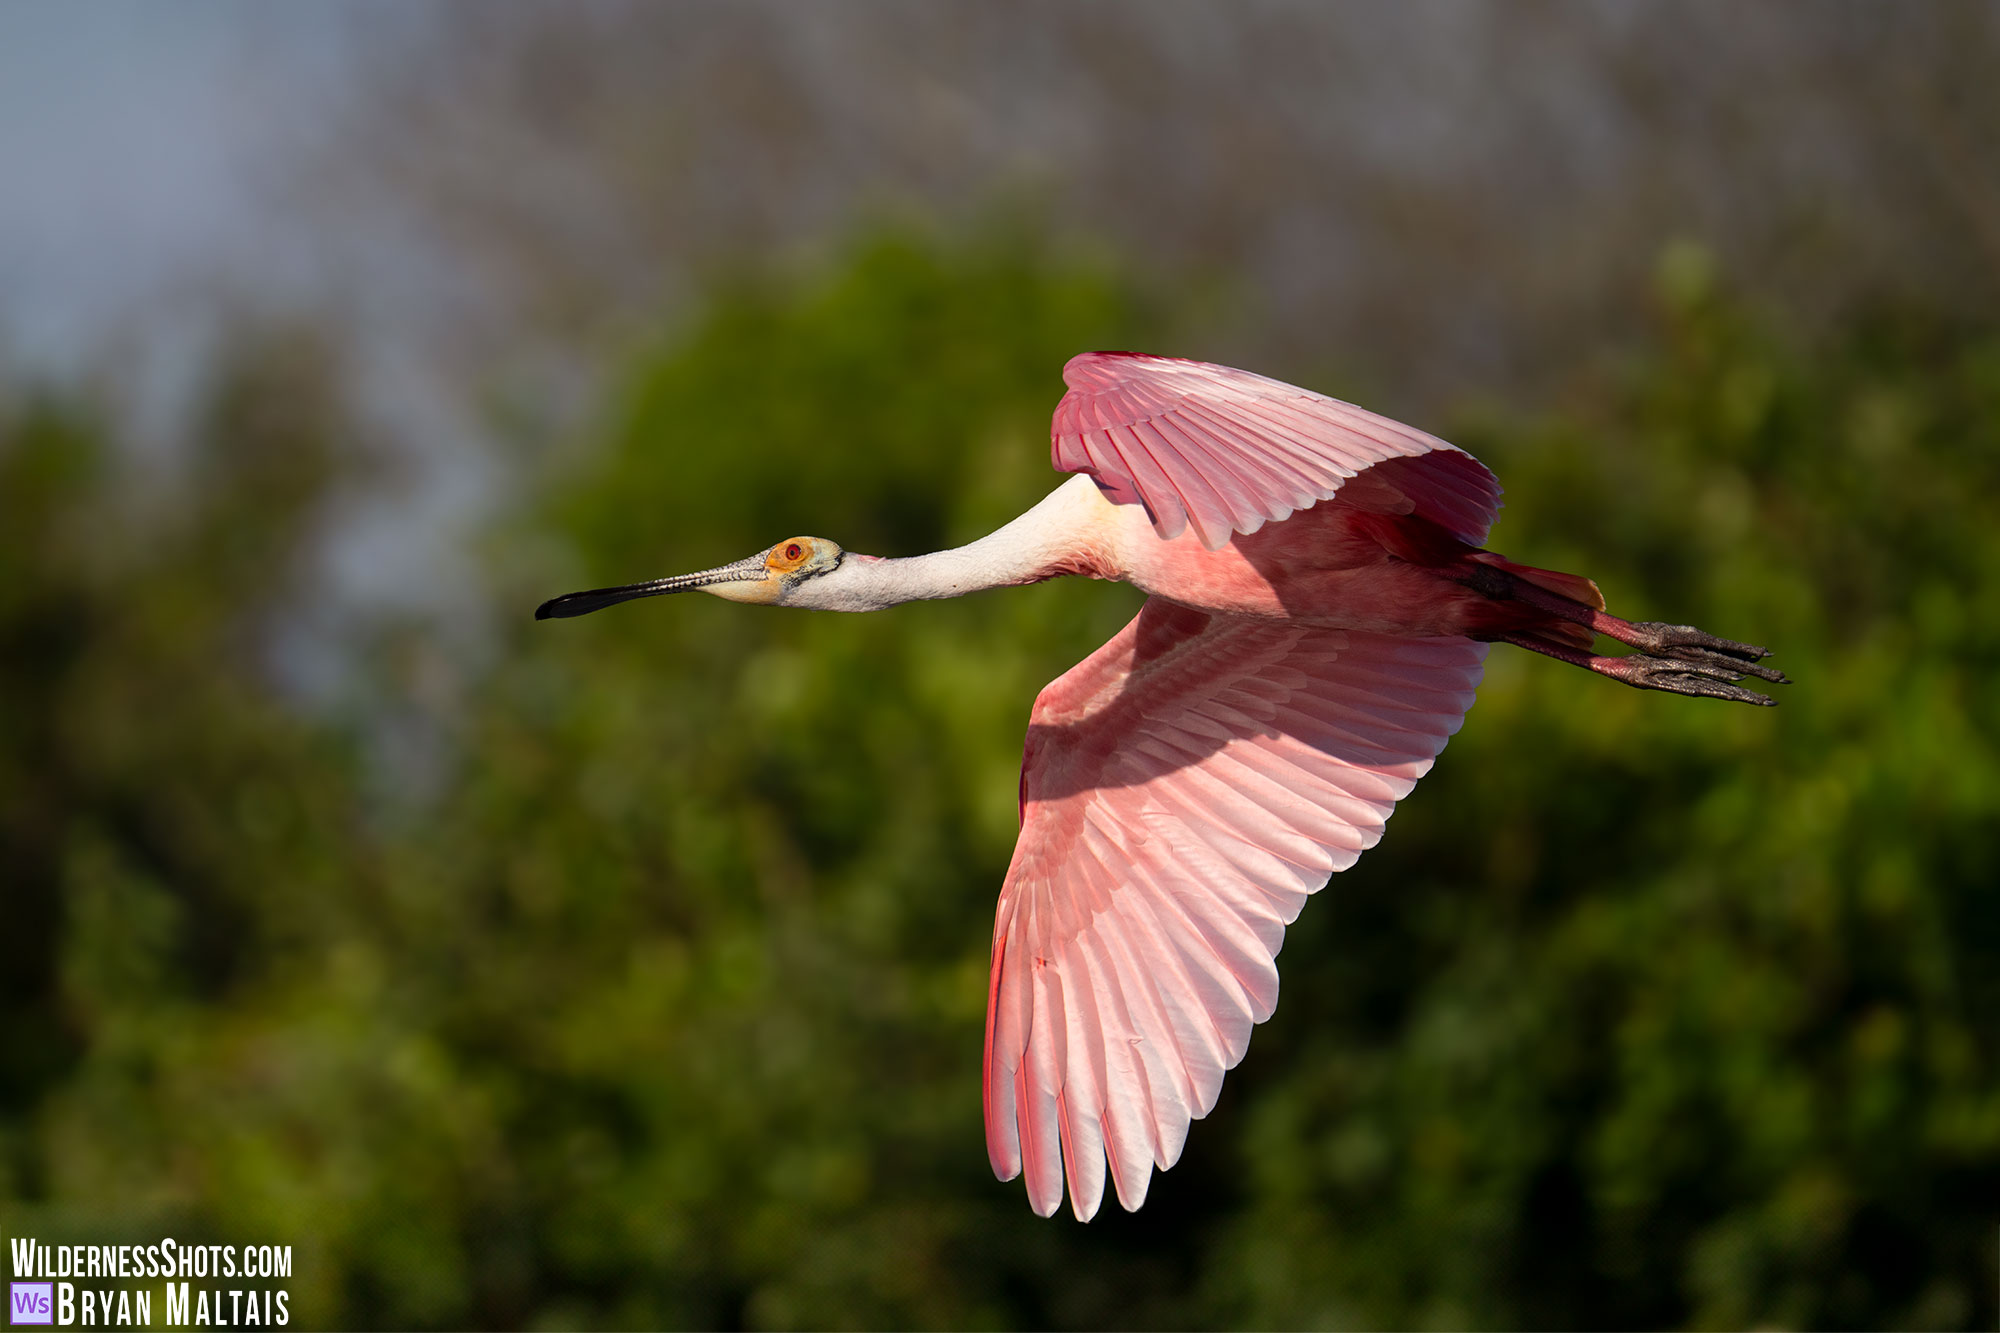
I recently returned from a mesmerizing birding trip to Florida’s beautiful southeast coasts. The photos that I captured make good examples to demonstrate bird in flight photo techniques. I encountered Roseate Spoonbills, Great Egrets and Great Blue Herons at rookeries on freshwater wetlands, and Ospreys, Snowy Egrets and Tri-colored Herons in salt-water inlets.
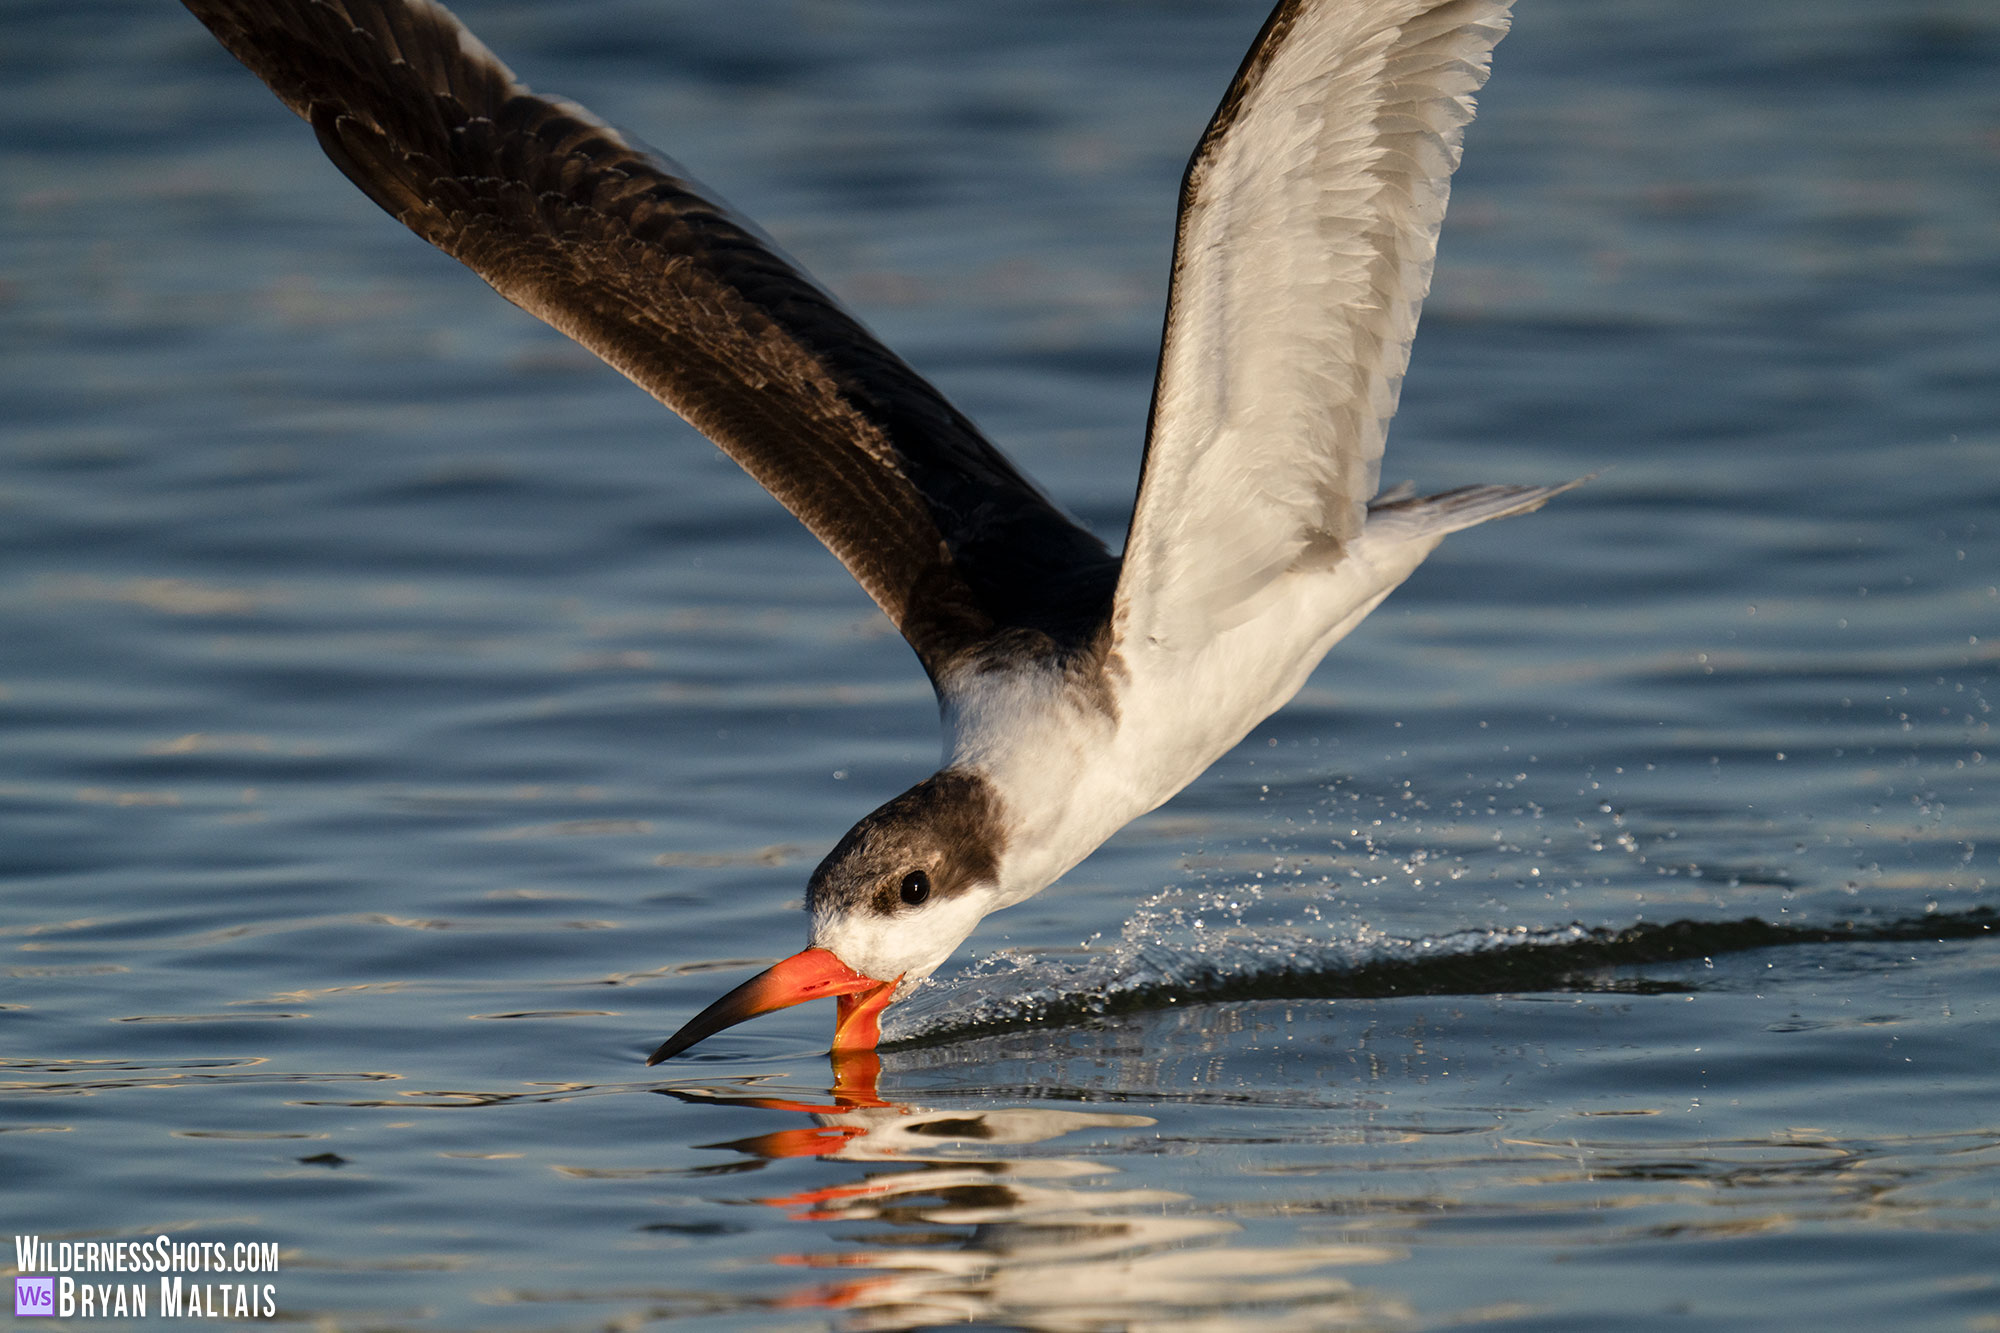 Black Skimmers pierced the water’s surface back and forth along the beach, snapping their bills shut the moment they came in contact with a tiny Anchovi. Sony A7rV. Sony 200-600mm. Sony 1.4x Teleconverter. 1/4000th sec, f/9, ISO 800
1. Use a Shutter Speed between 1/2000 and 1/4000th sec
Setting a sufficiently fast shutter speed is the most crucial factor for capturing sharp photos of birds in flight. The shutter speed should be between between 1/2000th sec and 1/4000th sec, assuming you’re using a telephoto lens. As a guideline, it should be around 2 stops above the lens’ focal length. For example, if shooting with an 600mm lens, you should aim for at least 1/2500th sec for birds in flight. 1/640th sec would be the minimum shutter speed needed just to freeze non-moving subjects. This is the reciprocal rule.
The stronger the lens and closer the bird, the more its movement is magnified, so the faster the shutter speed needs to be. Don’t forget to factor in extra magnification if using a teleconverter. Vigor of movement also dictates the minimum shutter speed needed to freeze action. An Osprey diving-bombing to catch a fish needs about 1/4000th sec, while an Egret serenely gliding across the sky may only need 1/2000th sec if you pan along with it.
So why wouldn’t you always use the fastest shutter speed possible just to play it safe? Well, in bright light you often can. But in lower light, using a fast shutter speed transmits less light to the sensor, forcing a higher ISO. High ISO renders high image noise. While it might be tempting to minimize noise by reducing shutter speed, high noise is better than a blurry photo. In most cases, you should let the ISO top out before setting a shutter speed that’s too slow to freeze action. Noise can be smoothed-out very effectively in post.
Now that you know how to pick shutter speed, you need to use the best shooting mode for controlling it.
Shop bird photography gear on Amazon:
This blog contains Amazon affiliate links. Clicking on them and shopping on Amazon as you normally would supports this blog by generating small commissions.
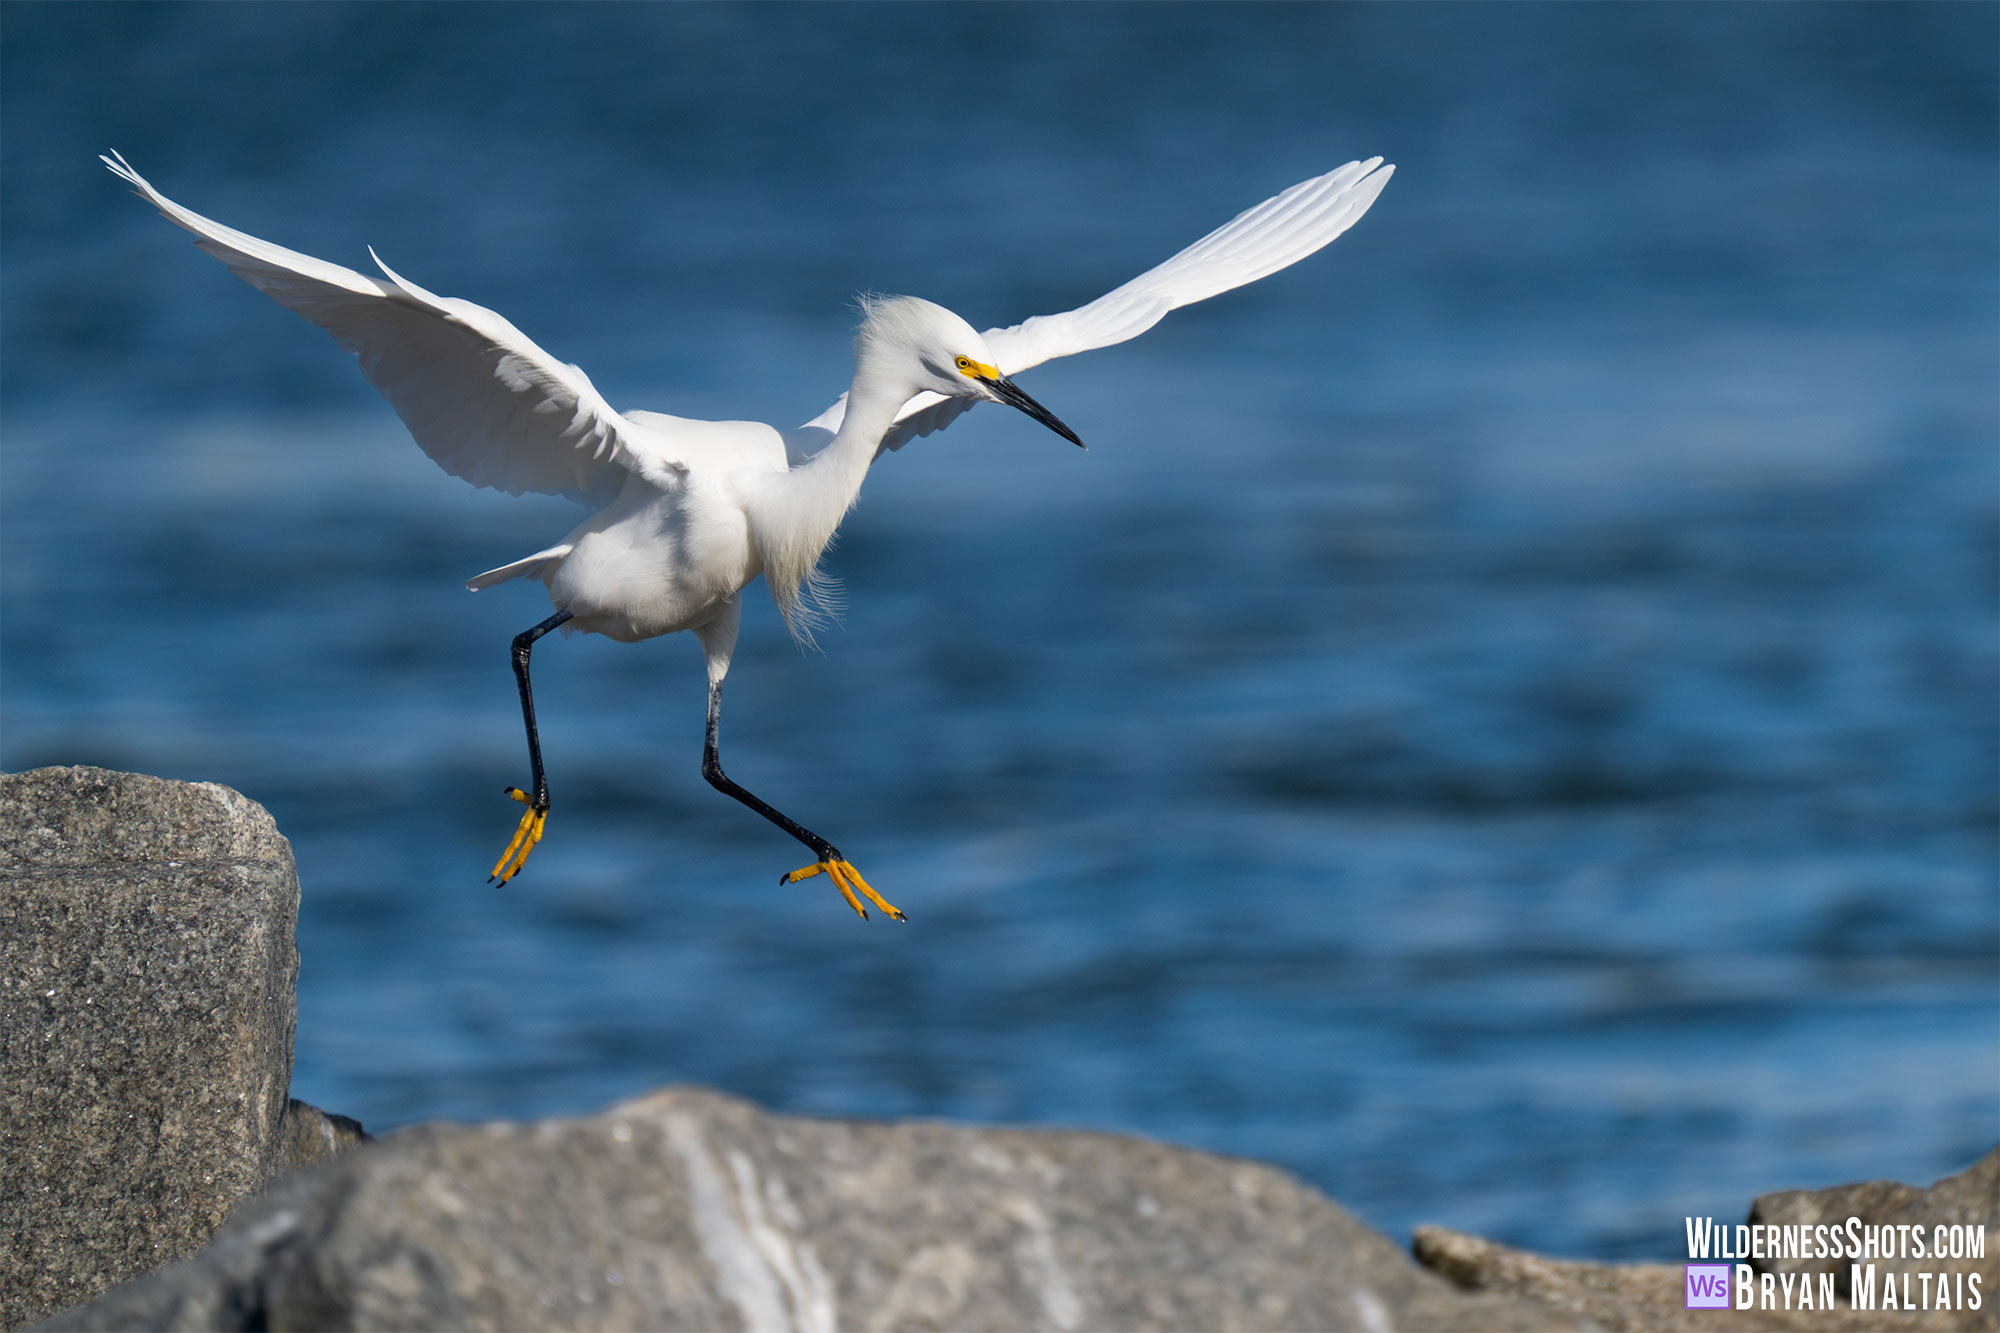 With such a wide wingspan and featherweight body, Snowy Egret can effortlessly hover in the headwind around bays, making them relatively easy to photograph in flight. Sony A7rV. Sony 200-600mm. 1/4000th sec, f/8, ISO 800
2. Shoot in Manual Mode with Auto ISO for sharp Birds in Flight
I prefer Manual shooting mode + Auto ISO for bird and wildlife photography because you can control shutter speed on the fly. It also gives you direct control over the aperture should you need to change the f/stop to adjust depth of field. Though it’s called Manual Mode, you don’t actually have to juggle all the settings. You set shutter speed and only change it when needed, same with f/stop, and the camera handles exposure by controlling ISO.
What about Aperture Priority mode? This was the standard for wildlife photography during the film and early days of digital before Auto ISO, and is still the norm for many shooters. The drawback of AP Mode is that the camera sets the shutter speed instead of you. The problem with this is that camera doesn’t know which shutter speed is best for the subject at hand, so it defaults to the reciprocal rule. This keeps shutter speed around the lens’ focal length, which is way too slow to freeze action. For example, if shooting with a 600mm lens, the camera would set the shutter speed to 1/640th sec. That’s only fast enough to prevent camera shake from hand-holding, but not motion blur in flying birds. It’s not that you can’t use AP mode for birds in flight, but you have to control shutter speed indirectly by adjusting ISO. This is more cumbersome than using Manual Mode + Auto ISO where the camera handles it. You may have astutely pointed out that you can also use Auto ISO in AP mode, which lets you set a minimum shutter speed. However, to change the shutter speed, you have to dig into the ISO menu instead of just flicking the dial.
What about Shutter Priority Mode? After-all, the name implies that it gives control over shutter speed. SP mode isn’t a good choice because it constantly changes the aperture to control exposure. You want the aperture to stay at the f/stop that you set it. When the f/stop changes involuntarily, so does Depth of Field and bokeh, which changes the aesthetic of every photo.
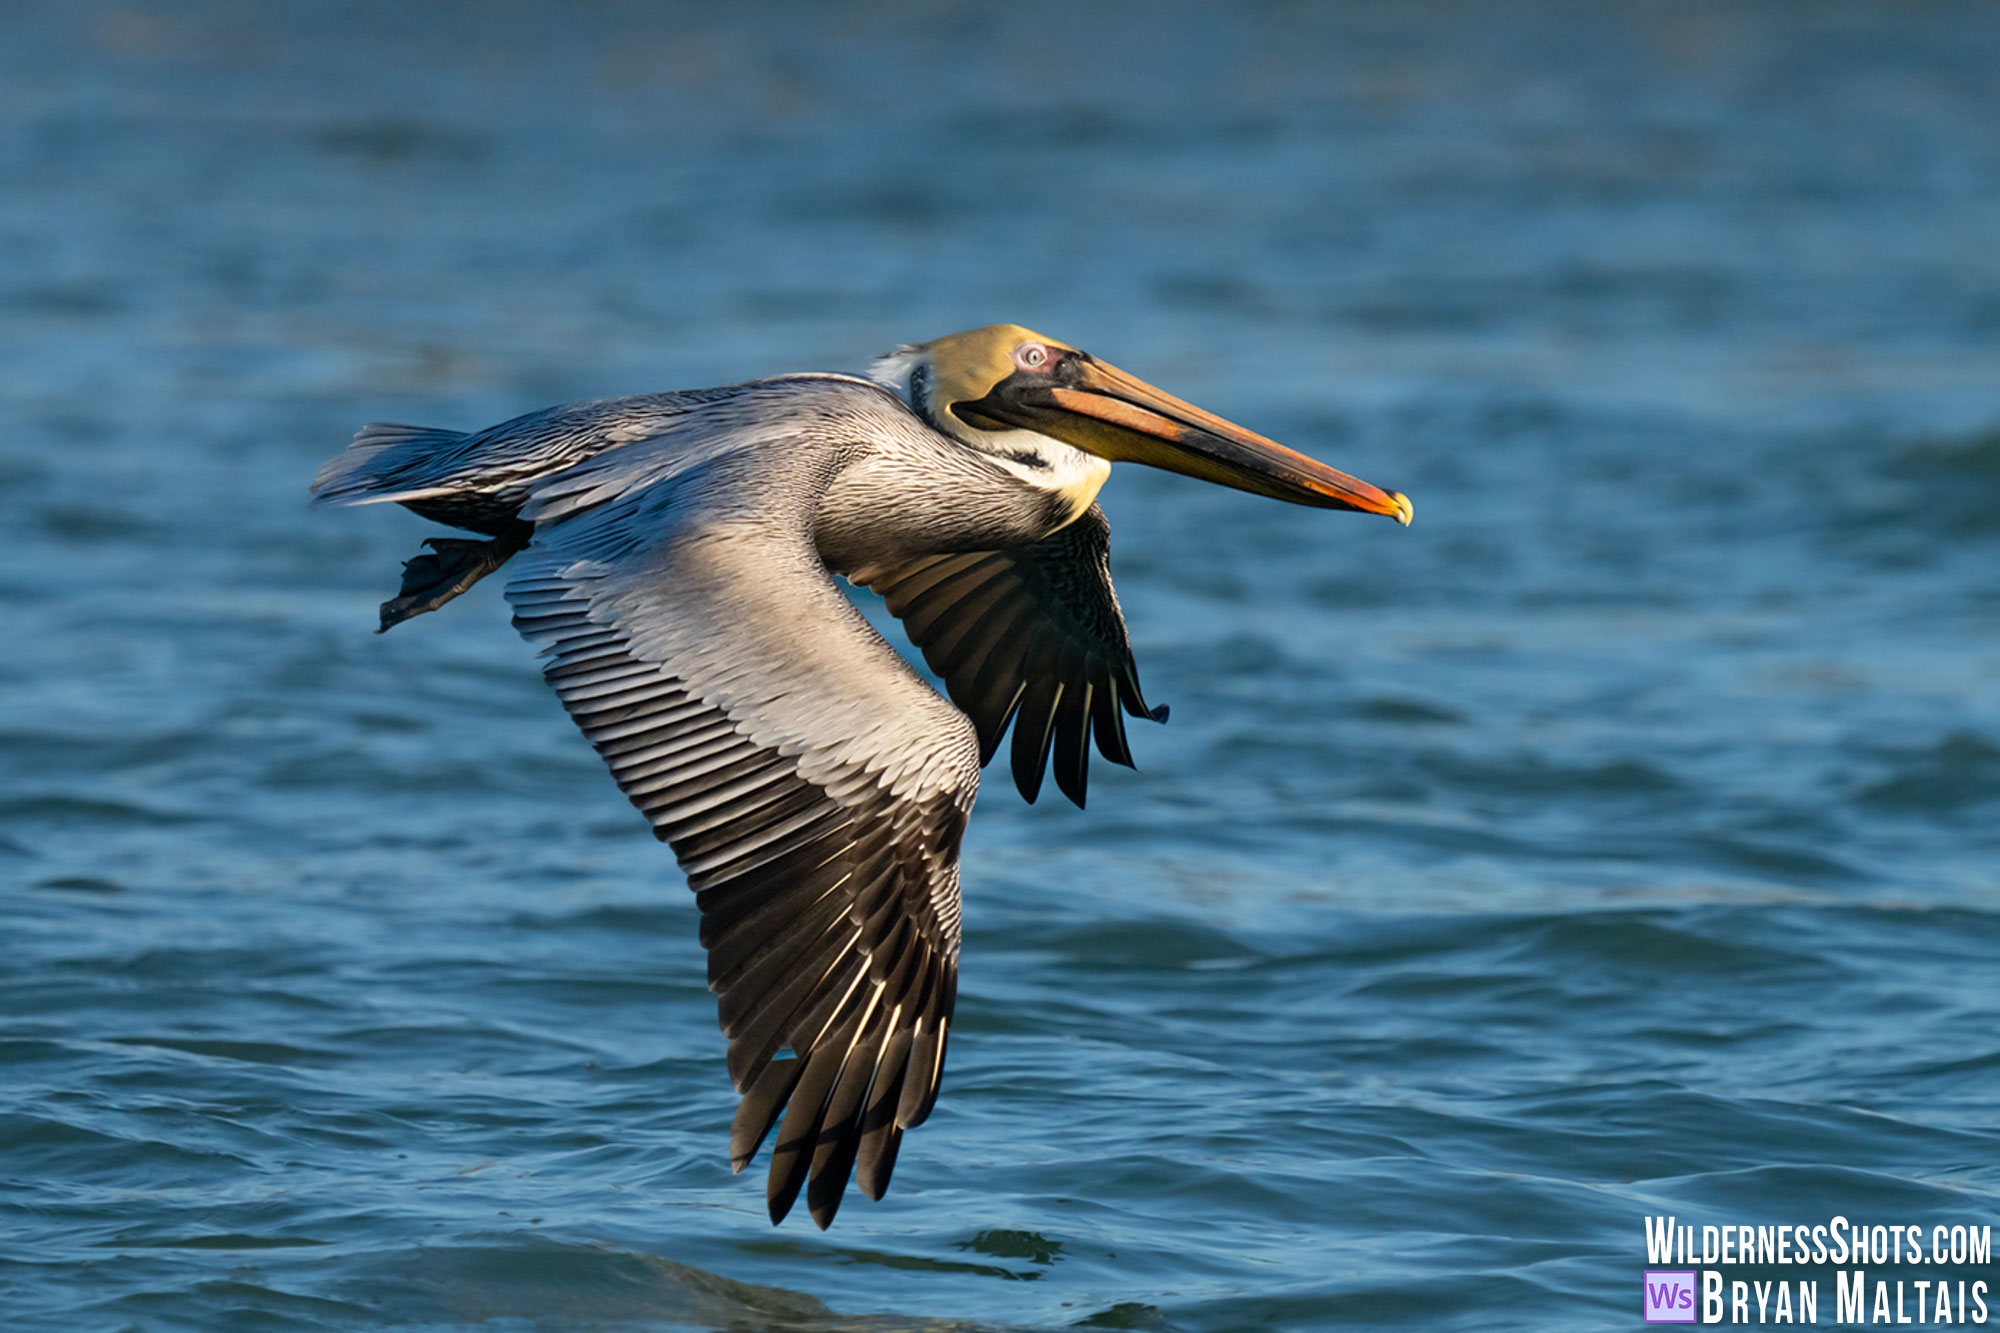 Black Pelican coming in for a water landing. Sony A7rV. Sony 200-600mm. Sony 1.4x Teleconverter. 1/4000th sec, f/9, ISO 2500
3. Use Bird Eye Focus Tracking
Under the strictest standards, if the bird’s eye isn’t in focus then it’s a missed photo. The best way to achieve this is to use a camera with bird eye focus tracking. It’s an absolute game changer that makes capturing sharp photos of birds in flight fun and productive vs tedious and futile. Of course, sharp photos of birds in flight existed before its recent advent, but the success rate was much lower.
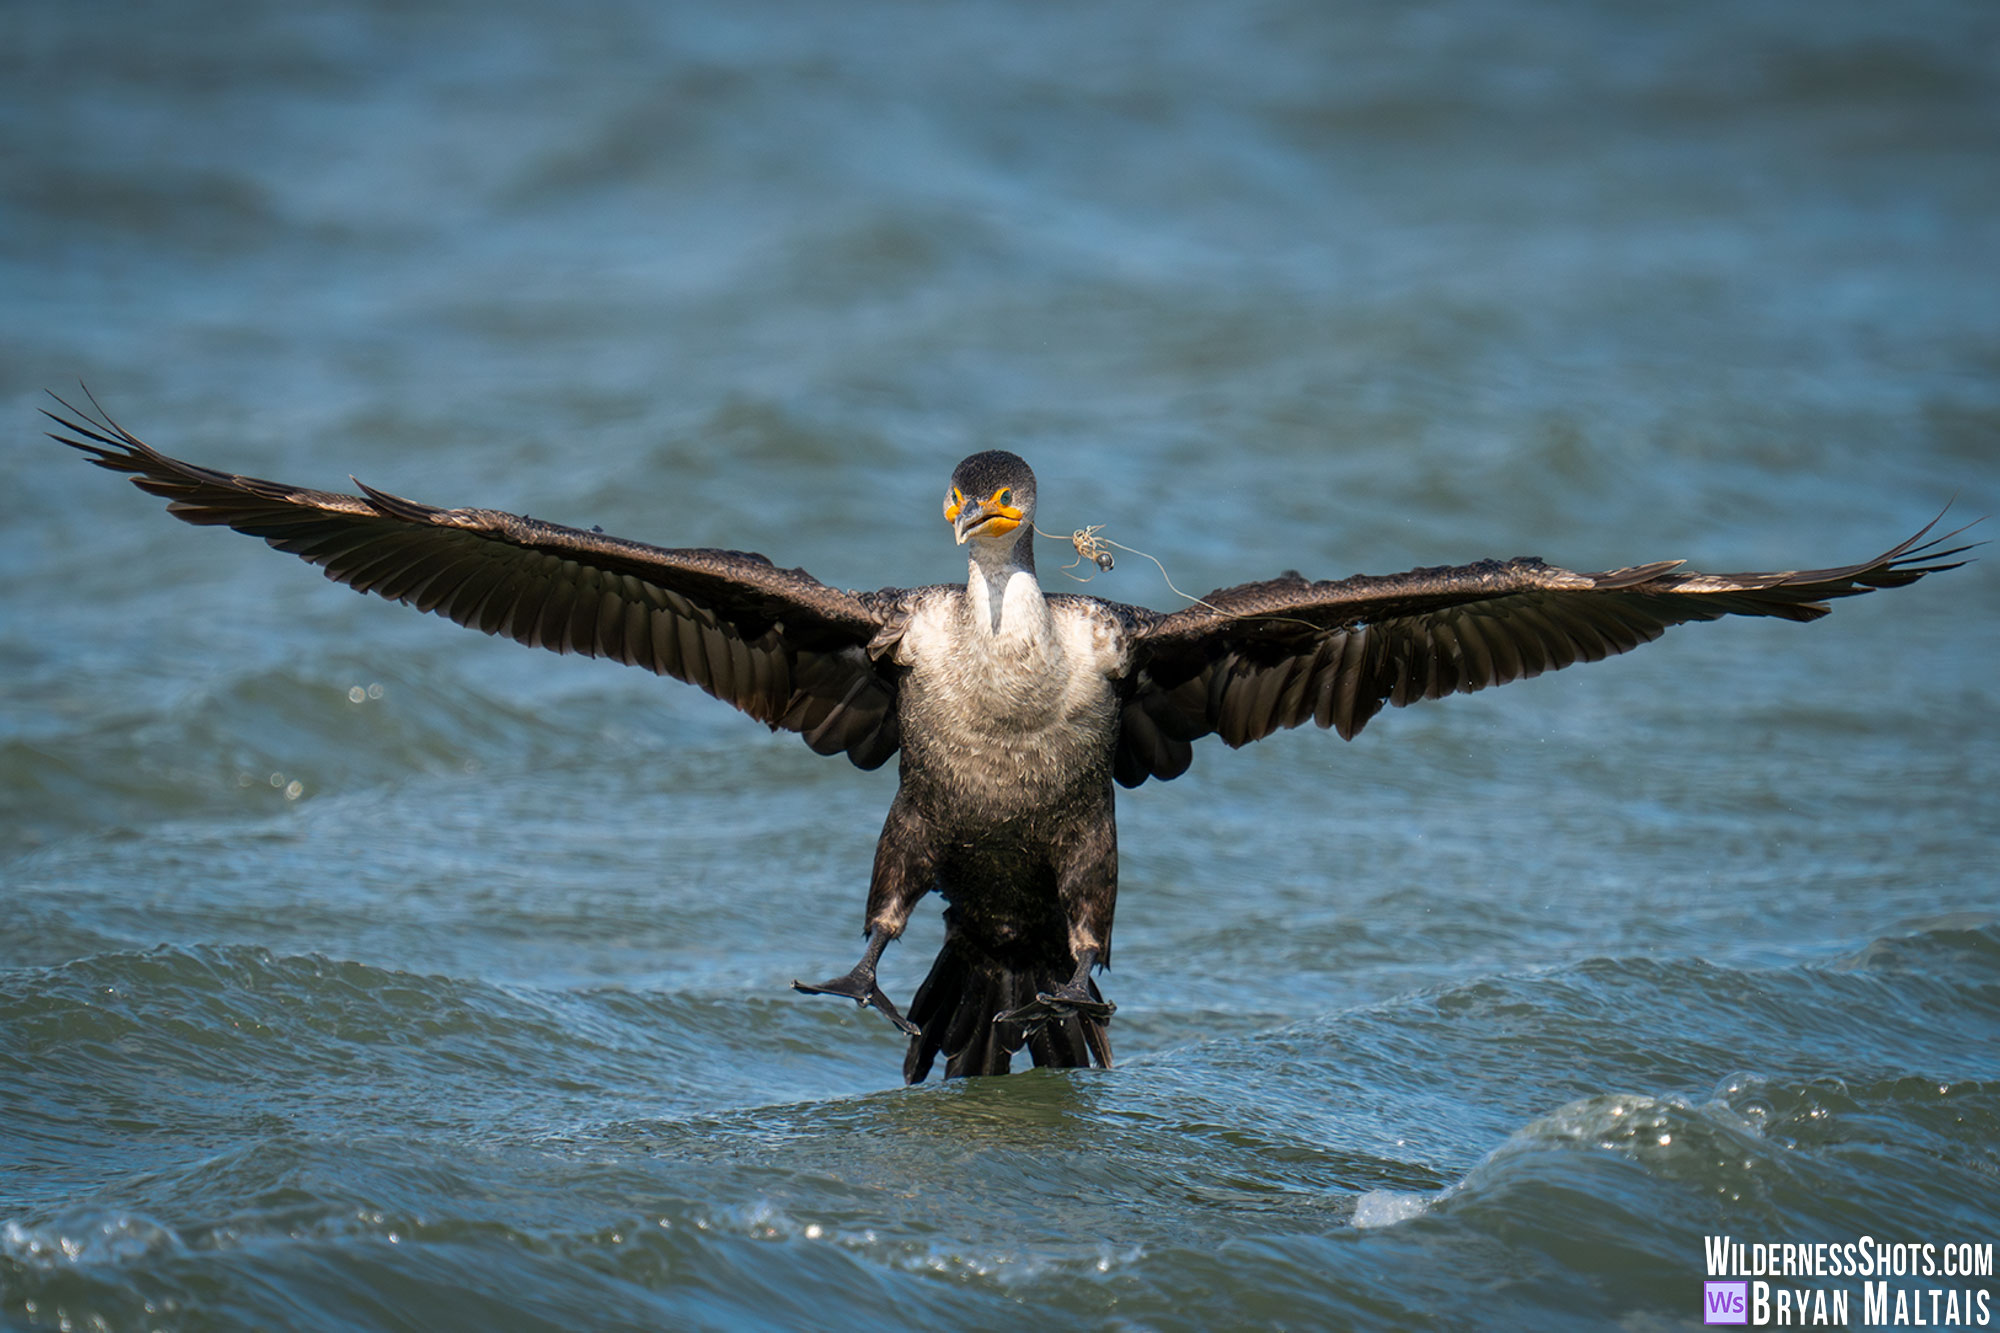 This Double-crested Cormorant has a tangle of fishing line hooked to it. Sony A7rV. Sony 200-600mm. Sony 1.4x Teleconverter. 1/4000th sec, f/9, ISO 2500
4. Pan along with Birds in Flight
Panning along with birds in flight can capture them more sharply and at a lower shutter speed than holding the camera still and shooting birds as they fly into the frame. It also beautifully blurs the background while capturing the bird sharply because the bird effectively becomes a stationary object, while the background moves through the frame like a filmstrip. To effectively pan, rotate your torso instead of your arms, and keep them tucked against the side of your body for maximum stability. Concentrate on panning slightly ahead of the bird to place it in one side of the frame so it has space to fly into. Otherwise it’s easy for the bird to fly out of the frame and be cut-off.
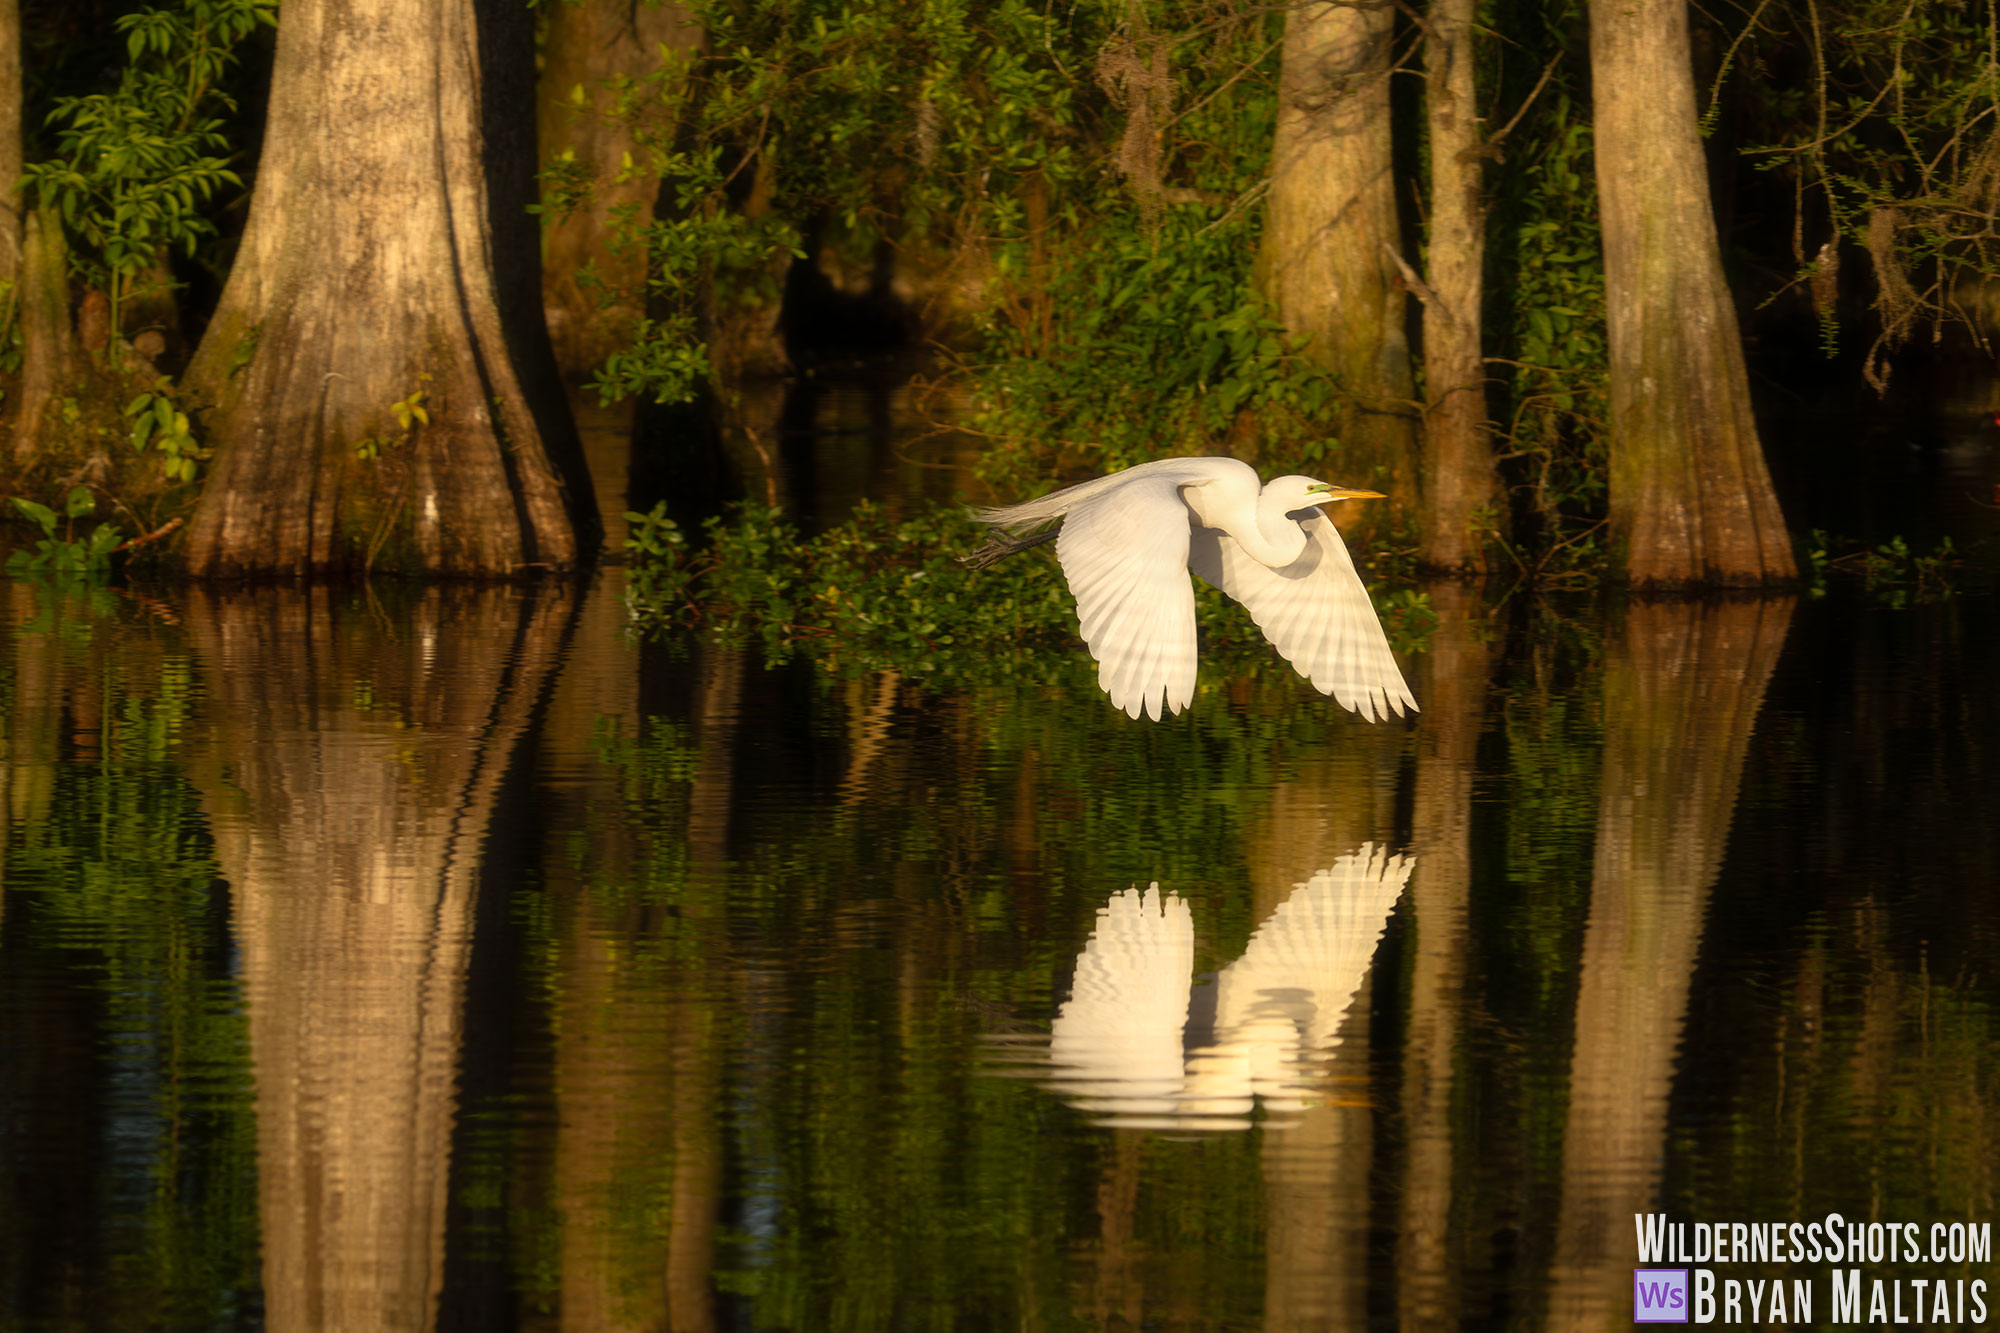
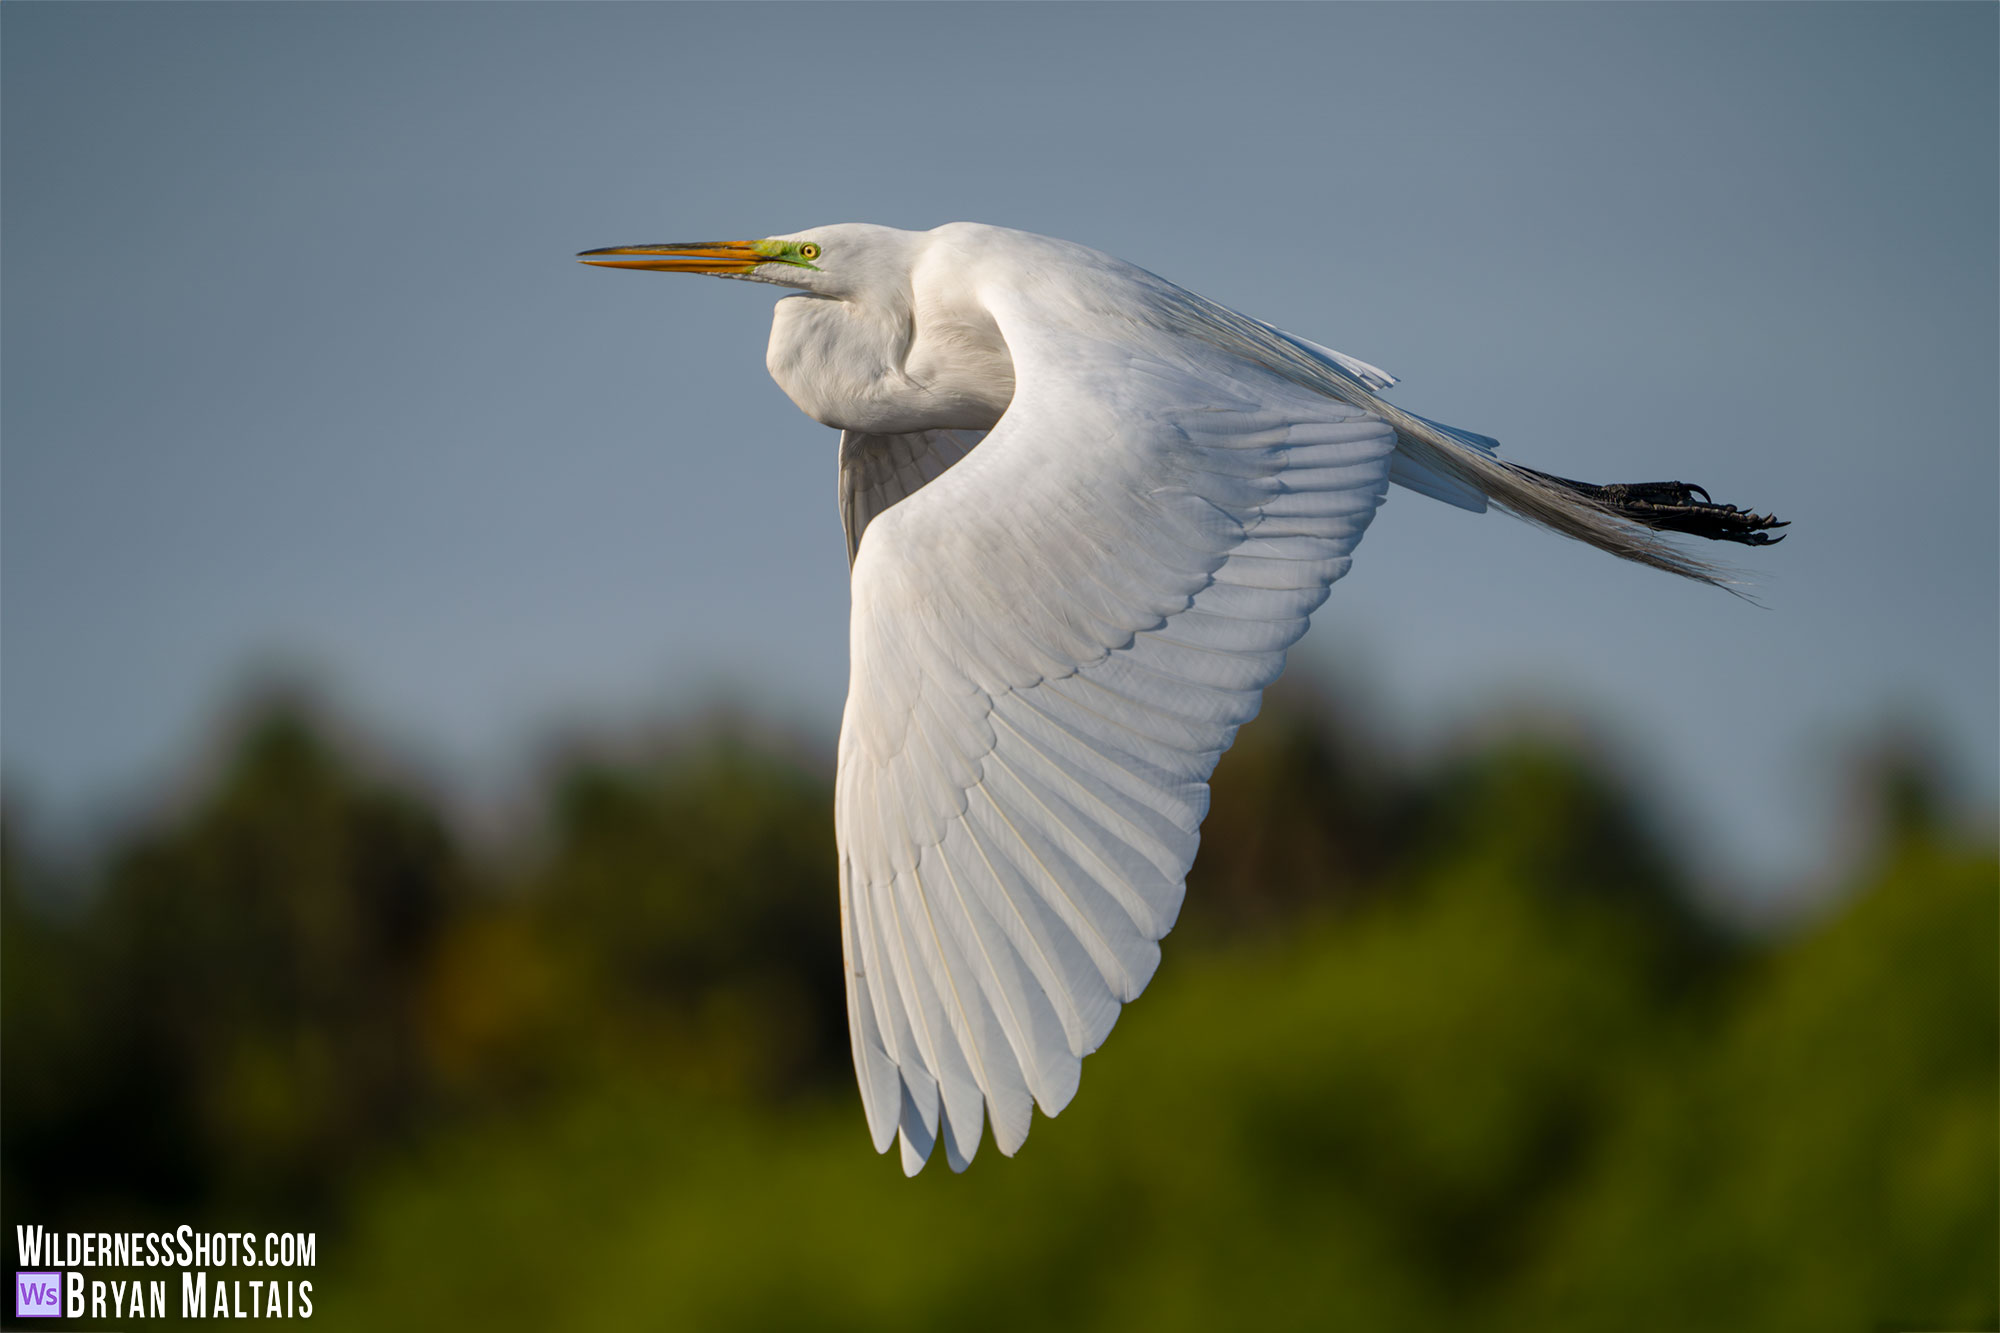 Great Egrets have a lime-green eye patch during the breeding season. Sony A7rV. Sony 200-600mm. Sony 1.4x Teleconverter. 1/2500th sec, f/9, ISO 400
5. Use a Monopod or Tripod
You don’t necessarily even need a tripod for bird photography if your muscles have the chops to wield your heavy rig all day. The fast shutter speeds that you’ll be using to freeze motion also eliminate blur from camera shake, so a tripod isn’t needed except for in dim light. Instead, it’s useful to shoulder the burden of your camera and super telephoto lens. If your arms have become wobbly from hand-holding your camera, you won’t be able to keep the birds in-frame in the first place.
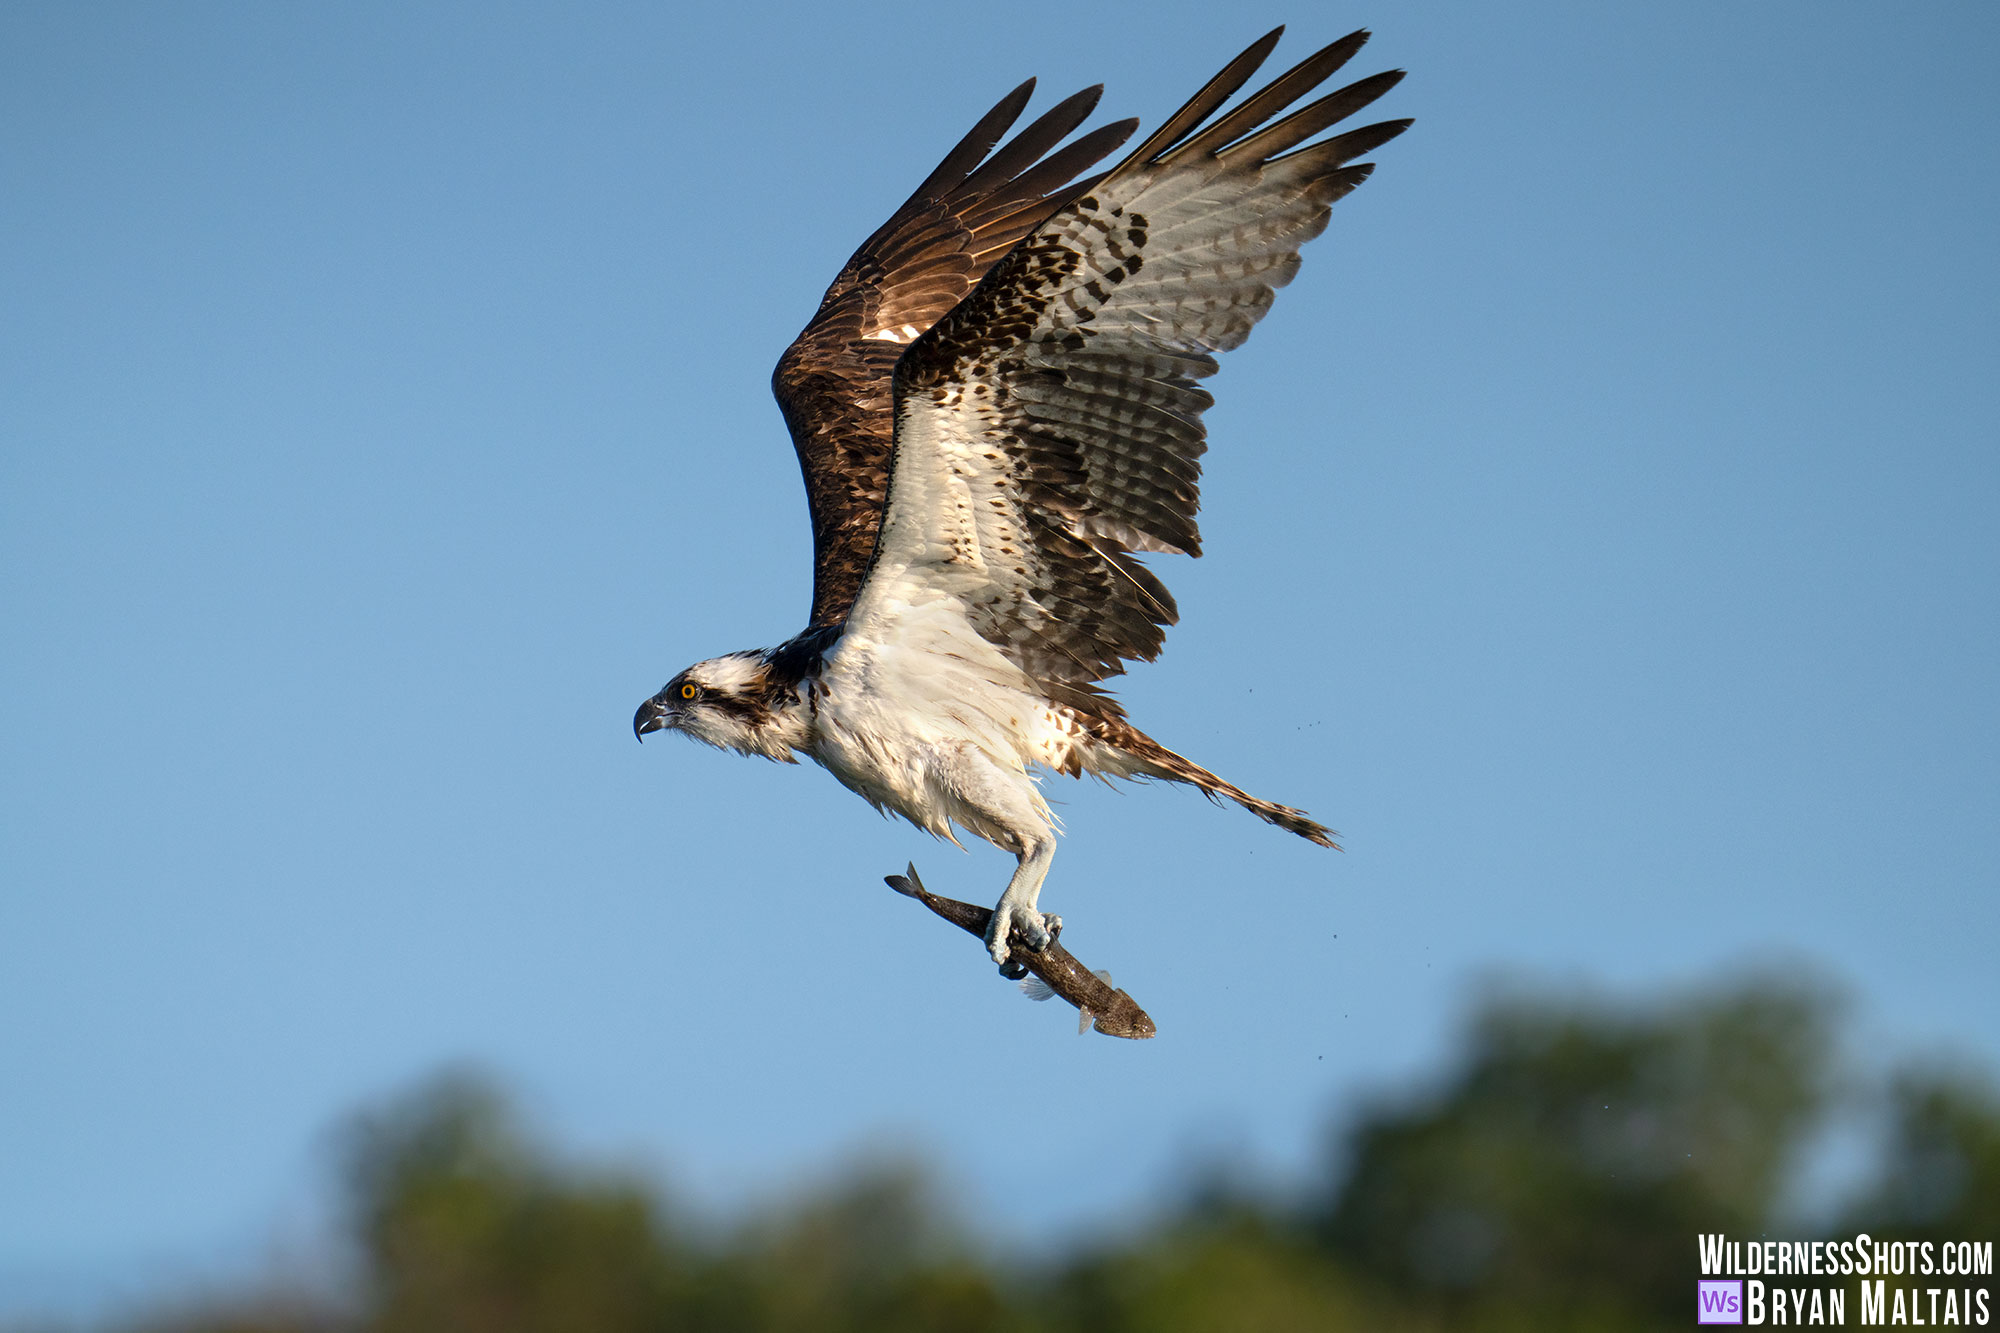 You couldn’t predict where or when an Osprey would capture a fish so you had to hold your camera up and ready. A monopod helped with this. Sony A7rV. Sony 200-600mm. Sony 1.4x Teleconverter. 1/4000th sec, f/9, ISO 1000
6. Use a medium f/stop, not the max aperture
When enough light is present, stopping down from the lens’ maximum aperture can render sharper images of birds in flight. For example, on a lens with a max aperture of f/5.6, stopping down to f/8 produces a bit more Depth of Field, increasing the likelihood that the bird’s eyes will be in focus. Furthermore, lenses suffer from more aberrations when wide open, causing slightly softer images. They become sharper when stopped down closer to the sweet spot. Though shooting wide open does render better bokeh, this isn’t a big deal when panning along with flying birds because the background will get blurred anyway . In low light, however, you’ll have to use the max aperture just to gather enough light to use a fast shutter speed.
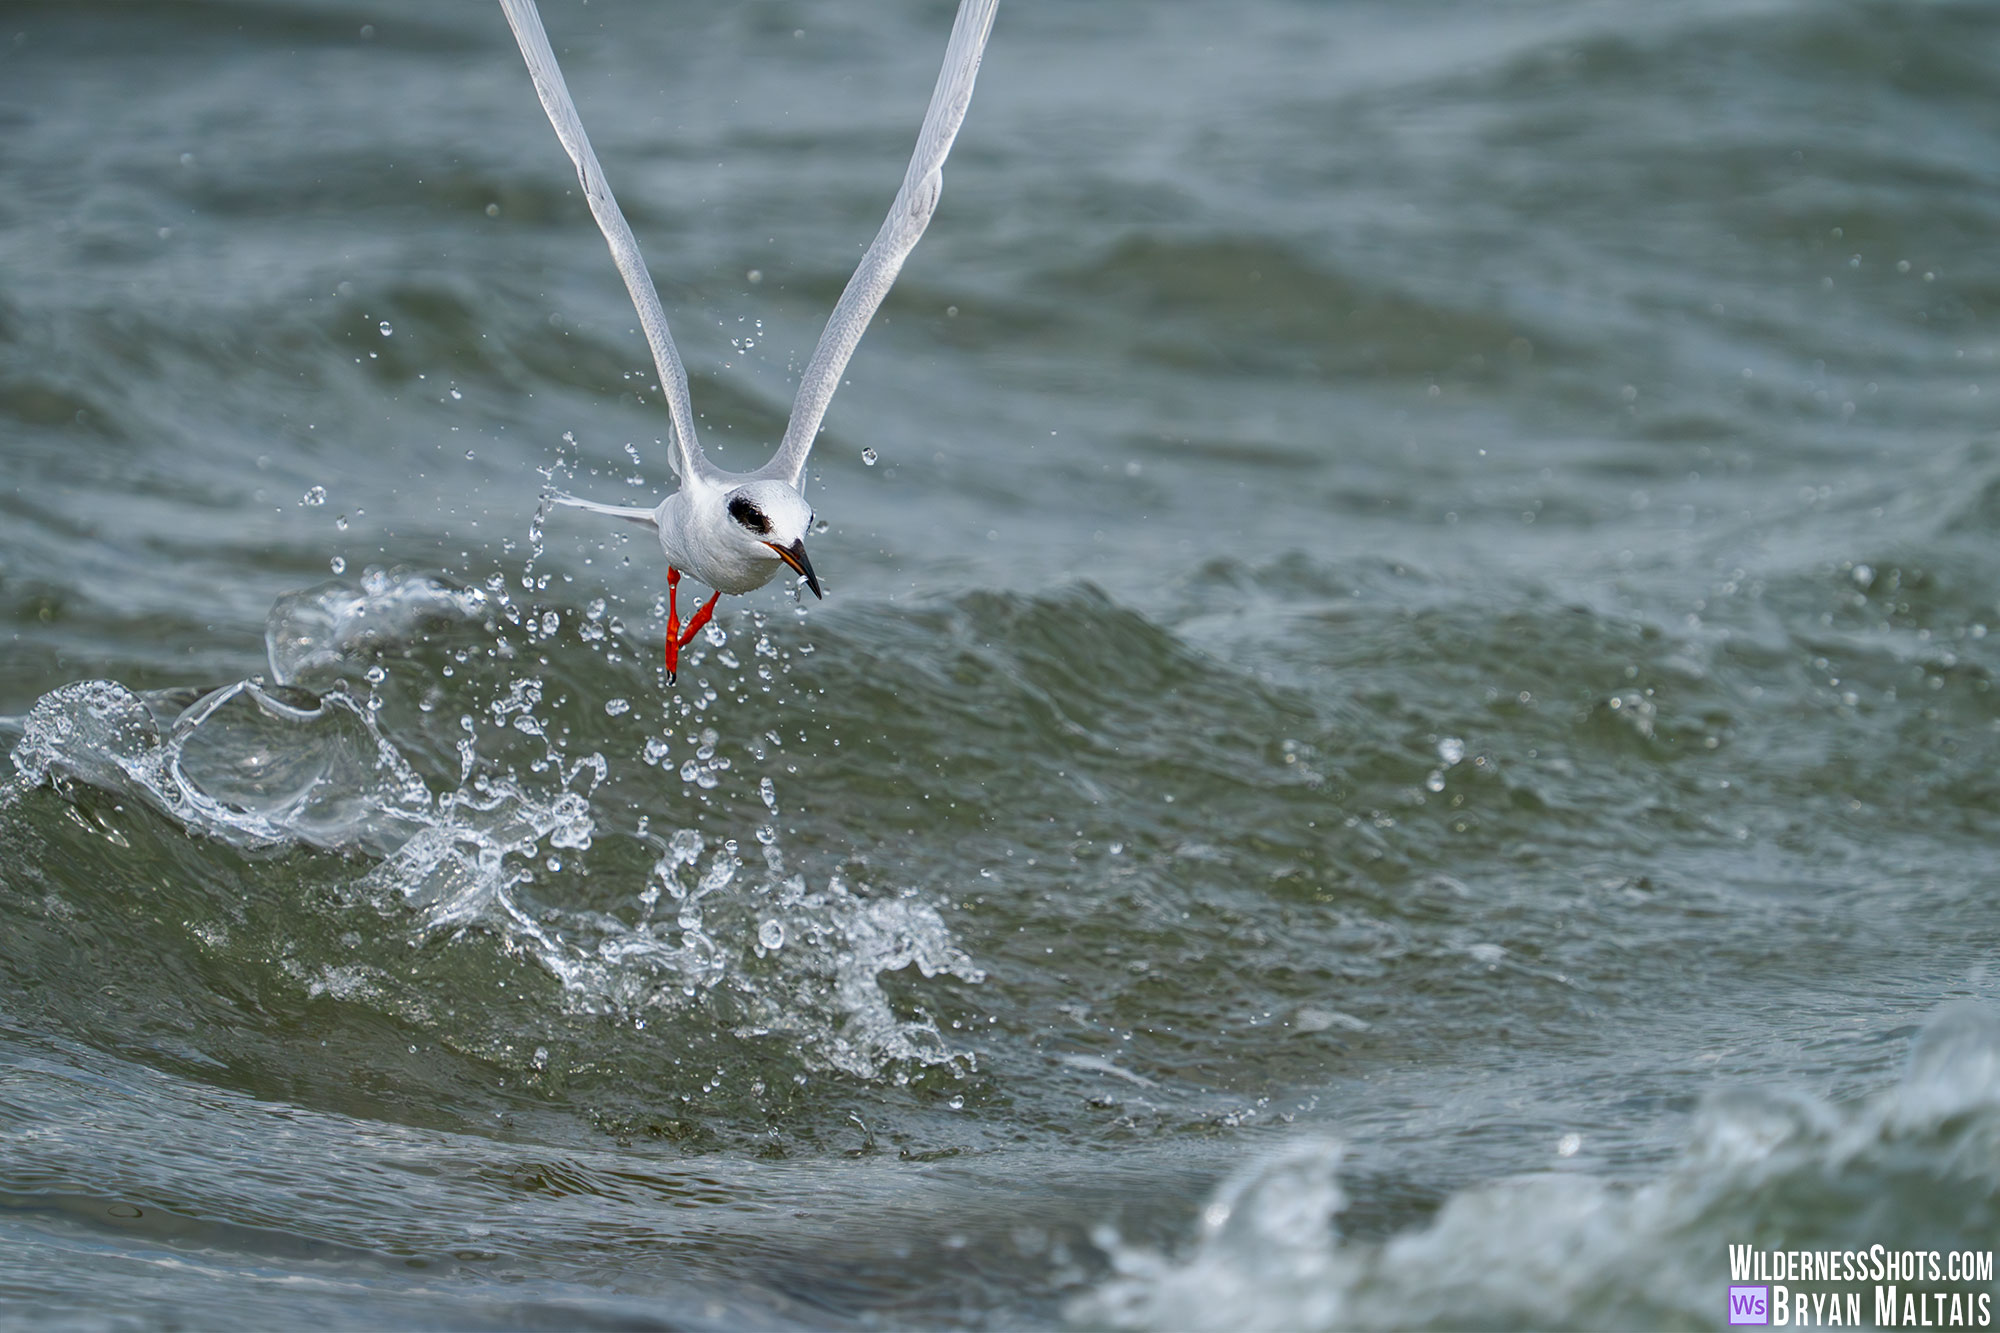 Forster’s Terns made strafing runs along the shore where every few meters they dropped into the water to capture tiny Anchovies. Sony A7rV. Sony 200-600mm. Sony 1.4x Teleconverter. 1/4000th sec, f/9, ISO 2500
7. Use the Mechanical Shutter
Most mirrorless cameras allow selecting between the mechanical or electronic shutter. While the electronic shutter extends camera life by sparing the mechanical shutter from actuations, it can cause the rolling shutter effect. This is when moving objects appear to stretch like putty between upper and lower parts of the image. The electronic shutter works by recording data from the sensor line by line, from top to bottom during the exposure. This can cause the same object to be recorded in 2 places at once in the photo if it’s moving fast enough. A perfect example of this happens when photographing birds in flight. The wing appears as a wavy streak in both the top and bottom of the photo because the up and down wing beats were captured.
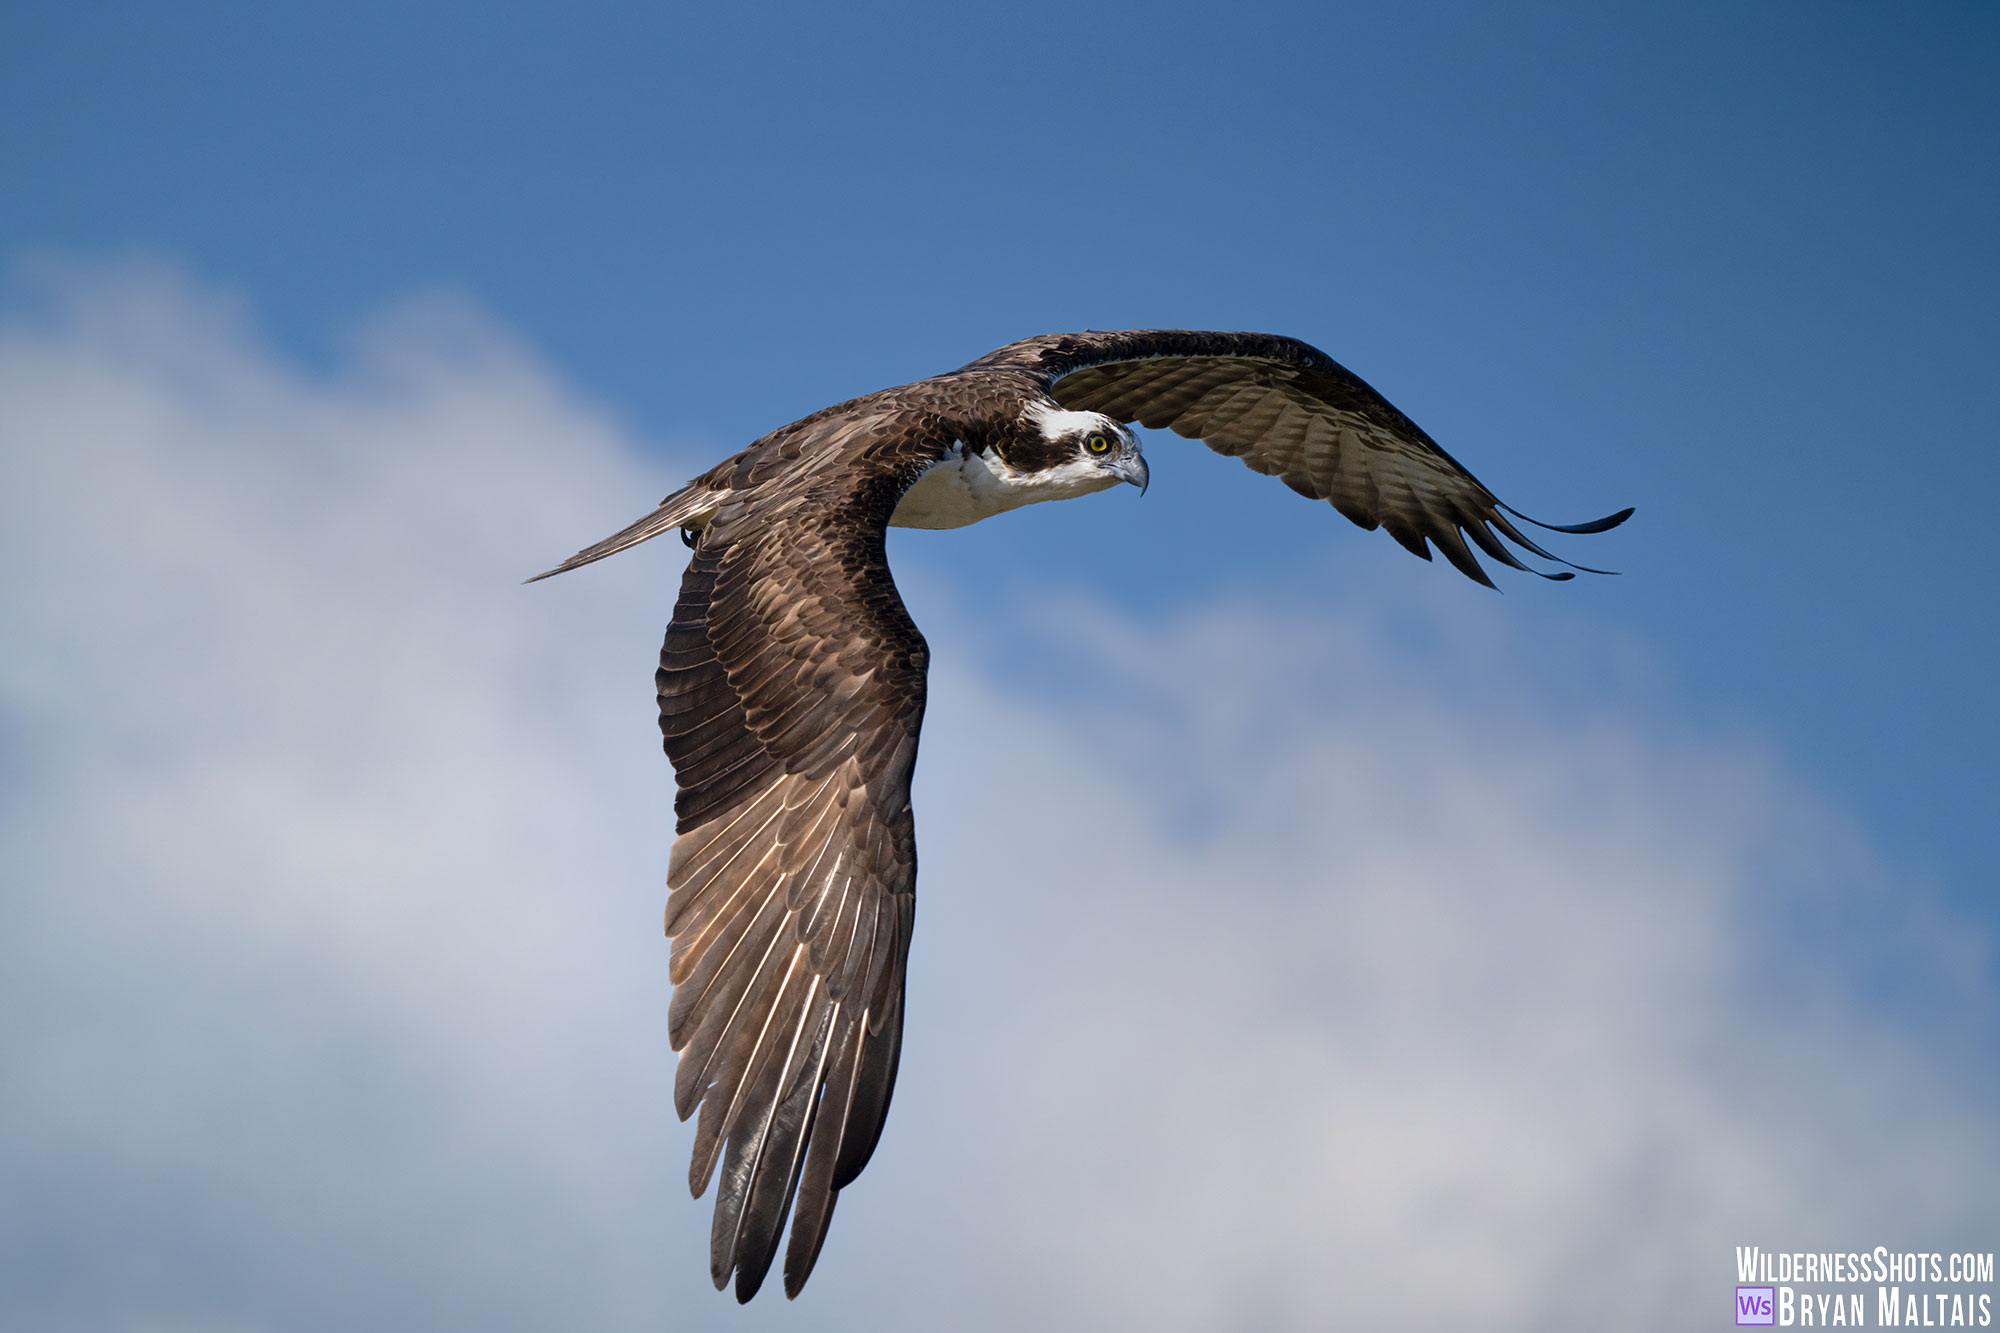 Osprey in flight. Sony A7rV. Sony 200-600mm. 1/4000th sec, f/8, ISO 800
What if you’re still getting unsharp Photos of Birds in Flight?
If you’re following all of these methods but still getting unsharp photos of birds in flight, it could be that you’re pushing the optical limits of your lens. You’re very likely to get unsharp photos if shooting birds that are far away, while using the widest f/stop, and zoomed-in all the way (if using a zoom lens and not a prime). Technically, such photos are fuzzy and not blurry. When shooting distant birds, there’s a lot of atmosphere between the lens and the birds that can degrade images. Mirages from heat waves rising off the ground distort the air, making the image appear low resolution. As described earlier, when shooting at the max aperture, lenses render softer images than when stopped down. Zoom lenses also render slightly less image sharpness when fully extended to their limit. These problems show up worse in images of distant birds that are small in the frame because they don’t have much resolution that captured their detail to begin with. All of these problems are further exacerbated if using a teleconverter. The solution, even though it might not be easy, is to get closer.