Knowing how to photograph sunstars (aka starbursts) is useful because they’re very easy to capture and can add intense drama to photos. They’re also a great way to harness front-lighting, which can be unattractive if not managed.
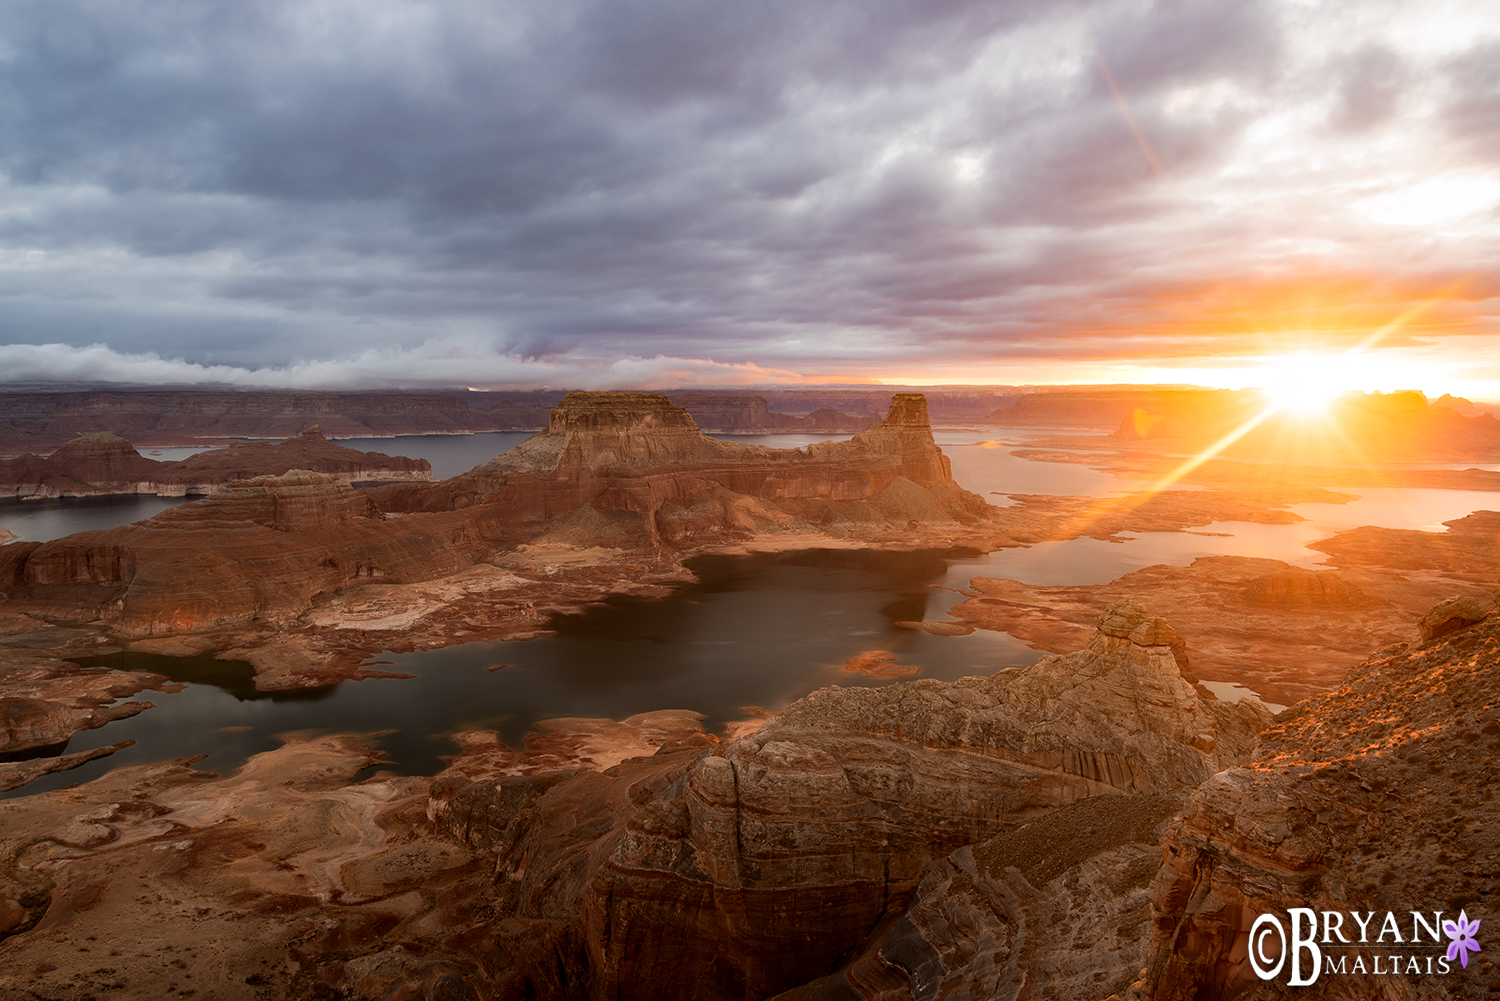
On a stormy December evening I was standing on the rim of Glen Canyon looking down over Lake Powel. I hoped to photograph the scene at sunset, but the sky was completely overcast with snow and howling wind. A small window of clear sky formed in the clouds to the west just above the horizon. The journey to reach this spot was tumultuous and I prayed that the sun would peak through in its final moments. The clouds around the opening began to glow with a silver lining, hinting that the sun was about to shine through the window. I waited behind my tripod in suspense. Finally, the sun lowered into the window and radiated intense golden light. Just before setting completely, the sun touched the edge of the red cliffs and burst into a gleaming sunstar with long, orange rays blazing into the frame. The transformation from bleak to warm was miraculous.
This blog contains Amazon affiliate links. Clicking on them and shopping on Amazon as you normally would supports this blog by generating small commissions.
What is a Sunstar or Starburst?
A starburst or sunstar is a point of light with rays extending into the picture. You can use any bright point of light to make a starburst including the sun, moon, streetlamps, headlights and bright stars.
How to create a Starburst in Photography
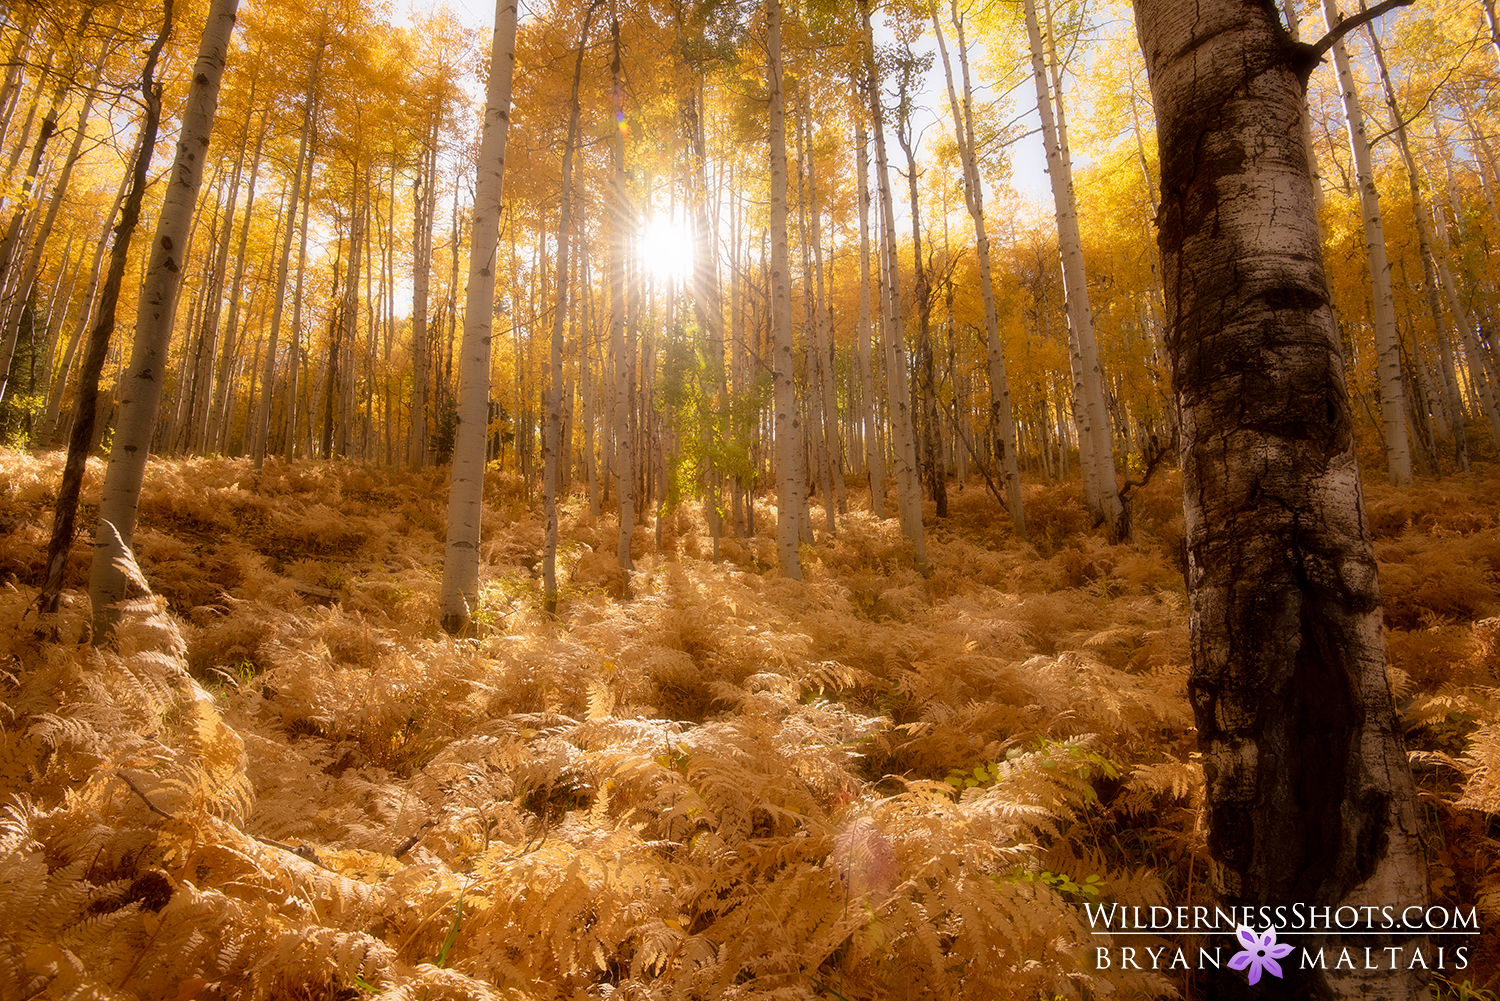
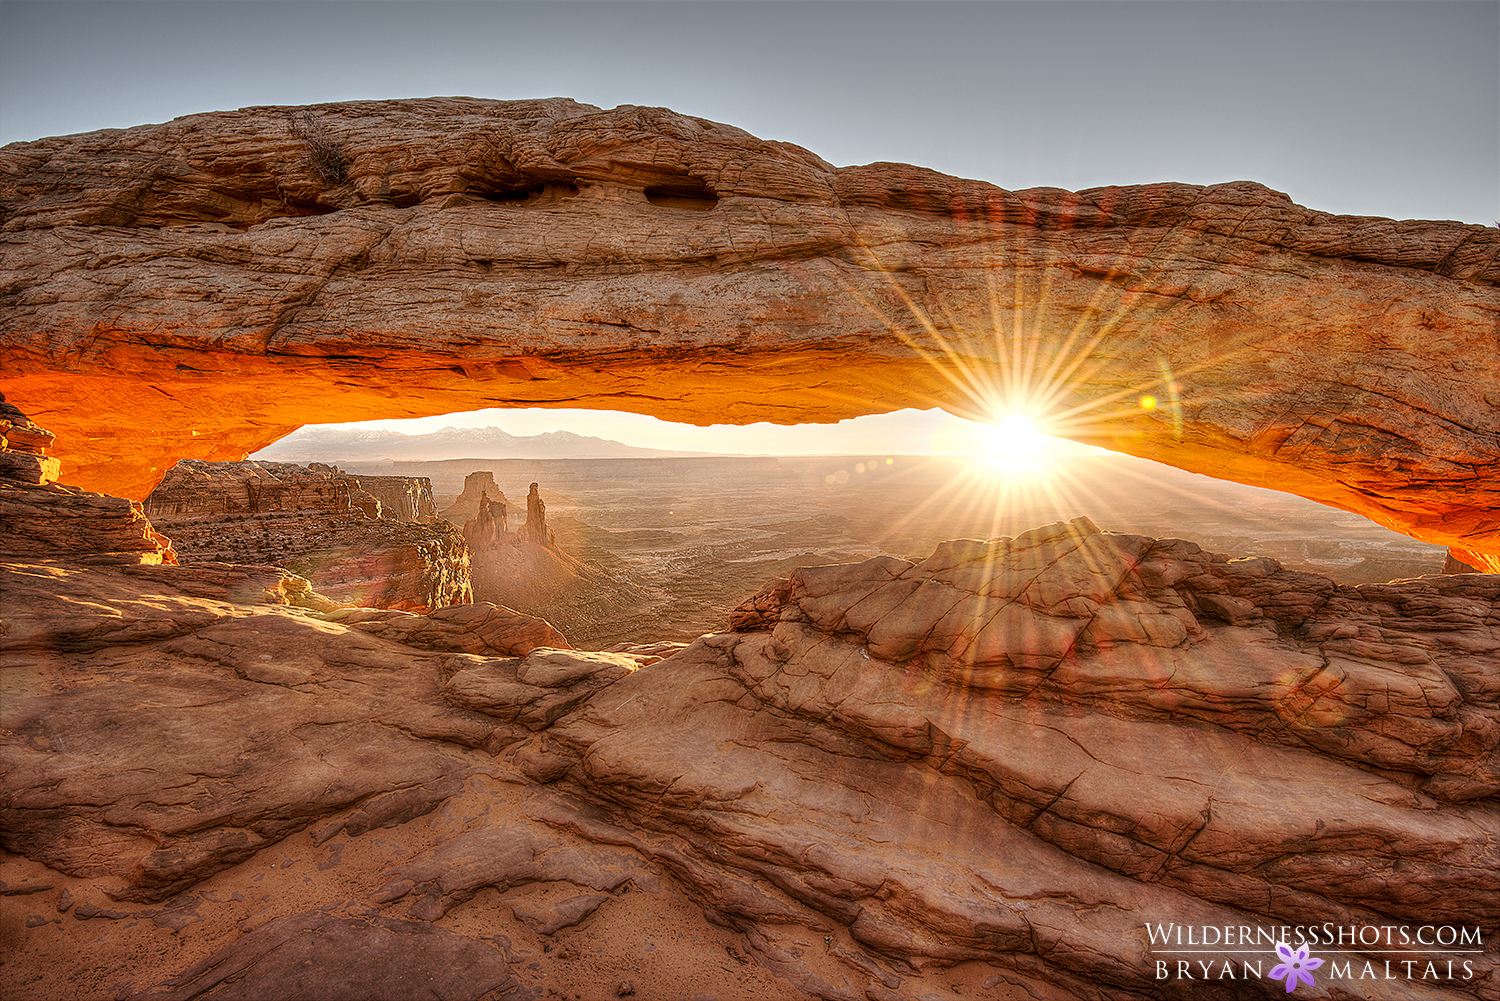
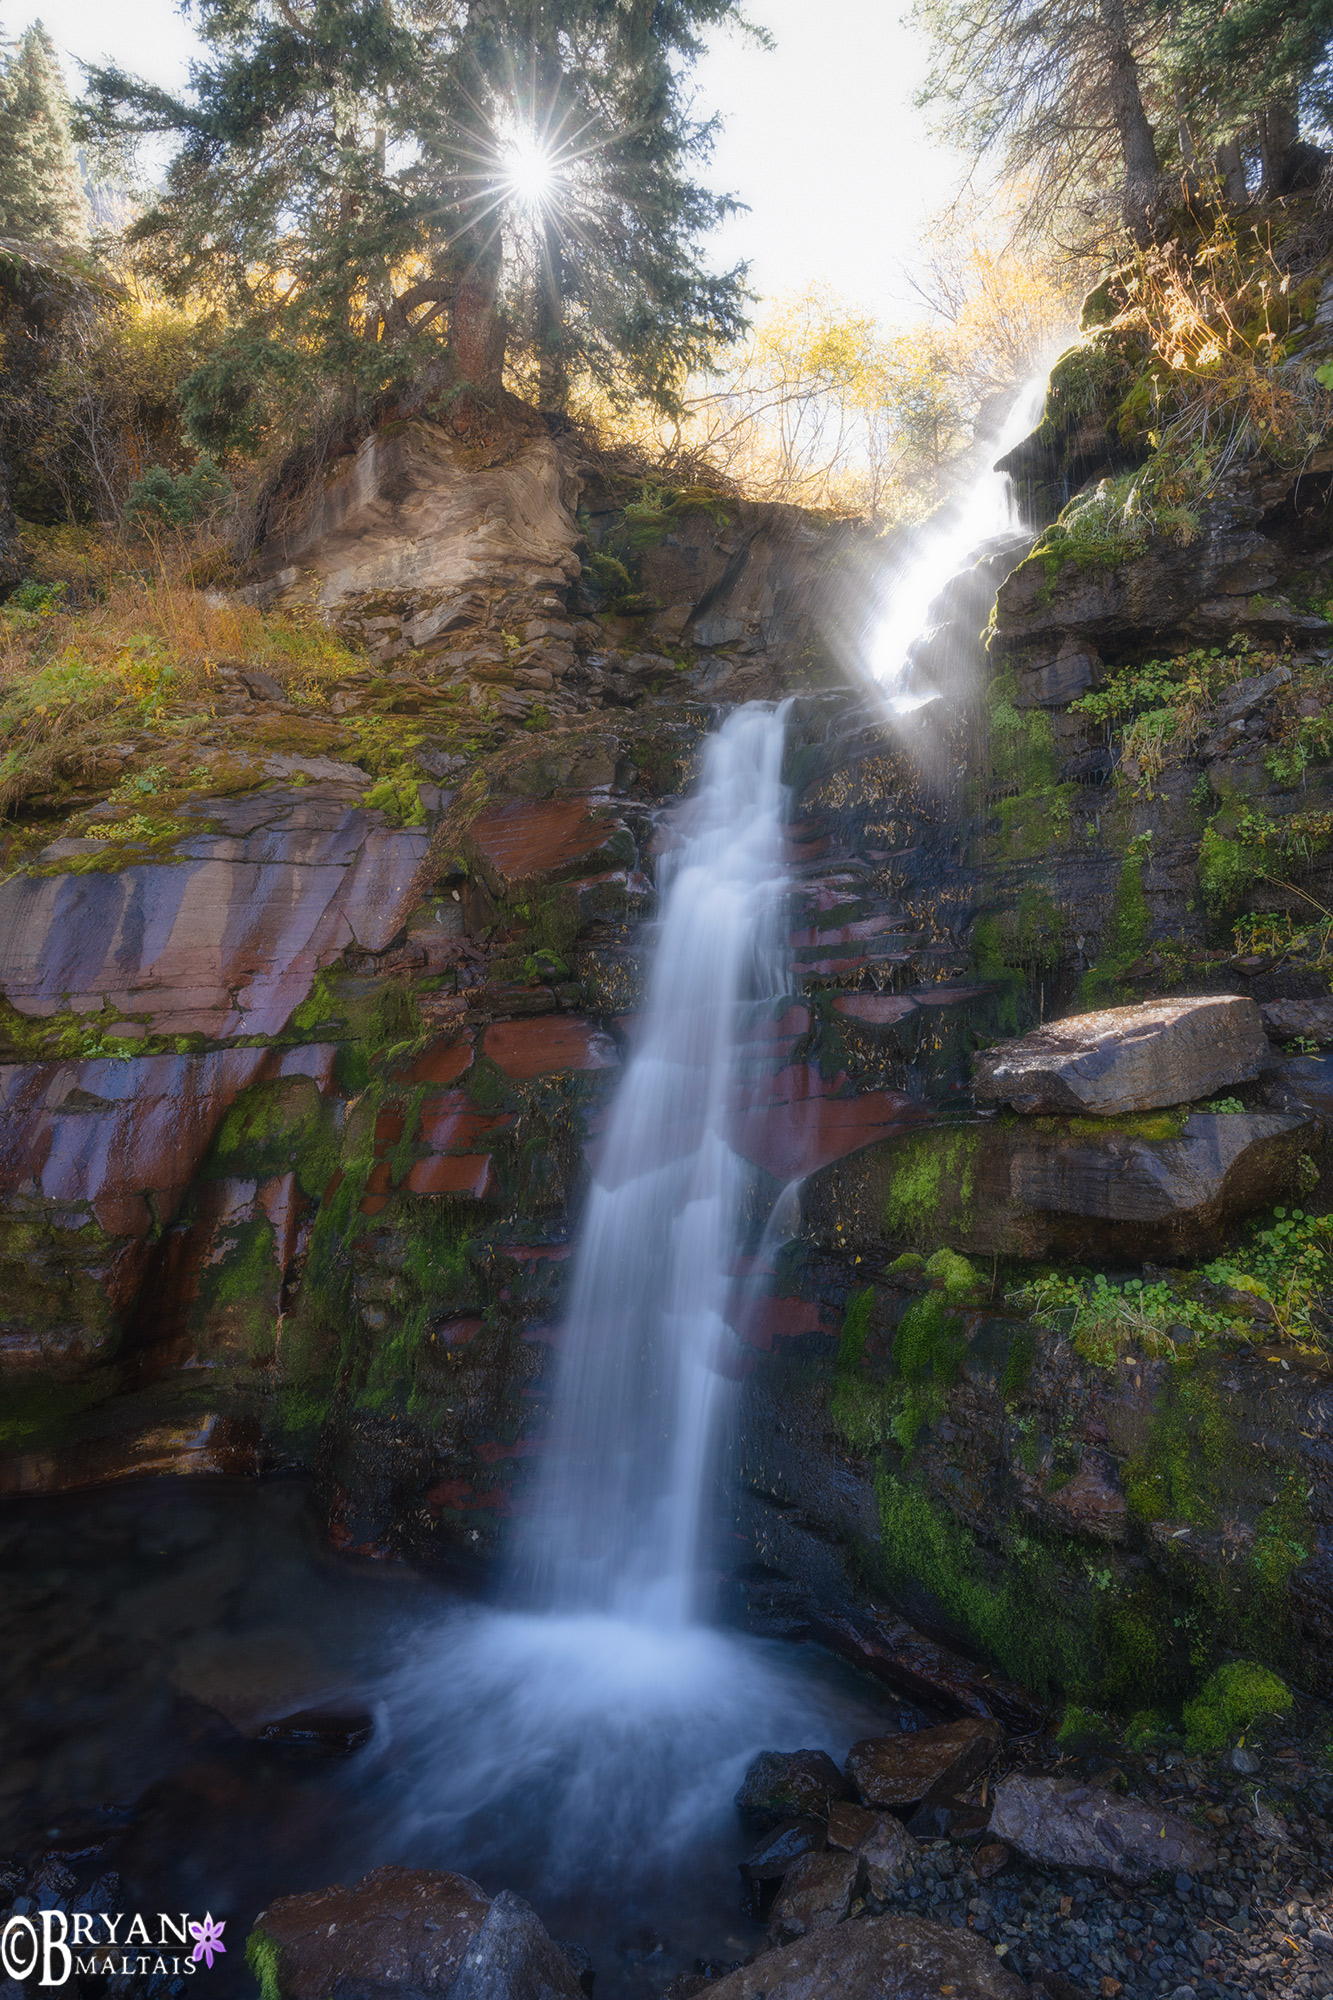
The rays on a starburst are caused by diffraction, which is when a light beam splits as it shines over the edge of an object. You can cause diffraction and create a starburst in one of two ways. First, you can position the sun or light so it touches an object like the edge of a cloud, mountain or leaves. You can also create a sunstar just by using a small f/stop. Diffraction happens when light travels through the hole of the small f/stop and hits the aperture blades. Sunstars are sharpest when simultaneously using a small aperture and touching the light against an object.
The smaller the aperture, the sharper the rays. You can make well-defined sunstars at f/11 and smaller. Large apertures like f/2.8 or f/4 are too wide to catch the light on the edge of an aperture blade, so the point of light looks like an amorphous blotch without rays. You can observe how the light changes from a blotch to a sunstar in real-time by dialing from your widest to smallest f/stop.
Why does the Number of Aperture Blades in a Lens matter?
The number of rays on the star corresponds to the number of aperture blades in the lens. A lens with an even number of aperture blades produces the same amount of rays. An odd number of blades produces twice as many rays. A lens with 9 aperture blades produces 18 rays, for example. The straighter the blades, the sharper the sunstar. Since sunstars are a common element in landscape photography, it’s worth researching the number and shape of aperture blades in a lens. While straight blades may produce sharper sunstars, keep in mind that they also produce less smooth bokeh.
Remember that deliberately causing diffraction by using a small aperture to create a sunstar also degrades image quality in the rest of the picture. On a full-frame camera, this isn’t noticeable at f/11 or f/16, but the image can begin to appear soft at f/22. However, diffraction is more severe on smaller formats. On Micro Four Thirds cameras, image softness from diffraction kicks-in at f/8.
How to fix lens flare when shooting Starbursts
A common side-effect of shooting directly into a bright light is lens flare, which appears as color ghosts. These are colored crescents, circles and other shapes that radiate from the point of light, especially when it’s positioned in a corner. You can solve this by shooting a second photo of the scene in which you block the light source with your finger. Blocking the light will give you a “clean” version of the photo without flare. In Photoshop, load both photos as layers, and mask out the flare spots in the original photo. Direct front light can also amplify any dust on your lens so make sure it’s clean.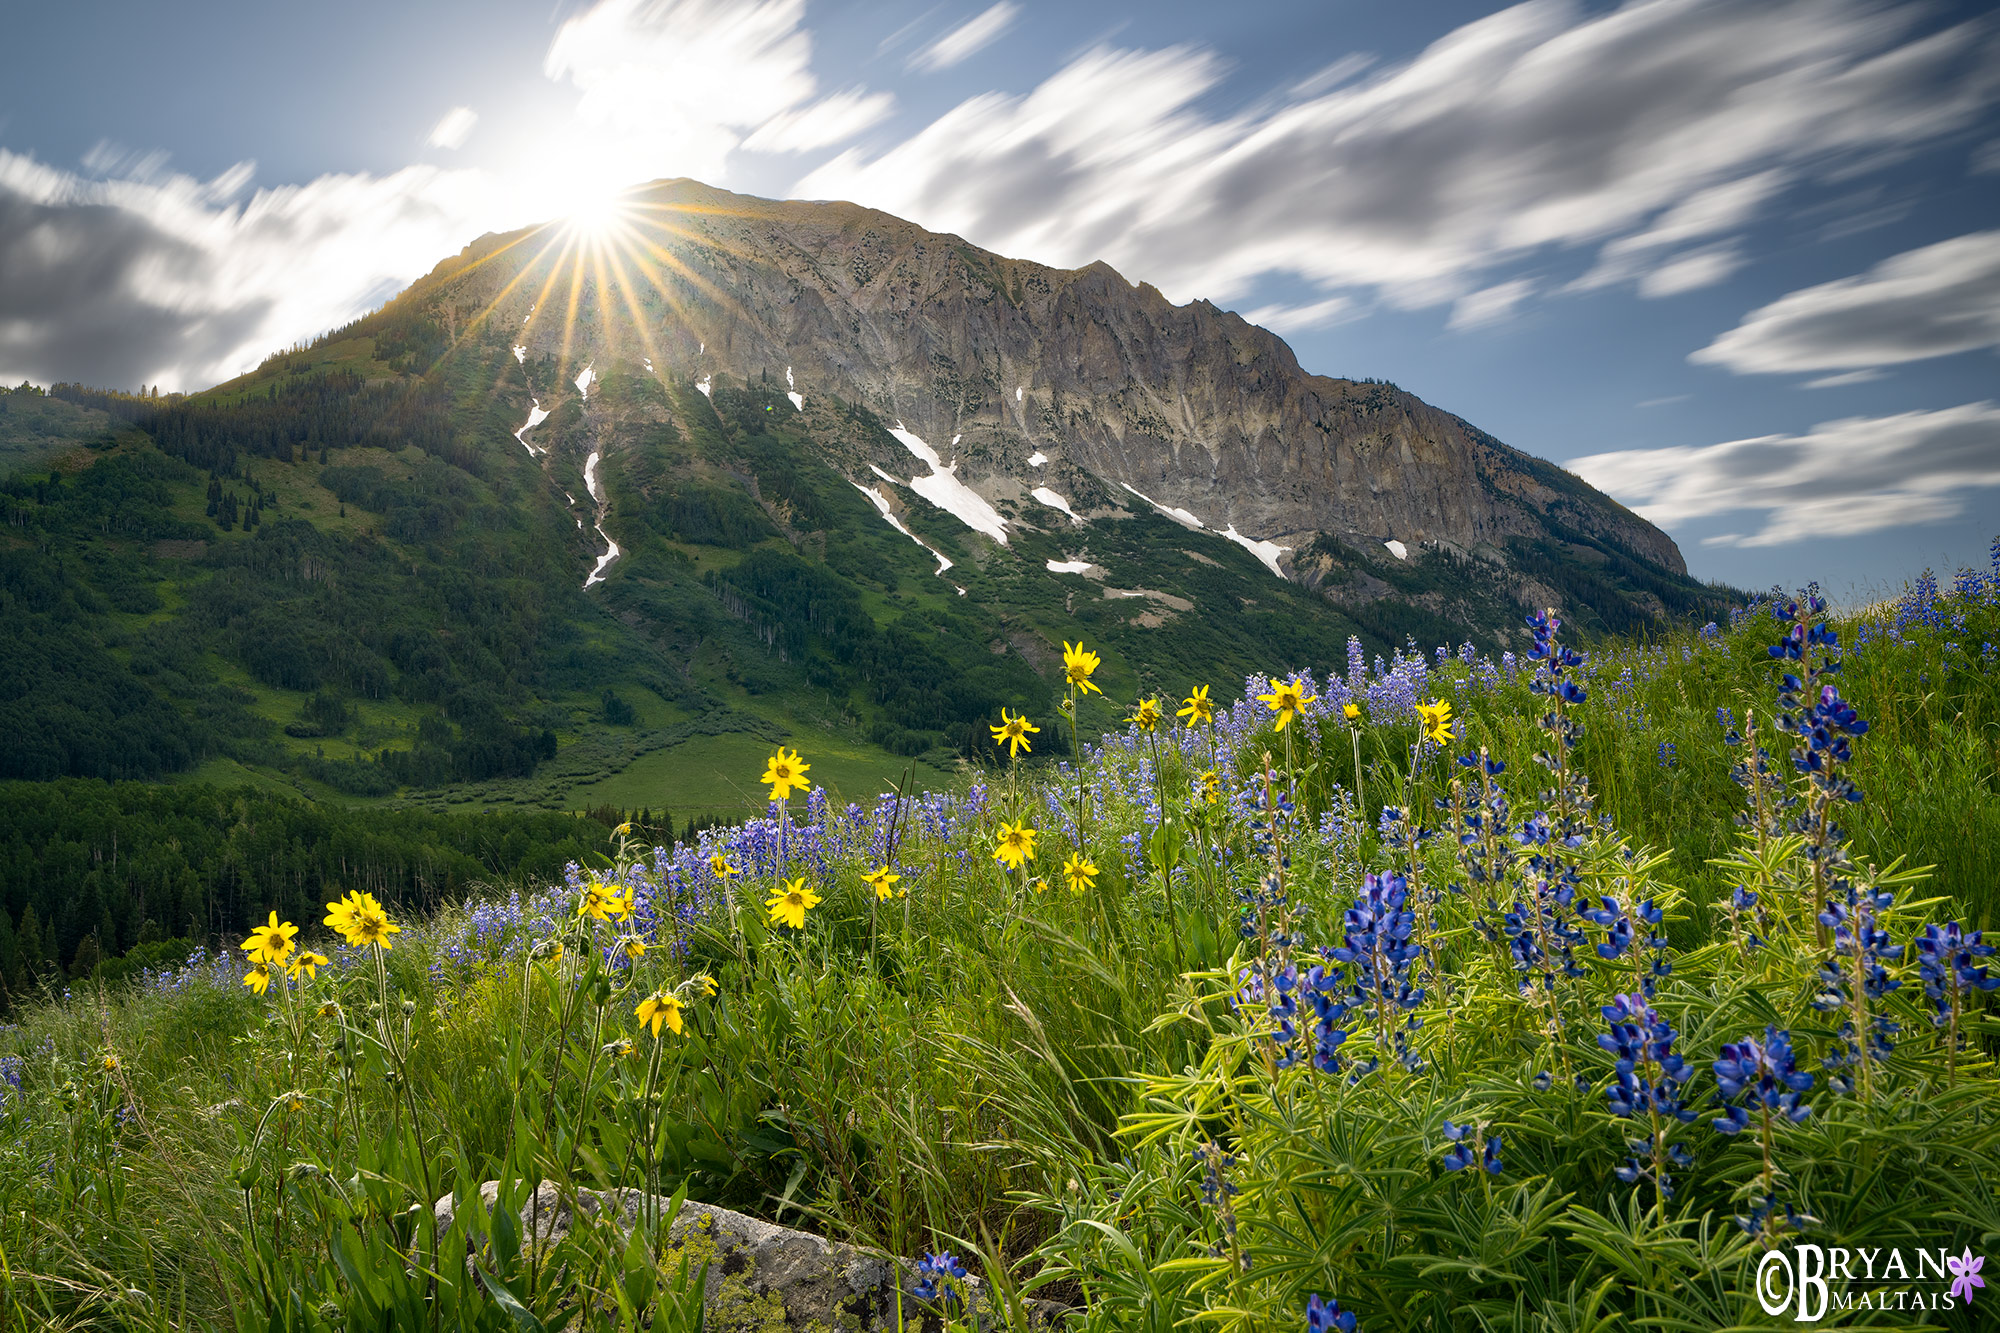
Sunstar Settings and Post Processing
Shooting directly into a bright light like the sun can cause the camera to underexpose the scene by 2-3 stops, which is good because this captures the detail of the sun’s rays. However, this leaves the foreground too dark, which must be fixed. You can correct this in post by increasing shadow exposure, but sometimes this can push the limits of the RAW file’s dynamic range and end up looking unnatural. The ideal solution is to bracket by +2, 0, and -2 stops, and then blend the exposures together. Blending can’t be accomplished in Lightroom. In Photoshop, load the images as layers and use masking to blend them. Use the +2 exposure for the foreground, -2 for the sky, and 0 for areas in between.