How to Photograph a Total Solar Eclipse
I’ve been blessed to have photographed two total solar eclipses. First in 2017 at Castle Garden, WY and recently the eclipse of 2024 at Wolf Lake, IL.
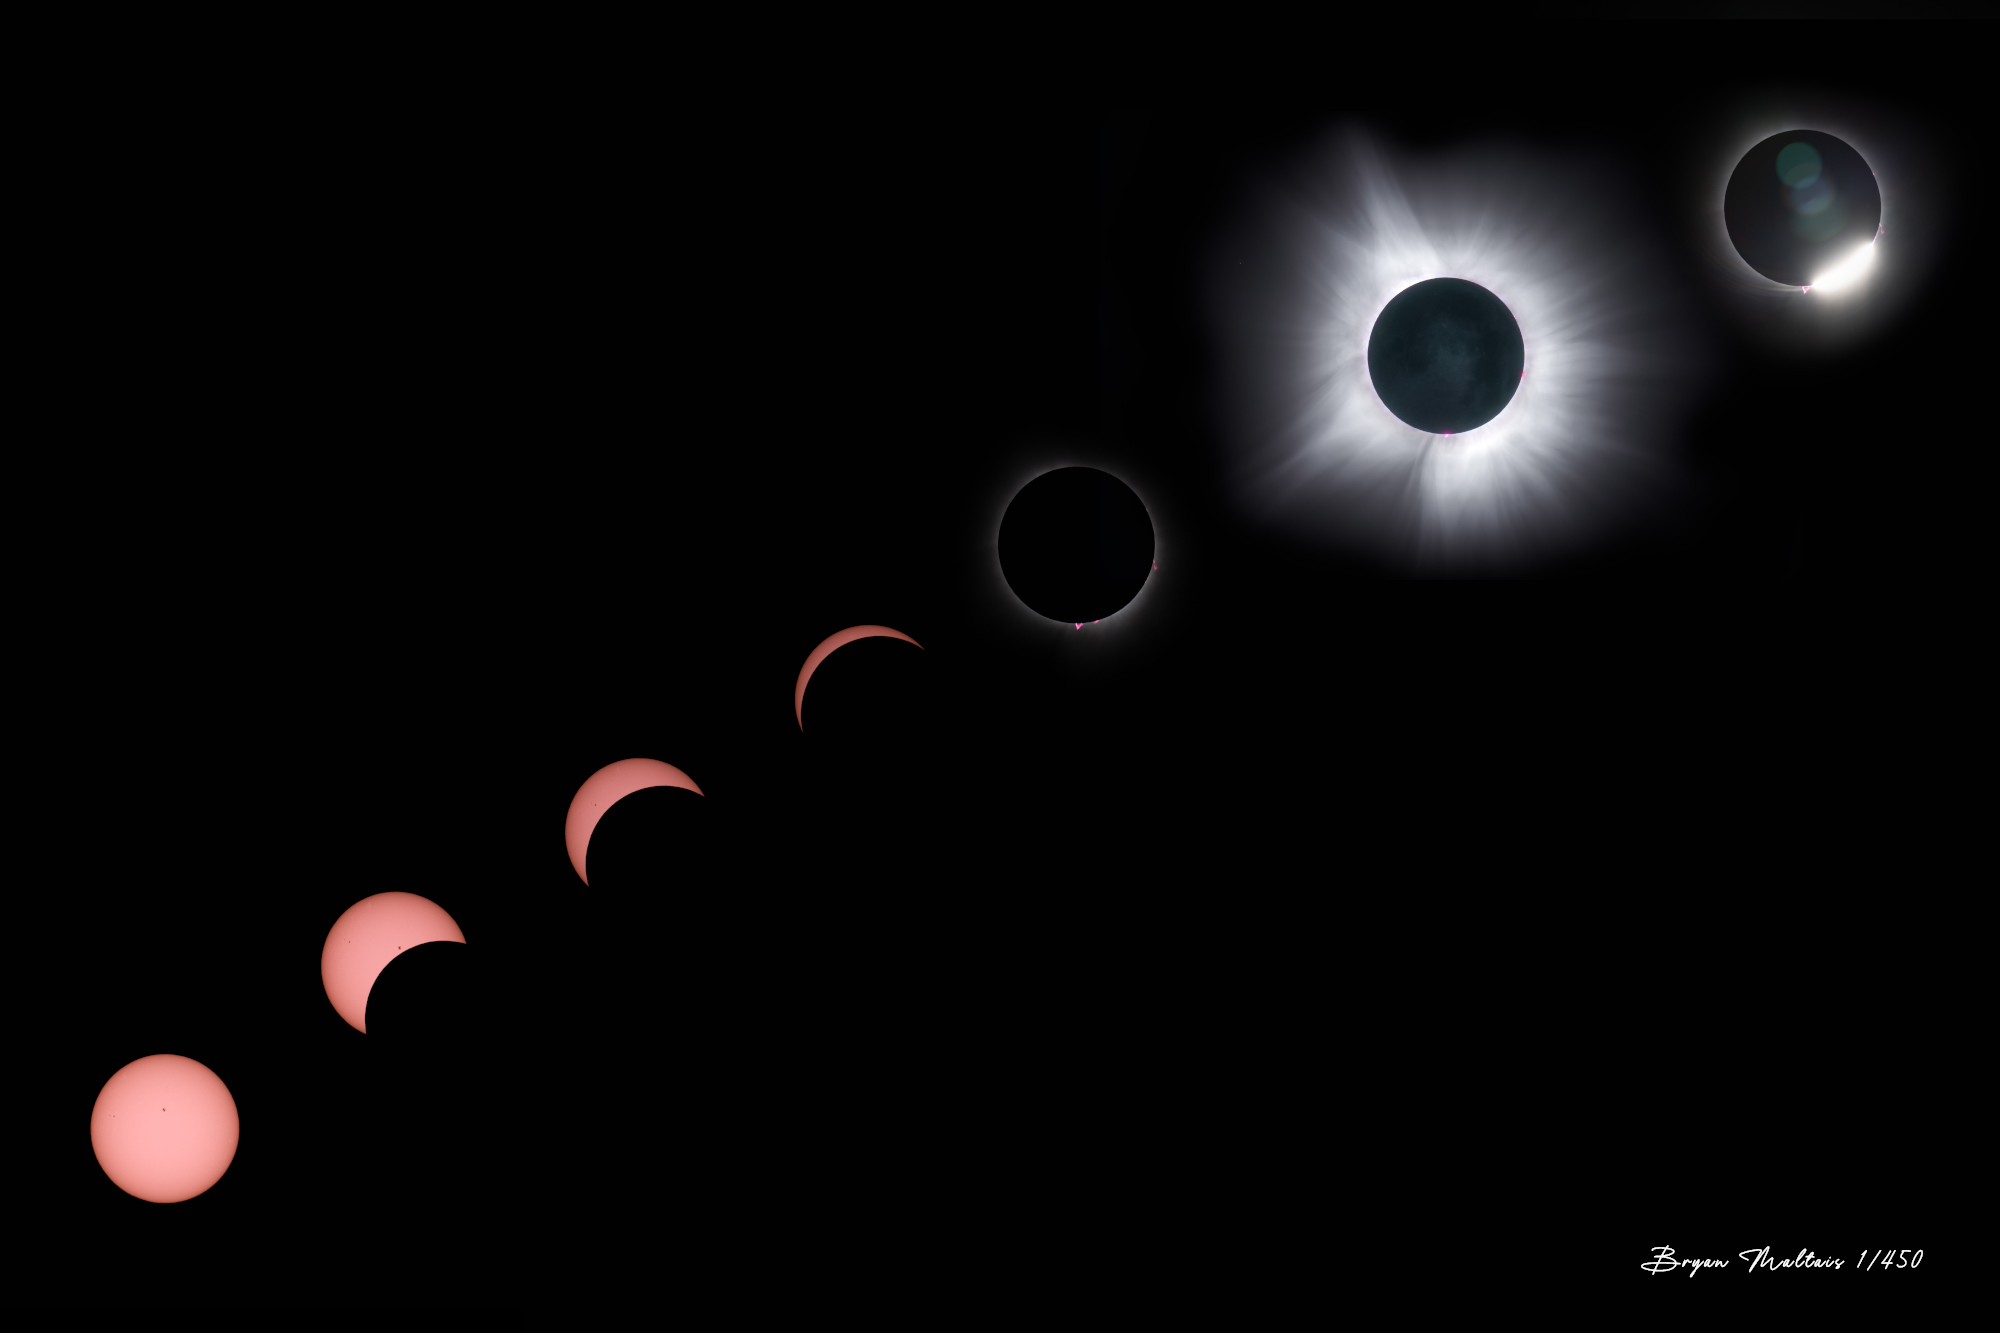
Witnessing a total solar eclipse along the path of totality is one of the most mesmerizing events in nature. In the seconds before totality, the last sliver of sunlight diffracts on the edge of the Moon, causing the “diamond ring”. It’s a gleaming starburst that outlines the silhouette of the moon. Seconds later, the moon completely covers the sun and the corona appears. The corona is an angelic aura of silvery filaments that extend off the sun deep into space. Its haunting beauty can make it hard to concentrate on the task of photographing.
During the brief moments of totality, the sky becomes dark like twilight, the temperature drops, birds stop singing and crickets begin to chirp. Through the lens you can actually see prominences; red spots of plasma ejecting off the surface of the sun.
The Corona is the main event of a total solar eclipse and it can only be witnessed directly in the path of totality. Even if you’re in an area with 99% coverage, this doesn’t mean you’ll get to see 99% of the show. It’s all or nothing; without 100% coverage there isn’t much to see other than the sky getting dim.
Photos in the post are available as prints to order here.
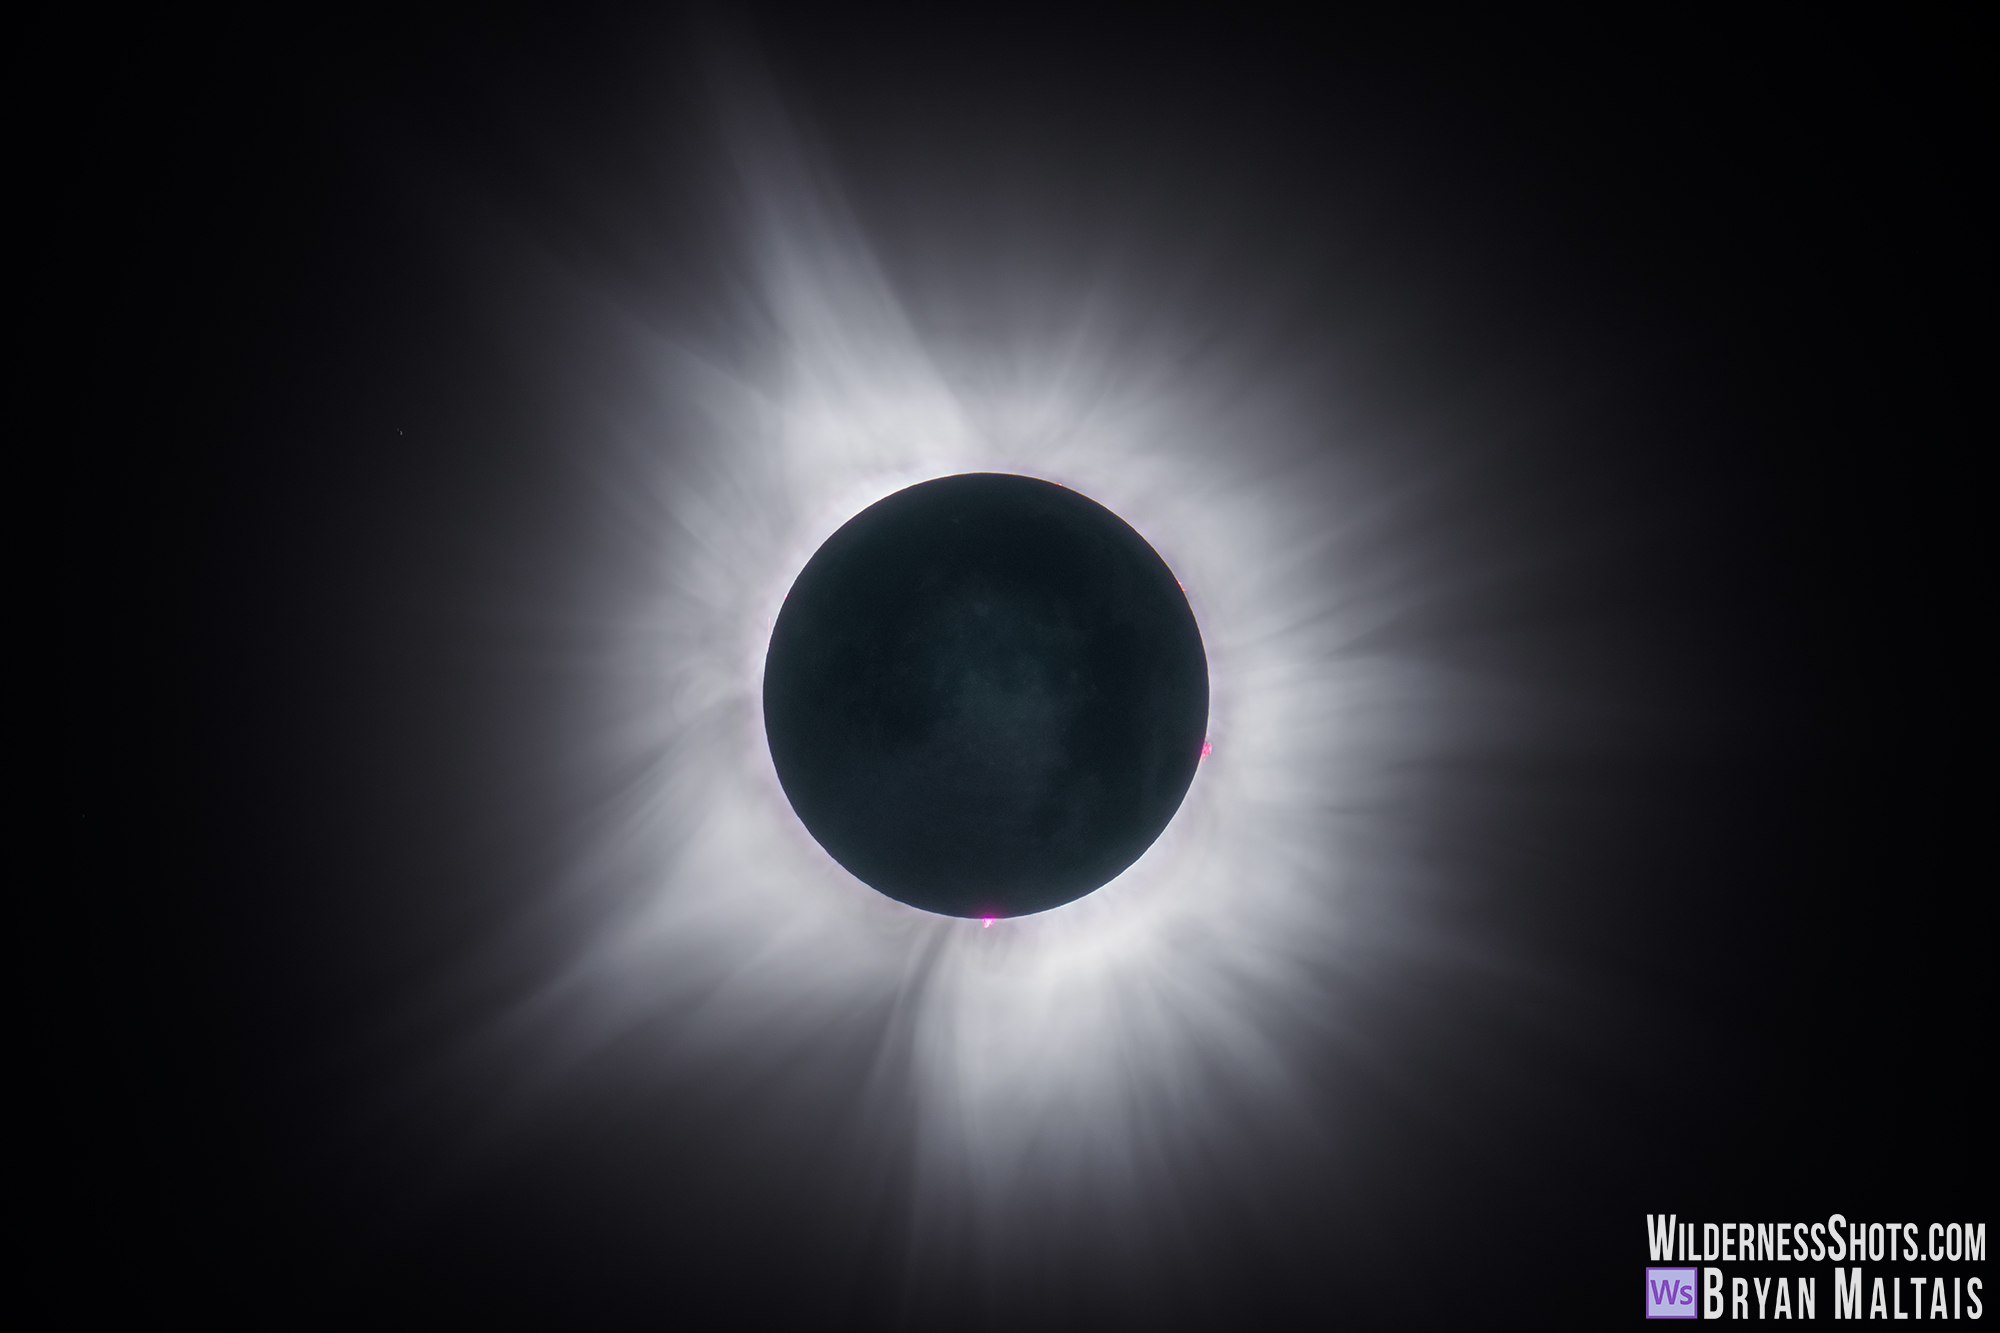 The Great North American Total Solar Eclipse of 2024. This is an uncropped image taken with a Sony A7rV and 200-600mm lens with 1.4x teleconverter
Settings and Timeline for shooting a Total Solar Eclipse
If you don’t want to read the whole article, here’s a quick reference for the key moments and settings for shooting a total solar eclipse. Study and rehearse it before shooting the eclipse.
- Save the partial eclipse and total eclipse settings listed here as presets so you can switch between them quickly
- Start with high capacity, empty memory cards and spare batteries
- Set up well before partial eclipse begins
- Affix the solar filter
- Shoot in RAW
- Manual Shooting Mode, Manual Focus, Mechanical Shutter
- f/8, ISO 200, 1/2000 (this is based on using a 20 stop solar filter, practice to confirm these settings)
- Manual White Balance around 6000k, or use Daylight WB
- Shoot with continuous bracketing mode. Set the maximum number of bracketed frames your camera allows (e.g. 7 shots x 2 EV)
- Use a remote shutter release
- Center the Sun in frame and manually focus on a sunspot
- Begin shooting at partial eclipse and track the sun throughout. This lasts 60-80minutes
- When the sun becomes a sliver, get ready to move quickly
- Remove the solar filter
- Photograph the diamond ring while the sun is a sliver
- Change to totality settings: f/8, 1/200, ISO 400
- The corona will now appear, begin shooting totality
- Leave the solar filter off for the duration of totality and continue shooting the corona. This lasts 2-5 minutes
- When the diamond ring is about to appear on the other side, switch back to partial eclipse settings f/8, ISO 200, 1/2000
- Photograph the diamond ring
- Reattach the solar filter and continue shooting the partial eclipse if desired
Eclipse Planning and Equipment
Know Eclipse Schedule and key Times
Before actually shooting the eclipse you have to plan for its key moments. You need to know the time that partial begins (C1), when totality begins (C2) and ends (C3), and when to pull off the solar filter. The partial eclipse typically lasts about 70-80 minutes, and totality lasts between 2-5 minutes. You should get a solar filter ahead of time because they’re likely to sell out.
Practice before the Eclipse
You can practice by photographing the sun a few days beforehand during the same times that the eclipse will occur. The sun’s path and elevation will be the same as during the eclipse. You also use the same settings to photograph the full sun as during a partial eclipse.
Choose a Location early
It’s best to plan well in advance where you’ll be along the path of totality. Millions of people converge along the narrow line all at once making it challenging to find lodging and even a spot to stand. Everybody arriving and departing at once can cause epic stop & go traffic that exponentially increases drive time. State governors have declared states of emergency during total eclipses because shipping, utilities and emergency services become temporarily hampered. Also bring enough food, water and fuel for a potentially long journey without resupply.
Equipment for photographing a Total Solar Eclipse
Despite the uniqueness of photographing an eclipse, you’re not asking the camera to do anything extreme so any camera with full manual controls will do.
There are many creative ways to photograph an eclipse, but I’ll concentrate on how to shoot one with a telephoto lens. Ideally, you want to use a strong focal length to capture maximum resolution and detail. On a full-frame camera, 840mm (i.e. a 600mm lens with 1.4x teleconverter) fully fills the frame with the eclipse and strands of the corona. Any higher and the corona is cut-off. Lower requires cropping to fill the frame. Remember to account for crop factor if using a cropped format.
Vibrations will be magnified at such high focal lengths so a heavy, sturdy tripod with a chunky head is ideal. Because of potential vibrations, it’s also best to use a remote shutter release.
A side-note on crop-factor. There are many articles about shooting photos of eclipses that claim that it’s beneficial to use a telephoto lens on a cropped camera because it increases magnification, thus increasing the size of the eclipse in the frame. That’s absolutely false. What’s really happening is that the field of view is being cropped because you’re projecting the same sized image onto a smaller sensor. For example, on an APS-C camera, a 600mm lens shows the same field of view as 900mm because the crop factor is 1.5x. This is effective magnification, not actual. It’s the same as just cropping a full-frame image 1/3 to make the subject look bigger. The only situations that a cropped camera actually increases magnification is if the pixel density is the same as a full-frame camera and when shooting video.
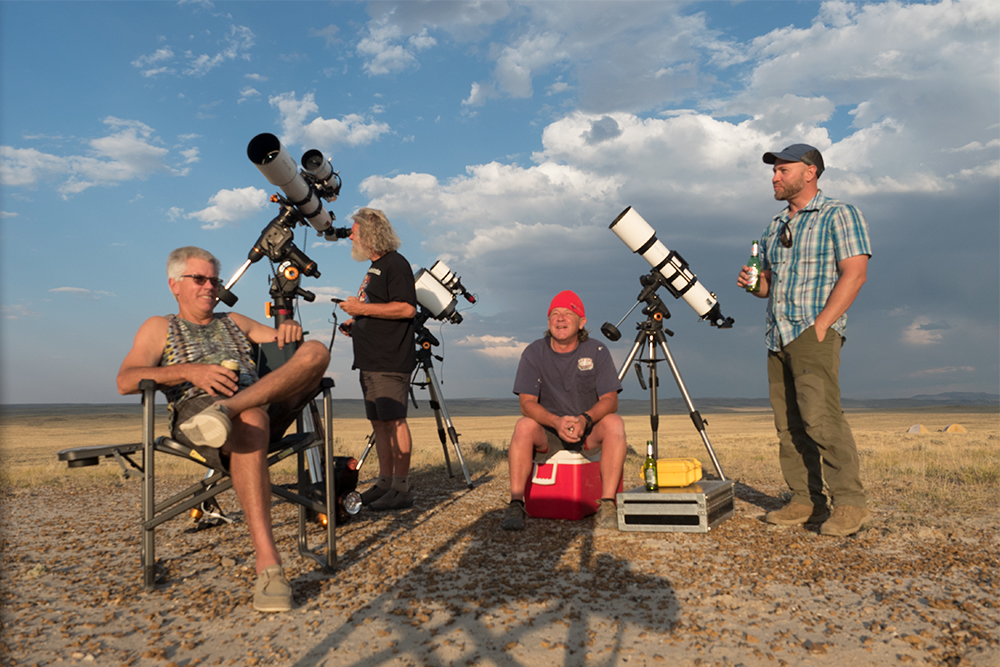 Preparing for the 2017 eclipse in Castle Garden, WY. A total solar eclipse attracts droves of excited onlookers from all walks of life. You’ll find yourself surrounded by photographers, amateur astronomers and armchair onlookers
How to photograph the Partial Eclipse
Using the Solar Filter
There are 2 phases to shooting the eclipse that require different settings; partial eclipse and totality. If you want to shoot the partial eclipse leading up to totality you need to use a solar filter. The sun is so bright that aiming directly at it can damage the camera sensor. A solar filter allows you to focus on the sun’s surface and see details like sunspots.
Typical Solar filters are made out of Mylar film in a universally-sized housing that slips over wide-diameter lenses. This type is inexpensive and works very well. They block about 20 stops of light. You can also use a glass solar filter, which is more expensive and doesn’t work any better. In a pinch, you can stack neutral density filters. You’ll need at least 16 stops of light blockage to shoot the sun, which a stacked ND 1000 and ND 64 achieves.
Camera Settings for the Partial Eclipse
Settings to shoot the partial eclipse should be around f/8, ISO 200 and 1/2000 sec. Shoot in full manual mode with mechanical shutter. Use either manual white balance around 6000K or sunlight WB. This will render the sun white, but more importantly, preserves the natural white color of the Corona during totality. If you want the sun more orange you can easily warm it up in post.
With the solar filter on, manually focus on sunspots on the surface of the sun. Use manual focus magnification assist for accurate focus.
Bracket every shot by the full number of frames that your camera allows, with 2 EV between frames. For example, 7 shots x 2 exposure values (-6, -4, -2, 0, +2, +4, +6). This requires using continuous bracket mode so when you press and hold the button all shots are fired in succession. You should use a remote shutter release for this (unless you’re using a tracking head,which takes the shots for you). Even if you think your settings are solid, capturing every possible exposure through bracketing is good insurance in case it’s the only eclipse you’ll ever photograph!
Be cognizant that a minuscule breeze can cause surprisingly intense vibrations on a large telephoto lens that’s aiming straight up like a ship’s mast. To this end, you should also use a remote shutter to avoid touching the camera while shooting.
When do you remove the Solar Filter during the Eclipse?
You remove the solar filter when the sun becomes a mere sliver just before totality sets in. Be ready to shoot the diamond ring the instant you remove the filter. It only lasts a few seconds before the moon covers the sun entirely. After the diamond ring disappears and totality sets in, change the settings to photograph the corona. Settings to shoot the corona during totality should be f/8, 1/200, ISO 400.
How to Track and Frame the Sun during the Eclipse
There are several ways to frame the sun depending on what kind of images of the eclipse you want.
You can shoot it continuously throughout the eclipse to create a time-lapse video, or a composite image that shows its phases. For this, you need to follow or track the sun because it moves quickly out of frame, especially at high focal lengths. You can follow it with a star-tracker or by recentering it after every shot. A star tracker will result in perfectly aligned images that let you assemble a time-lapse with little processing. Even if you don’t use one, the images can be very easily aligned in Photoshop using auto align.
You can also shoot a sequence or time-lapse of the eclipse during totality as it passes through the frame without having to track it. For this you position the frame so the sun enters at the lower left corner when C2 begins, and exits at the upper right at C3. You must know the precise elevation and path of the sun to align it properly.
You can also keep it simple and just photograph the eclipse during totality. This doesn’t require tracking or a solar filter.
 How to photograph Totality
Camera Settings for the Total Eclipse
After you’ve popped off the solar filer and photographed the diamond ring, it’s time to readjust your settings to capture the corona. There are no big changes. Stay at f/8 and readjust to 1/200th sec and ISO 400 (or whatever equivalent you prefer). Also stay in manual mode and sunlight white balance. To save time and stress, you can save these settings as a preset and switch over.
Bracketing is key
Leave bracketing on during totality. During this phase, it’s crucial and not merely insurance. You won’t have time to experiment with nailing exact exposure so you have to take a scattergun approach. You also need all of the different exposures that bracketing provides to capture the different features of the eclipse. The underexposed images capture solar prominences ejecting from the sun’s surface that would otherwise be obscured by the bright corona. The corona has a wide dynamic range and each of the middle exposures capture varying levels of detail in it. The overexposed images capture some detail on the moon’s surface. You can also use the bracketed photos to create a blended or HDR image that simultaneously shows all features.
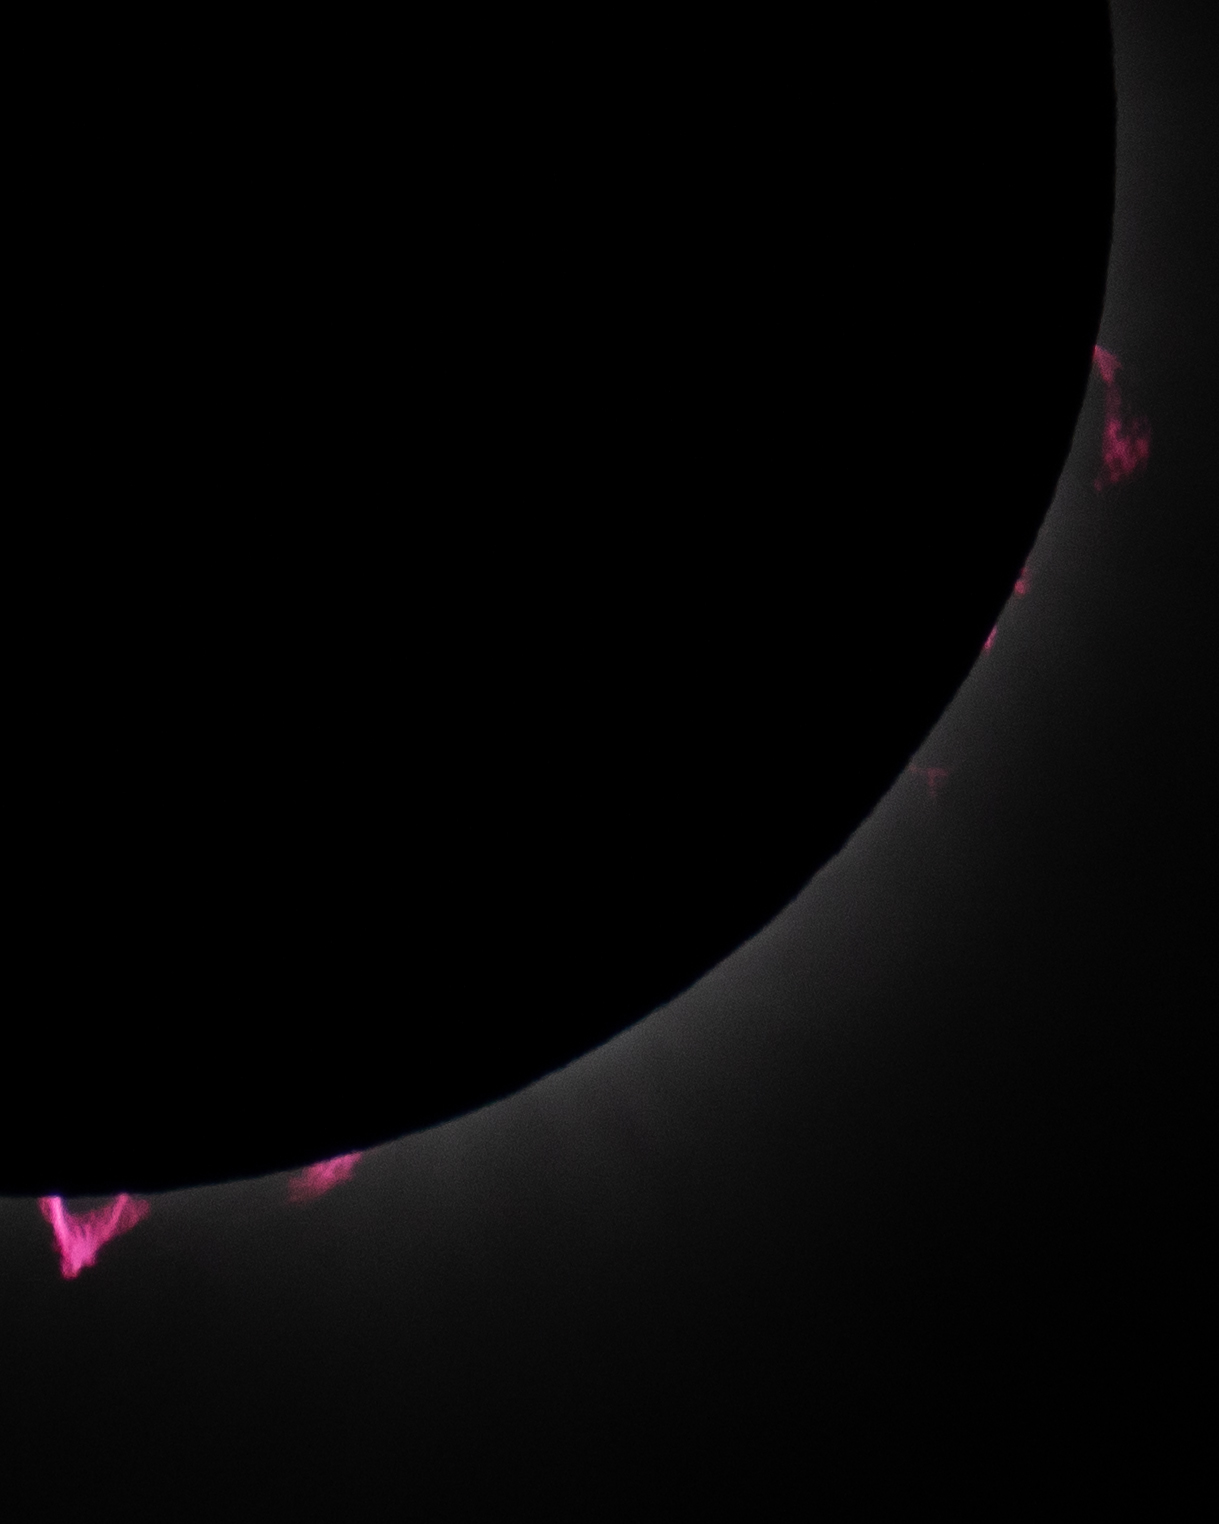 A solar prominence is an arc or plasma that erupts from the sun’s surface and is anchored by the sun’s magnetic field. They may extend hundreds of thousands of miles into space and can be exponentially larger than the earth. They’re only visible during a total eclipse when the sun’s light is blocked. You can capture them with a telephoto lens.
When are the next Total Solar Eclipses?
Aug. 12, 2026-Greenland, Iceland, Spain, Russia, and a small area of Portugal
August 2, 2027-From Portugal and Algeria, over North Africa and the Middle east to Yemen
July 22, 2028-Austrailia to New Zealand
See you there!
I made this short film about the 2017 total solar eclipse at castle garden, WY from several time-lapses that I had running.
