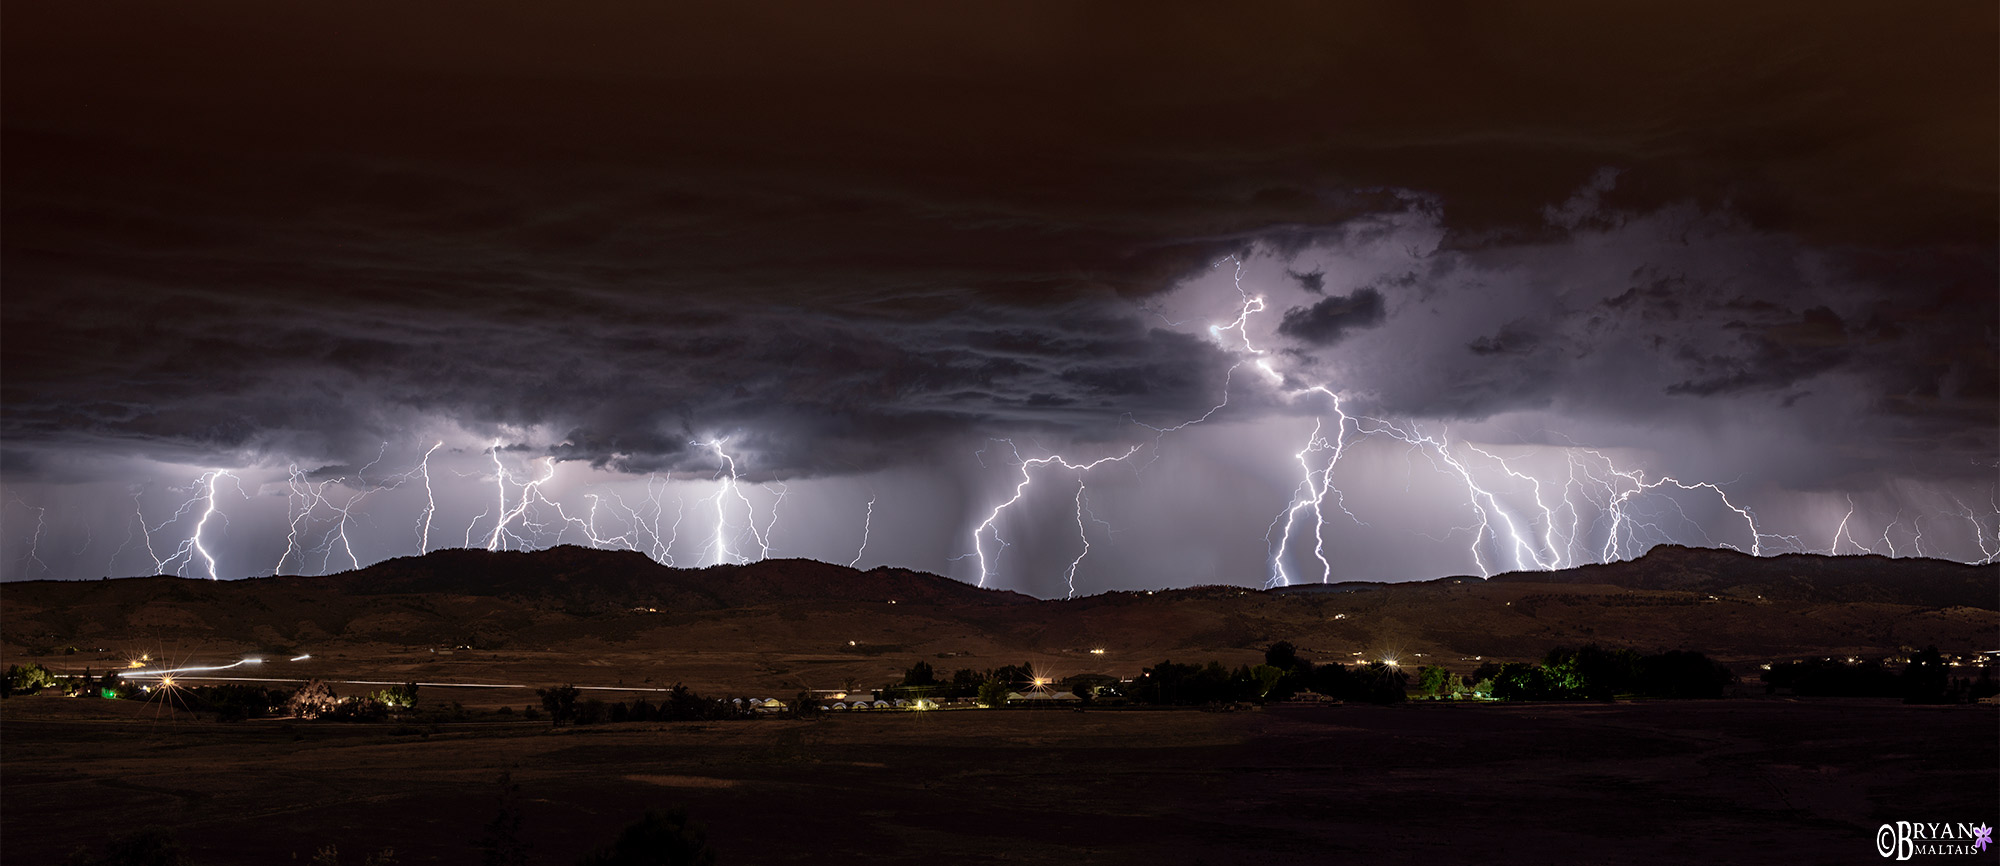
Panoramic composite of 5 images shot individually with remote shutter release. each photo taken at ISO 100, f/8, 30 sec, Manual WB 4000k. Nikon D800/Nikon 50mm f/1.4 lens.
In late Summer of 2013 frequent storms with particularly intense lightning thundered over the foothills west of Fort Collins. I watched the first storm from my deck as it cast lightning wildly like a tesla coil. Mesmerized, it chugged into the distance before I could set up my camera.
I monitored the forecast to be ready for the next one. Fatefully, another storm brewed up the following night. It approached quickly from the south, moving due north in a straight line. I quickly set up my camera while contemplating how to best capture the action. I decided to use the storm’s trajectory to my advantage. I photographed it as a wide panorama by panning along with the storm and stopping to shoot frames as it moved north. The lightning was so intense that each 30 sec exposure was filled with overlapping strikes.
I merged the 5 resulting photos into a wide panoramic composite image that was filled with electrical tentacles from one edge to the other.
These storms developed into the weather system that precipitated the Great Flood of 2013. The Colorado Front Range averages about 15” of annual precipitation, but some spots received up to 12” of rain in only 24 hours, creating mass flooding and destruction.
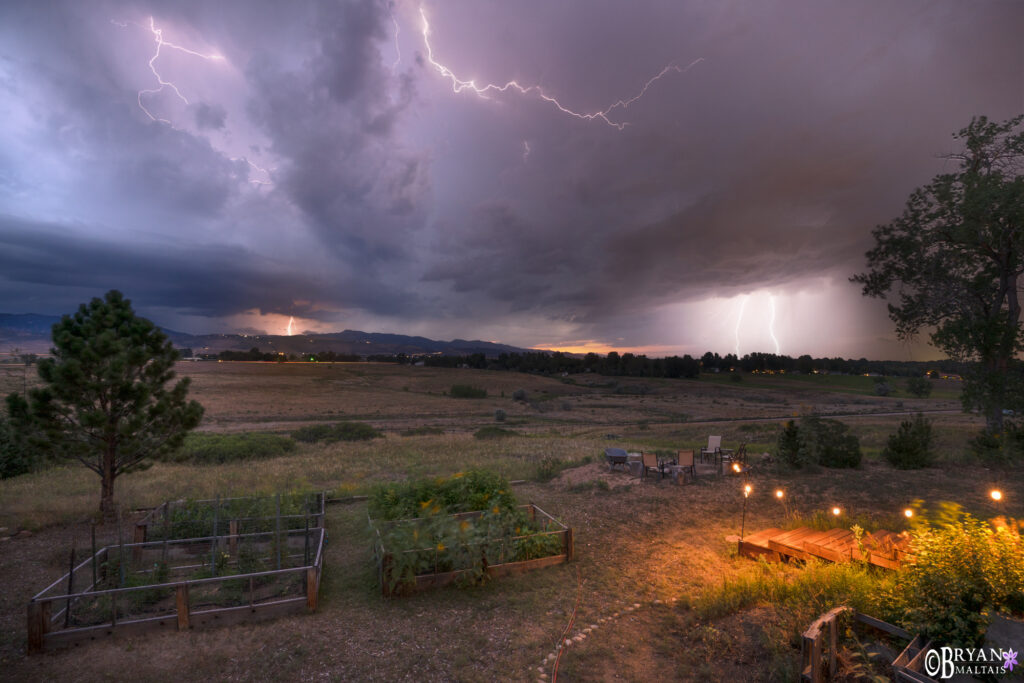
 This is a blend of strikes from 3 exposures taken from an intervalometer sequence using a 6-stop ND filter. ISO 64, f/11, 3 sec, AWB. Nikon D810/Nikon 16-25mm f/4 lens @ 18mm.
Photographing Lightning Technique
Capturing lightning in a photo may seem like technical wizardry, but it’s relatively easy. It doesn’t require split-second timing, complicated technique or special equipment.
The most reliable technique is to shoot continuously with your camera’s intervalometer (aka time-lapse mode). With the intervalometer, the camera shoots continuously until you cancel it or when the designated number of shots is reached. This produces a batch of images that capture virtually every lightning strike during the course of a storm. For still photos (as opposed to time-lapse video), the goal is to set an interval with a relatively long shutter speed
When shooting lightning at night, the longer the shutter speed, the more strikes are captured in a single frame, but the more the clouds blend together. 10-30 seconds is a good starting point. Lightning acts as a giant flash that illuminates the landscape and clouds. During daylight you need to use a neutral density filter to get long exposures. A 6-stop ND filter is ideal for preserving depth and low ISO while producing around 4 second exposures. (depending on ambient light). Denser ND filters may produce longer exposures, but they’re too dark to record lightning without increasing ISO and opening aperture.
The resulting images from interval shooting give you three creative possibilities. For starters, you have a batch from which to select the best image. You can also blend several photos together into a single image showing strikes from several frames. This is particularly useful for blending shorter daylight exposures that may not have captured as many strikes as desired in one shot. Lastly, you can create a captivating time-lapse video of the storm if enough images were captured. For example, you need 24 frames to get 1 second of video, so 240 photos is enough to produce a 10 seconds of timelapse video. However, if your goal is expressly time-lapse video, the settings differ from the instructions here, including using shorter shutter speeds to get more frames.
Interval shooting saves labor, but you don’t have to use it to capture lightning. You can shoot manually using a remote shutter release. You can either shoot at will or set the drive mode to “continuous high” and shoot continuous photos until you’ve captured the desired strikes. At night you can set exposure to “Bulb” and hold the shutter open until you’ve captured the desired strikes. Lightning triggers exist, but they’re unreliable, expensive and an extra piece of gear to tend.
Selecting a lens for photographing lightning is like with any other type of landscape photography. A distant storm might require a telephoto lens, while a closer one casting lightning all across the scene may need an ultra-wide lens.
Obviously, photographing lightning can be life-threatening. You should only photograph distant storms that aren’t moving toward you. Shoot from within a safe shelter if possible. Never shoot lightning in the open or if a storm is over you. Remember that both you and your tripod act as a lightning rod.
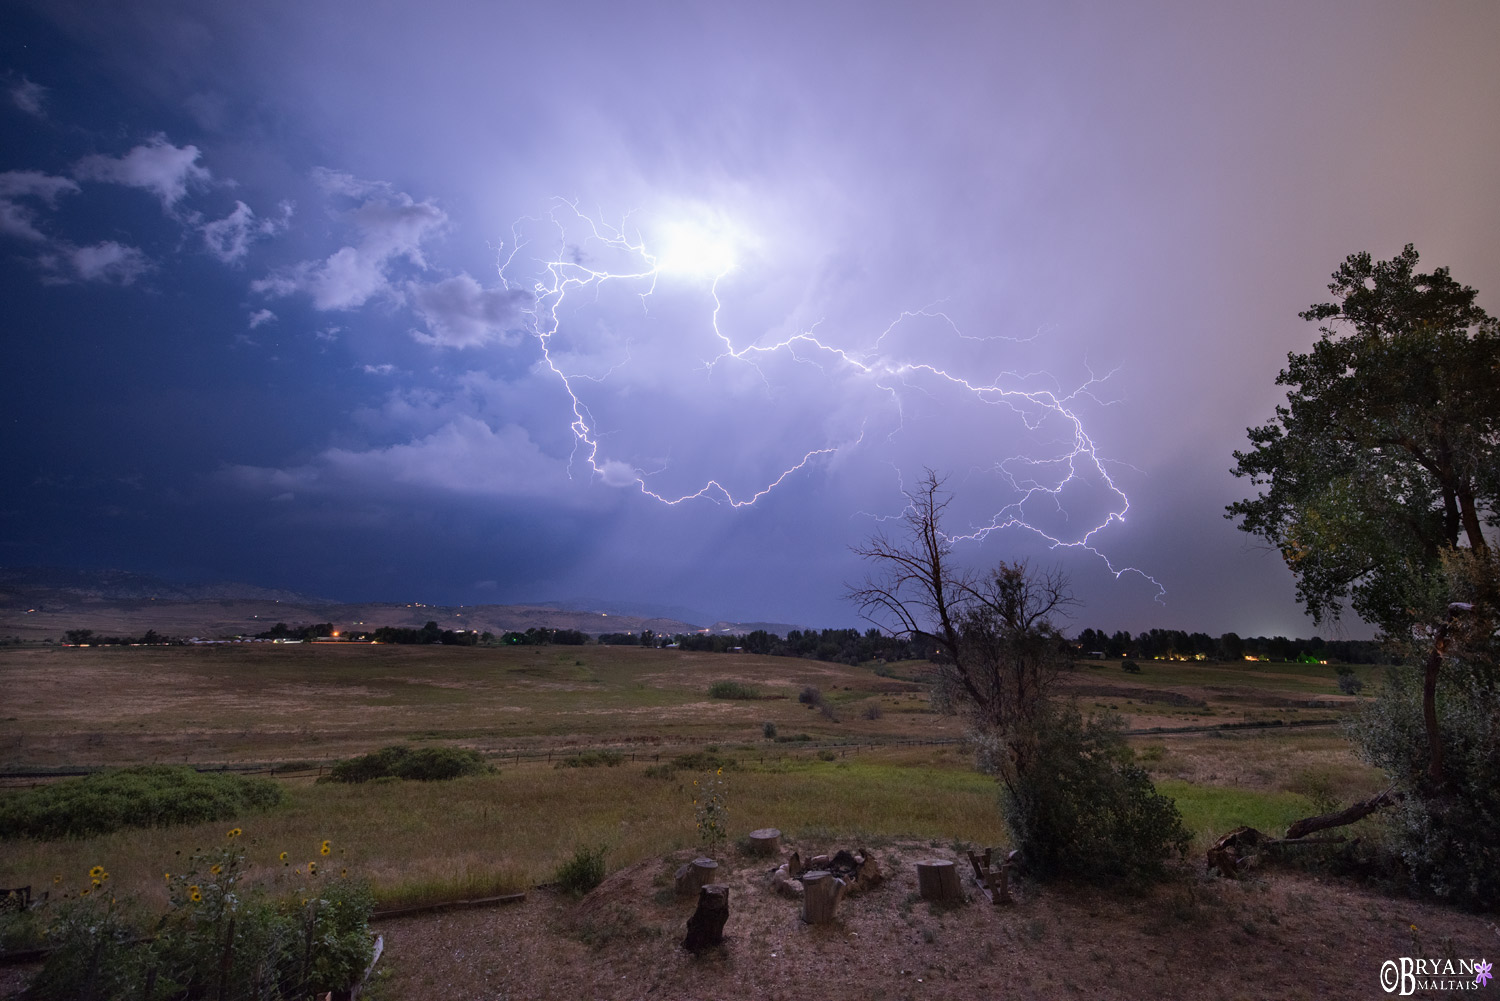 This is a single (non blended) image from a continuous intervalometer sequence. ISO 500, f/4, 3 sec, Manual WB 4250k. Nikon D810/Nikon 14-24mm f/2.8 lens @ 14mm.
How to shoot Lightning by Day:
During daylight the goal is to adjust the settings for the longest exposure possible using an ND filter. Doing so will inherently produce an image with low noise, high depth of field and a well lit landscape.
- Mount Camera on Tripod.
- Settings: Aperture Priority Mode*. Lowest native ISO. Auto WB. Aperture f/16.
- Compose the shot based on direction of storm travel and likely lightning strikes.
- Set the desired focus point (not infinity) then switch to Manual Focus.
- Mount the ND filter. Use at least an ND16 (4 stops), but ideally an ND64 (6 stops). Using an even darker filter will require using higher ISO or wider f/stop and isn’t recommended.
- Take a test shot with a strike if possible to ensure the settings aren’t too dark to capture lightning, then adjust as necessary.
- Set-up Interval Shooting per your camera’s instruction. Make sure the interval is continuous with only 1-sec between shots. Set the number of shots to far exceed what you anticipate needing. You can stop interval shooting when the storm is over and discard the excess images.
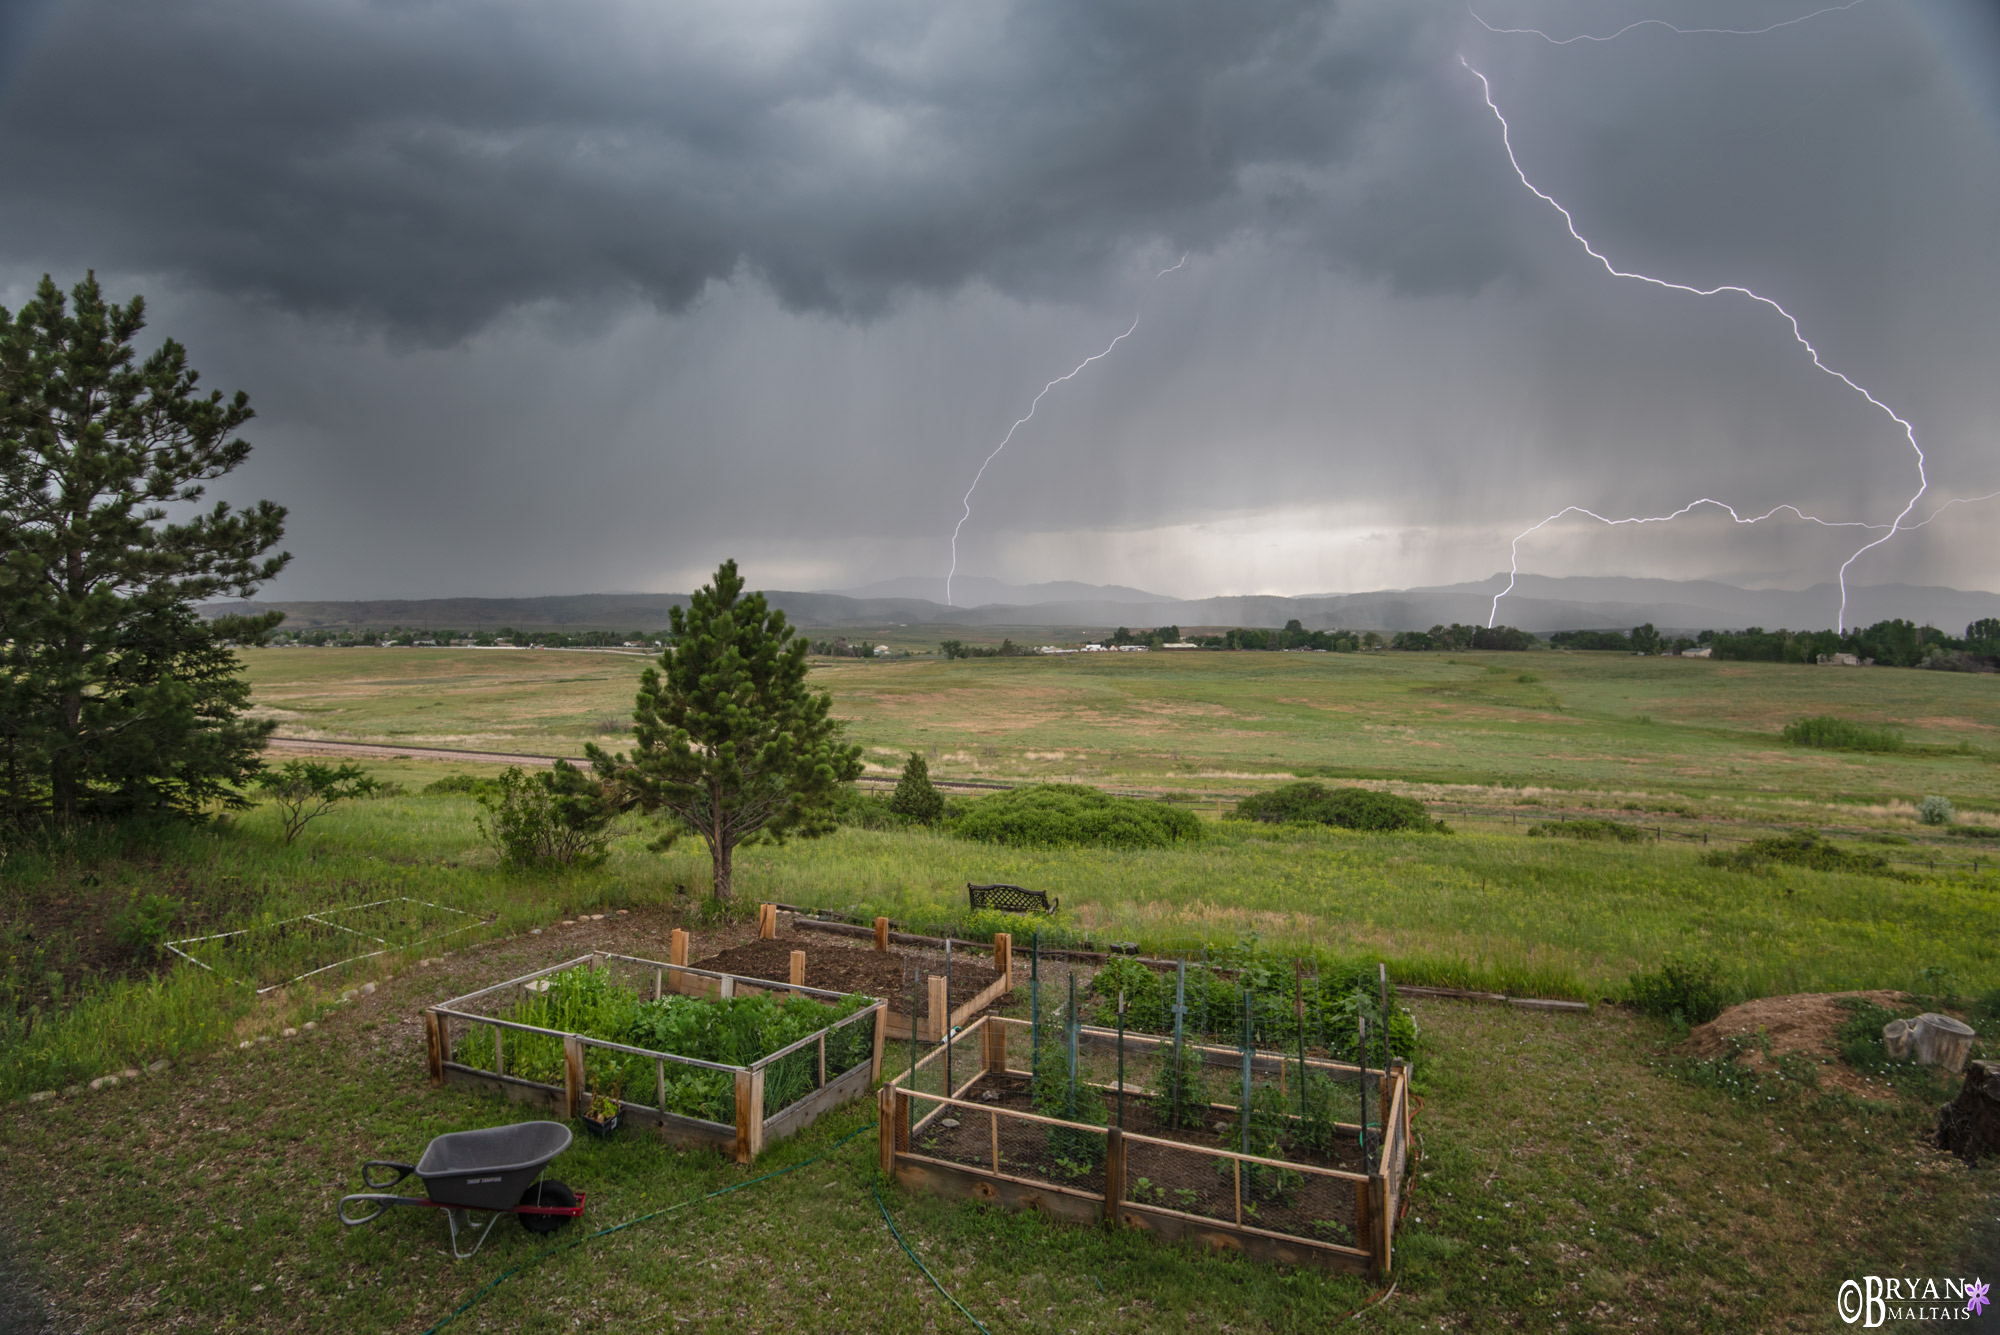 This is a single image from a continuous intervalometer sequence with a 6-stop ND filter. ISO 100, f/11, 3 sec, AWB. Nikon D810/Nikon 16-25mm f/4 lens @ 19mm.
How to shoot Lightning by Night:
These settings are a starting point that may need a lot of adjustment depending on the scene.
- Mount camera to tripod.
- Settings: Manual Mode, ISO 400. Manual White Balance ~4000 Kelvin. Aperture f/5.6. Shutter Speed 10-30 sec.
- Set desired focus point while in Manual Focus.
- Take a test shot of lighting. Readjust exposure settings for best landscape brightness.
- Set-up interval shooting as described above.
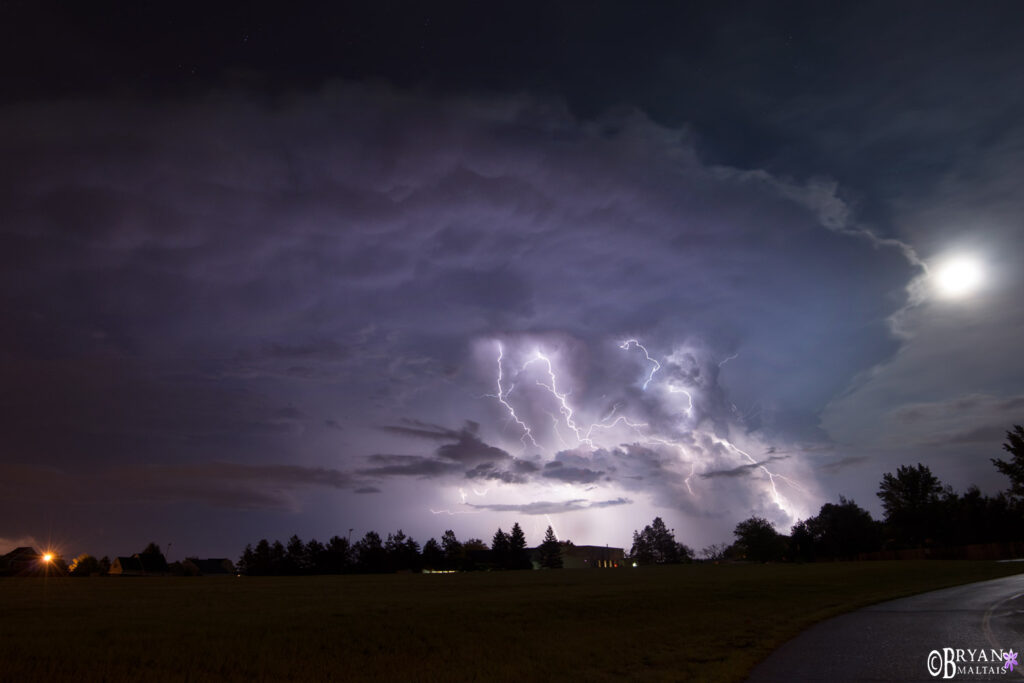
 This is a blend of 3 images taken from an intervalometer sequence to show the best lightning strikes. ISO 400, f/8, 15 sec, Manual WB 5000k. Nikon D810/Nikon 16-25mm f/4 lens @ 16mm.
 This is a single, manually taken shot. ISO 400, f/8, 13 sec, Manual WB 3700k. Nikon D800/Nikon 16-25mm f/4 lens @ 16mm.
