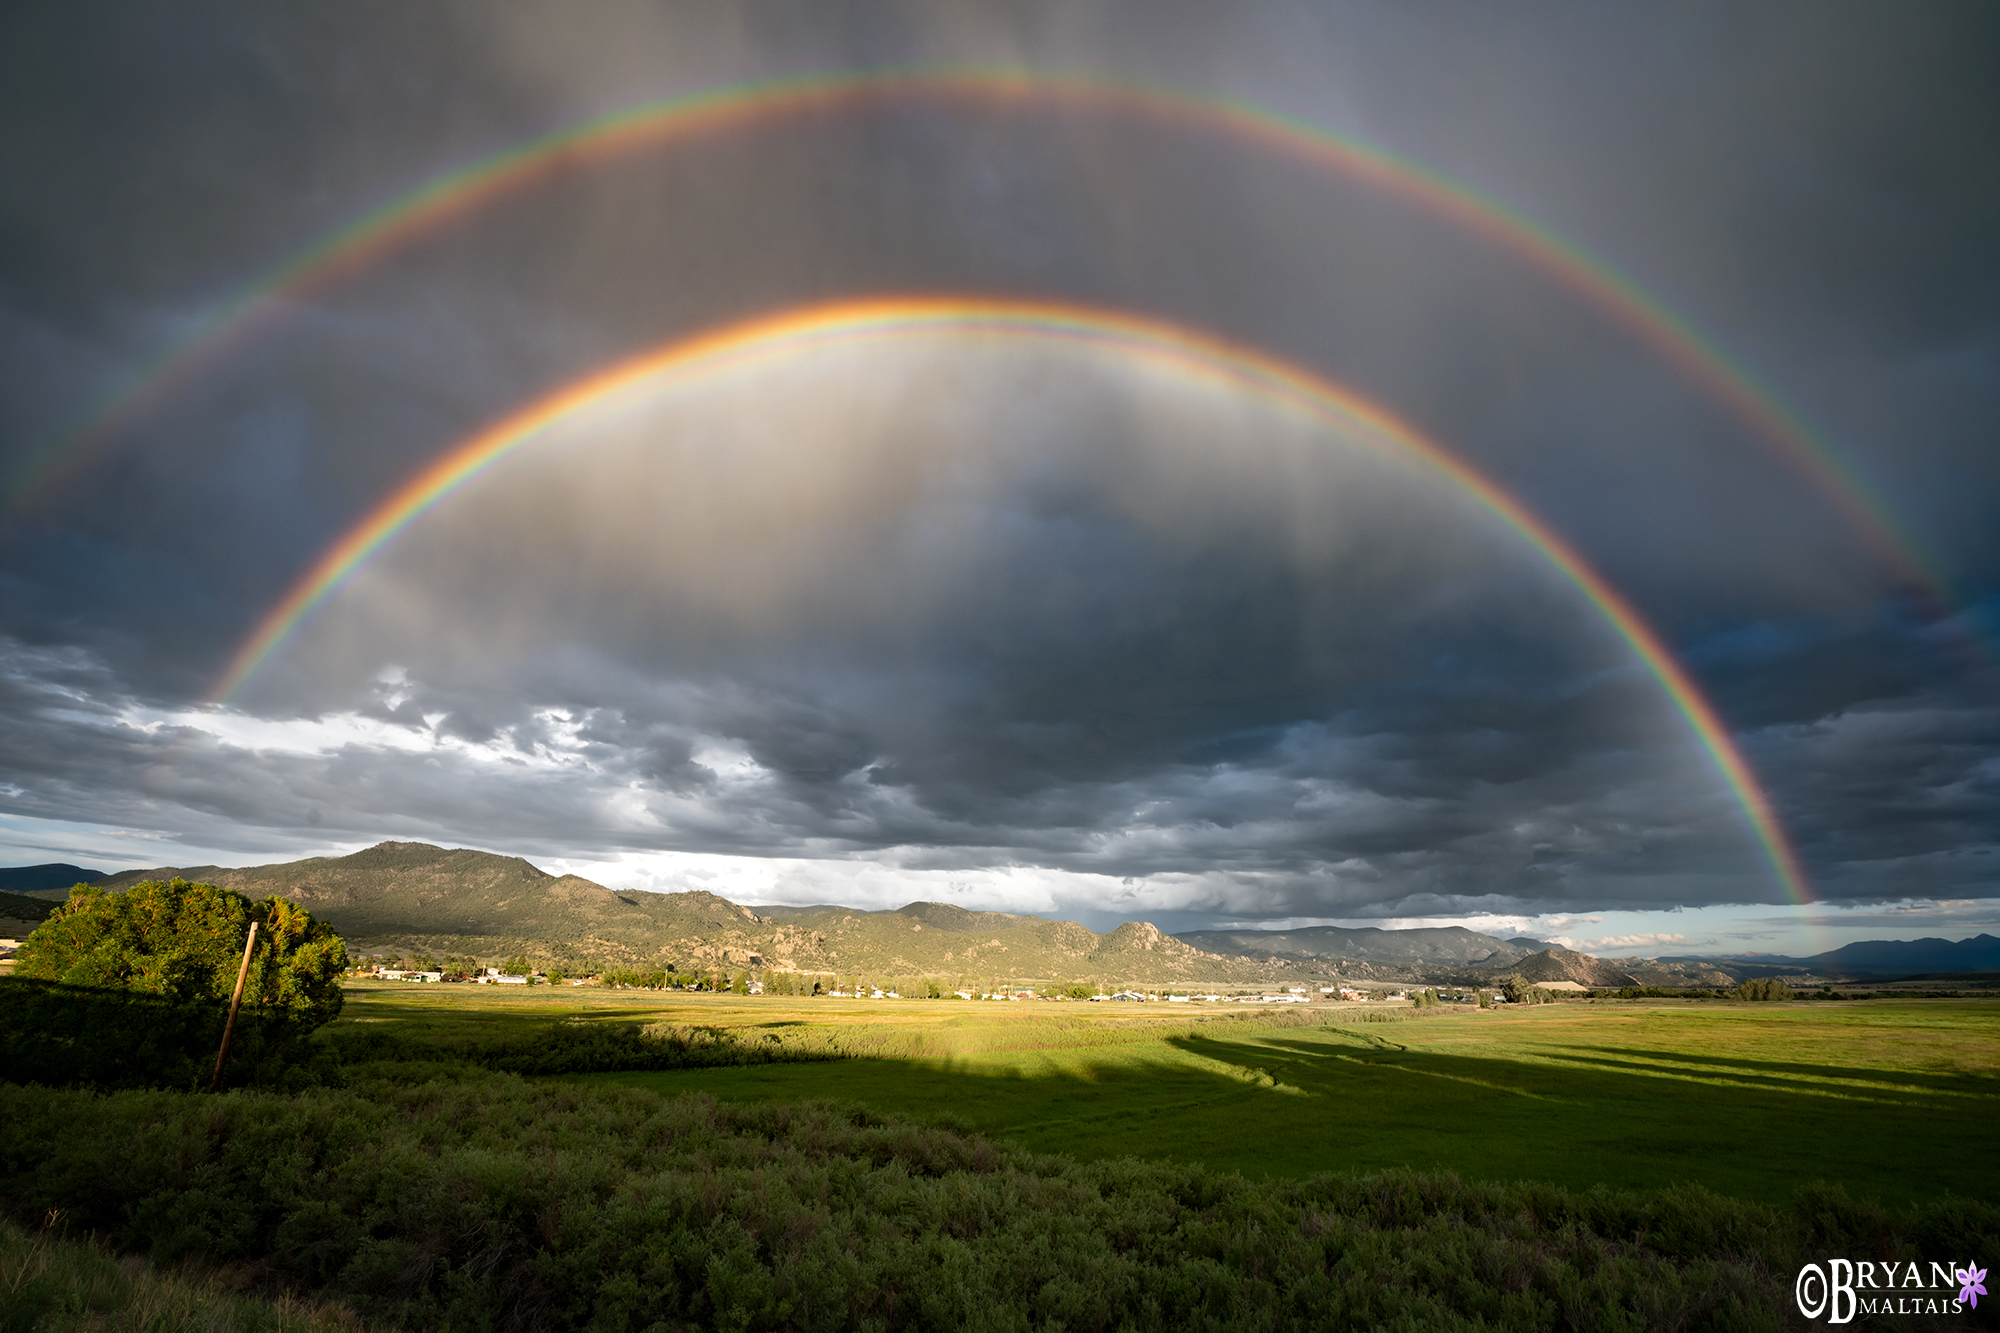
Buena Vista, CO. Sony A7rV. 16-35mm f/2.8 lens @ 16mm. B+W CPL. F/11, 1/25th sec, ISO 200.
How to Photograph Rainbows
It’s useful to know how to photograph rainbows when one spontaneously appears because they can be the final touch that creates a photographic pièce de résistance. In stormy skies they often appear along with other beautiful atmospheric phenomena. Picture a rainbow forming as rays of sunlight are caught by wispy veils of virga, gently falling from towering cumulonimbus thunderheads. Pages can be written about the physics that cause them, but successfully photographing rainbows is actually pretty simple. Still, it helps to know some basics of where and why rainbows form.
This blog contains Amazon affiliate links. Clicking on them and shopping on Amazon as you normally would supports this blog by generating small commissions.
Why do Rainbows form?
You already know that rainbows form when it rains while the sun is shining. To see a rainbow, the sun must be behind you, shining on rain that’s directly in front of you. In other words, you must be standing between the sun and rain. Rainbows form directly opposite from the sun. This means that, from ground level, you can only see them when the sun is shining across the earth at a low angle of around 42°. At the mid-latitudes, the sun is at this low angle from late afternoon until golden hour, or early to mid-morning.
You can’t see rainbows when the sun is overhead shining down because the rain would have to be in front of you at a low angle, which would be underground. From an airplane, you would be able to see a rainbow directly beneath the aircraft. It would appear as a full circle because it wouldn’t be truncated by the horizon.
There’s no such thing as the “end of the rainbow” because its position changes depending on the viewer’s location. The rainbow’s apex is always centered on the viewer. Because the viewer must be located between the sun and the rain to see the rainbow, a person standing far away at a perpendicular angle can’t see the same rainbow. Actually locating the end of a rainbow isn’t something you’d want to do anyway. Despite their cute reputation in pop culture, most Leprechauns are actually criminals.
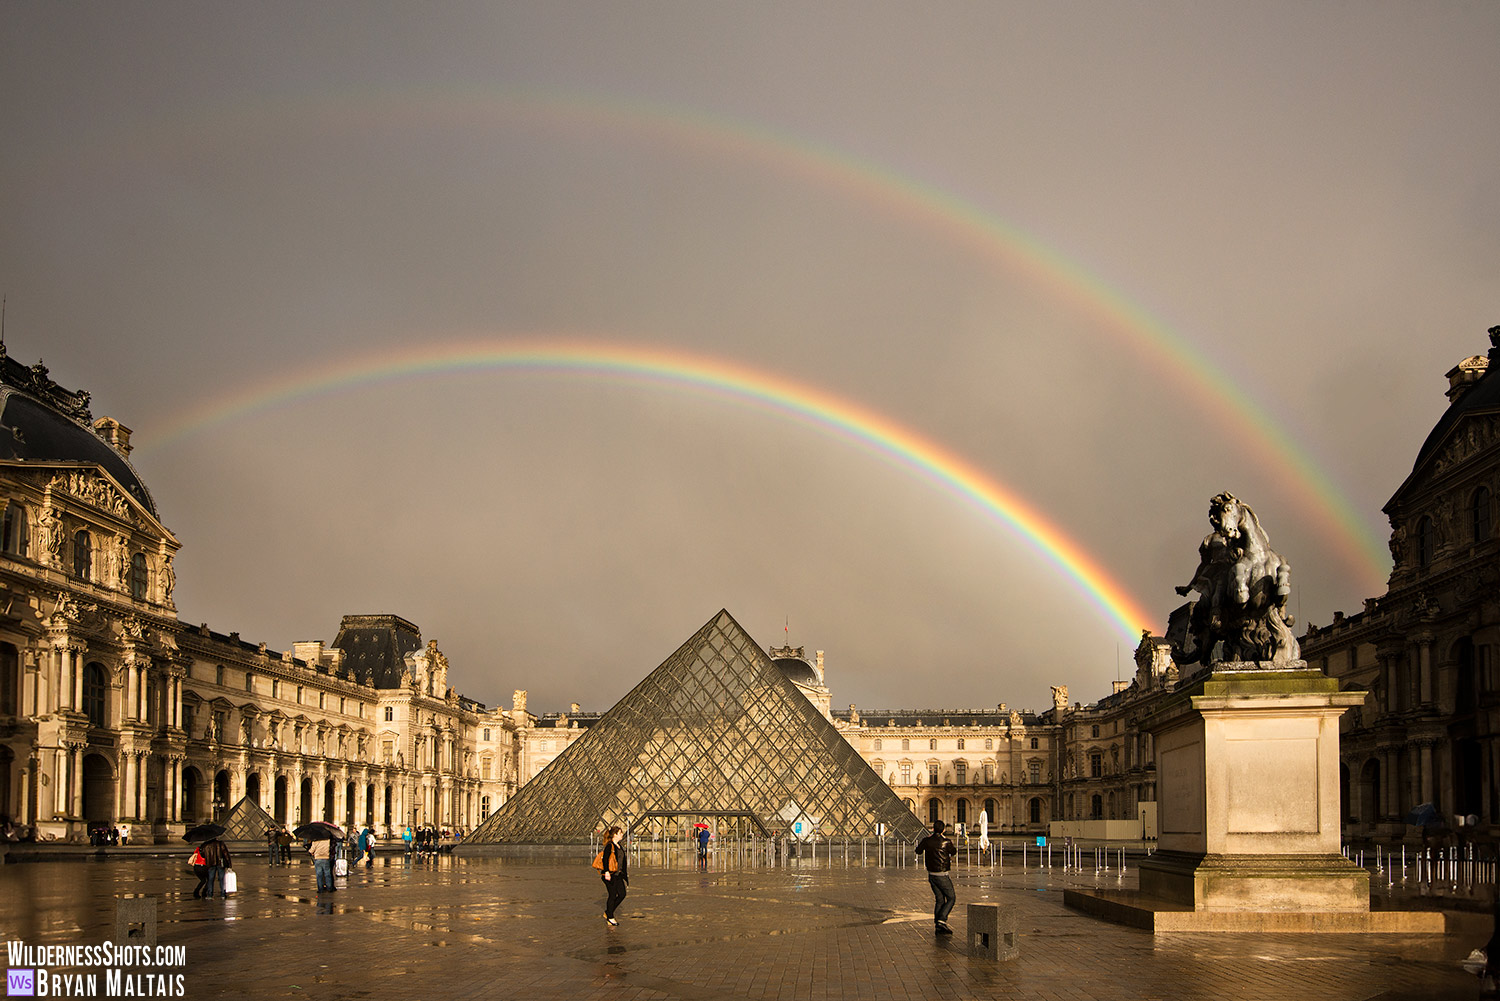
Louvre, Paris 2014. Nikon D800. 16-35mm f/4 lens @ 21mm. Circular Polarizer. F/11, 160th sec, ISO 400.
When is the best time to photograph Rainbows?
You can see why Rainbows are somewhat rare. Simultaneously, the sun must be at a low angle, the sky must be clear where the sun is shining, and rain must be falling directly opposite the sun. When these conditions do congeal, it’s often just after a storm has passed and is traveling in the opposite direction of both you and the sun.
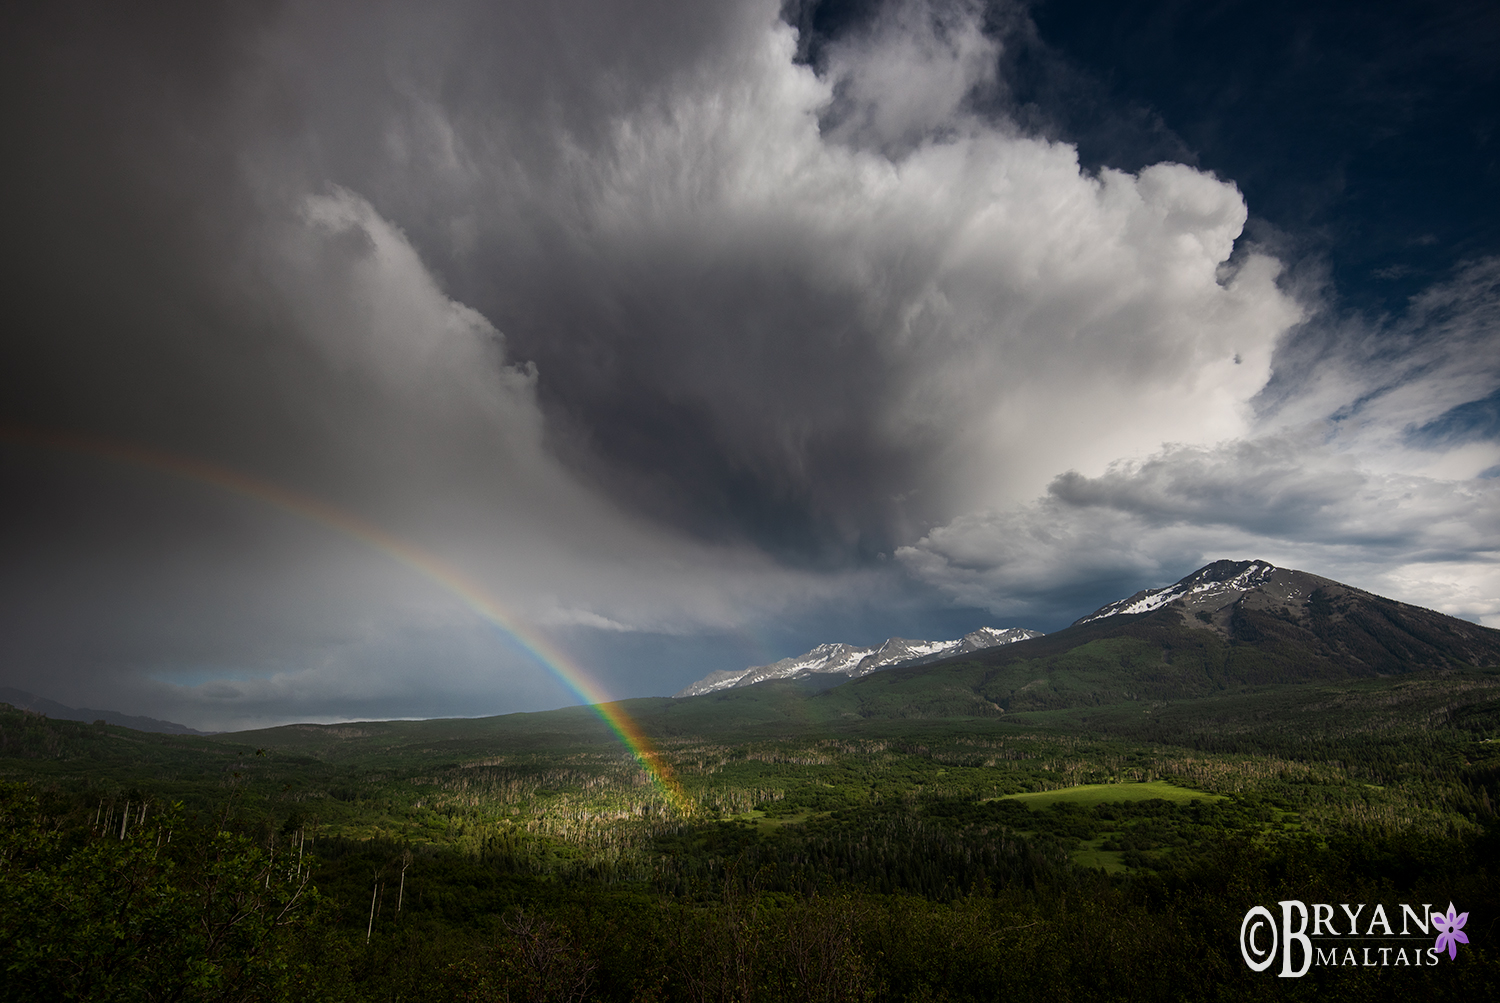
To go rainbow chasing, look for scattered thunderstorms in the late afternoon or early morning. Sustained rain with an overcast sky is unlikely to produce rainbows unless the sun peeks through. We usually don’t plan to photograph rainbows because they just appear. However, photographers are more likely to encounter them because we often seek the very conditions that create them; golden light with dramatic weather. Though they can appear any time of year, the greatest likelihood of encountering rainbows is during a region’s stormy season.
 What are the best Settings and Equipment to Photograph Rainbows?
Capturing rainbows requires the same equipment that you would often use when shooting landscapes; a polarizer filter and a wide-angle lens.
A polarizing filter makes the colors of a rainbow pop, where without one they appear pale. With a circular polarizer, you have to rotate the filter for the full effect. If rotated to the wrong position, it will polarize all reflection from the water droplets and render the rainbow invisible.
A wide-angle lens is needed to capture the full width of a rainbow. They span an angle of view of 84°, which is the perspective of an 18mm lens (full-frame). Double rainbows, which are relatively common when rainbows form, require wider than 16mm to capture from end to end. You can also shoot a panoramic composite to capture the full breadth of a double rainbow. You can use stronger focal lengths to capture just a leg or section of the rainbow.
Settings for rainbow photography aren’t different from shooting normal landscapes. Aperture priority mode, auto white balance and a small f/stop are sufficient to sharply capture the landscape with a rainbow above. You can use bracketing to give yourself blending options and insurance for perfect exposure, but this isn’t necessary.
As always, you should use a tripod for sharp images when shooting fixed landscapes in the low light of golden hour. However, rainbows are spontaneous and ephemeral in nature. Sometimes you have to shoot them handheld with a higher ISO and wider aperture rather than risk missing them while setting up your tripod.
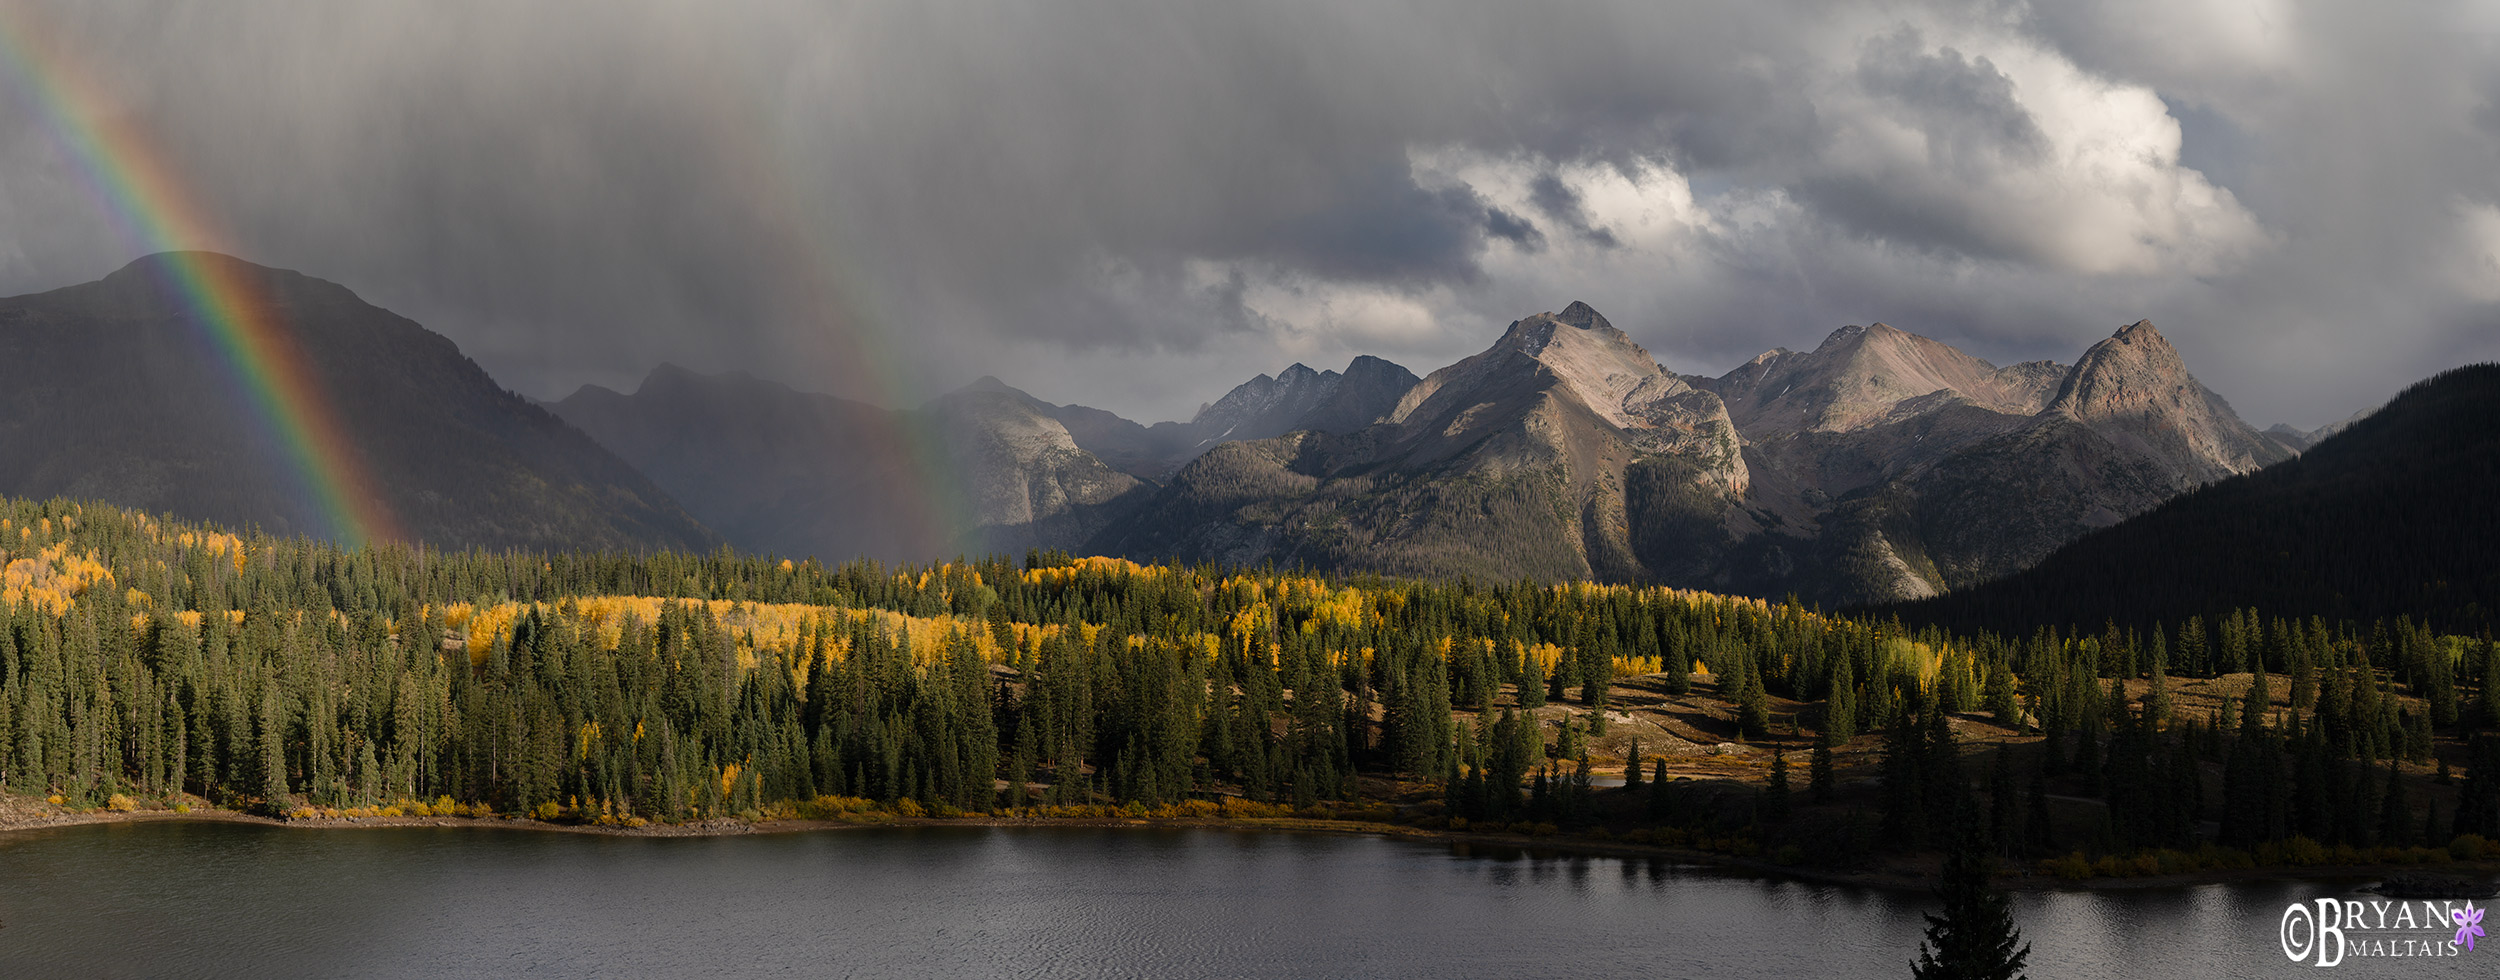
5-image panoramic of the base of a double rainbow above the Grenadier Mountains, CO. Sony A7rV, Sony 24-105mm @ 90mm, B+W CPL. F/8, 1/640th sec, ISO 200.