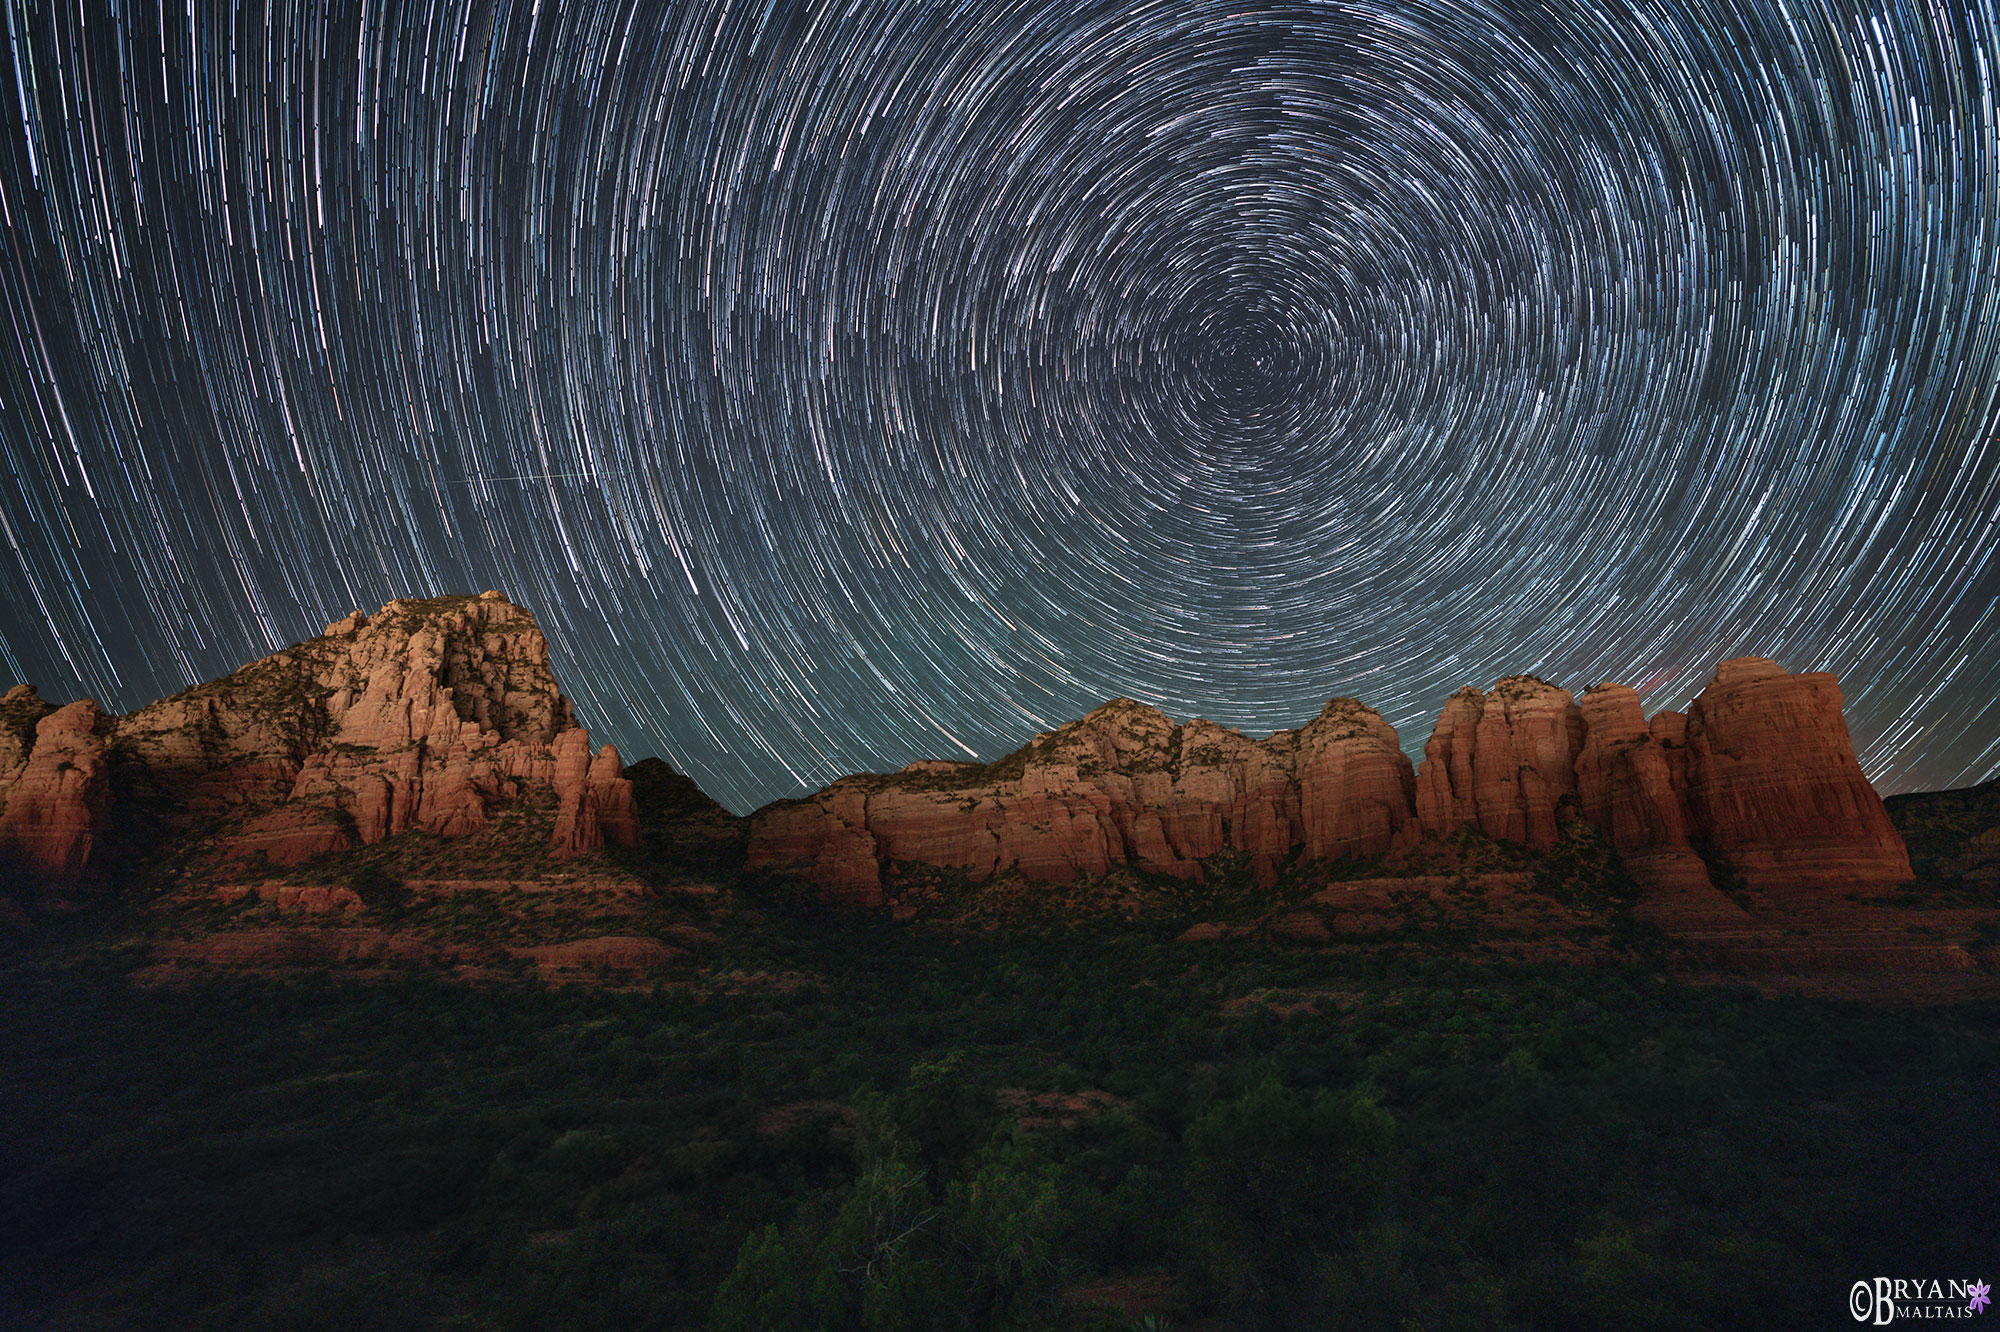
What are Star Trails?
As the earth rotates while photographing a fixed area of the sky for a long duration, the light of the spinning stars naturally leaves behind trails in the photo. To make the image above, I photographed the stars in the northern sky continuously for 2 hours, giving me 348 exposures. This let me create 2 products; a star stacked photo of circumpolar star trails, and a time-lapse video of the stars swirling as they incrementally form star trails. I photographed the stars above the Schnebly Hill Formation in Sedona, AZ. I was able to create the spectacular footage of the star trails as they grew using cumulative image saving in the amazing StarStax app. You’ll notice several interesting phenomena in the footage:
Hundreds of streaking Meteoroids?
You’ll immediately see hundreds of sharp streaks in the notch beside Capital Butte. At first I thought these were meteoroids. After all, I was there during the peak of the Perseid Meteor Shower. However, their behavior didn’t add up. Many of these streaks continued through several exposures. Each exposure was 20-secs, meaning it took the streaks several minutes to traverse the sky. They weren’t planes because they leave behind longer trails with ugly flashing lights. It also couldn’t have been meteoroids because they zip through in split seconds.
The streaks can only have been satellites. By my estimation, Starlink are the only satellites numerous enough to leave behind such prolific streaks. There are currently 5,000 Starlink satellites already in low orbit, with a total “constellation” of up to 42,000 planned by Mr. Musk. A few of the thicker lines that remain in the video are meteors.
Green Air-glow
In the opening footage you can see faint green flickering pulsating across the sky. It’s similar in appearance to a weak Aurora. This is known as airglow and is the result of photons being released during chemical reactions in the upper atmosphere. While heavy airglow may be possible to observe with the naked eye, it normally requires a camera to see.
Smudges Flying Across the sky
I had to remove dozens of aircraft trails from individual frames. Otherwise, their blinking lights would have crisscrossed the final composite image of the stacked star trails. When looking at individual images, you can’t tell that an aircraft trail was removed, but when all the images are animated into a video, the handy work is revealed as distortions flying through space.
Flickering on the Rocks
This was caused by night hikers with headlamps. Sedona is a busy place, especially on warm summer nights with interesting celestial events occurring. On this night of Aug 13, 2023 you could spot a Starlink satellite train cruising over Arizona and watch the Perseid meteor shower.
Star Trail Procedures in the Field
I shot 348 20-sec exposures with a 1-sec interval in between. This translates into 2 hours of continuous shooting. My settings were f/2.8 @ ISO 5000 and 3800K white balance. I wouldn’t normally use ISO 5000 for star trails because this captures too many stars and makes the trails too tightly spaced. However, I needed the gain of high ISO to also capture the Persied meteor shower. I used the camera’s intervalometer for continuous shooting.
I needed a south-facing scene in Sedona with Polaris positioned above, and minimal light pollution. This excluded all of the rock formations south of town because this would have captured Sedona’s glow. The Schnebly Hill Formation with Capital Butte was the obvious choice. City lights behind me conveniently illuminated part of the rocks while not casting much light into the sky.
Star Trail Image prep in Lightroom/Adobe Camera Raw
I batch edited all 348 images in Lightroom by adjusting one, then syncing the settings to the rest. I only needed to make minor global adjustments, mainly, desaturing color. Counterintuitively, I didn’t reduce noise because StarStax takes care of this through averaging while stacking. I had to manually remove aircraft trails from about 2/3 of the images with the healing brush. After editing, I used the batch processing command in Lightroom to save all of the edited images through Photoshop as JPEGs in a separate folder. You walk away from your computer and go do a chore during this step.
Using Averaging in Photoshop to decrease noise in Star Trails
In the final composite, funky lights from hikers tainted the foreground so I had to blend in a good image of the foreground. To do that I selected 8 good foreground images, brightened the shadows to show the foliage, then averaged them in Photoshop. Because I shot each exposure at ISO 5000 for 20 sec, there was significant noise. Averaging is a technique to reduce noise without destroying detail. You stack several images taken from the same position with the same settings. Because image noise color has a random pattern, Photoshop can analyze and detect noisy pixels between multiple images and keep the “good” pixels. I then blended the good foreground image with the stacked composite image in Photoshop using select sky and creating an inverse mask.
Averaging is fairly simple starting in Lightroom (or Bridge) and finishing in Photoshop.
- From Lightroom, select the images using shift or ctrl
- Right click over them and select Edit in -> Open as smart object layers in Photoshop
- In Photoshop, select all layers using shift then right click and select Convert to Smart Object
- In the menu bar, go to Layers -> Smart Objects -> Stack Mode -> Mean
- Done
Creating Star Trails Composite in StarStax
StarStax makes processing star trails easy compared to the complicated process in Photoshop, with a much better outcome. The app is intuitive to understand and doesn’t require a detailed step-by-step. Essentially, you take the saved JPEGs that you exported from Photoshop and drop them in to StarStax. You can then choose to stack the images as “comet” star trails or regular star trails. The video above shows the difference. One of the best features of StarStax is that it can save the cumulative images as it goes, allowing you to make a really cool timelapse video of the forming star trails. Another amazing feature is that it automatically averages as it stacks, thereby eliminating noise and minor clouds that float through the frame. AND it bridges gaps in trails where airplane trails were cloned out. AND it’s free.
Creating Video of Star Trails
You need 24 frames per second (23.976 precisely ) to create smooth video. The 348 images that I photographed provided enough frames for a 14 sec video. StarStax conveniently saves JPEGs of the emerging star trails as it stacks the single star trail composite image. This allowed importing the JPEG’s into Adobe Premiere Pro as frames of the movie. Premiere Pro has a feature that automatically imports a batch of photos as a time-lapse video. When importing, you just select the first image in the folder, then in the bottom right of the import window, check the image sequence box. From there it was matter of changing the timeline setting to 24 fps, adding a few titles and pretty music.
