Have you ever photographed a scene that was spectacular in person, but your photo of it turned out dull?
Photography would be much easier if you could simply point, shoot and get a picture that looks exactly like what you saw. This is a reasonable expectation because the camera & lens seems like an analog to the human eye. However, new photographers are often confused when their photos look much different than what they saw. It requires skill and technique to infuse two-dimensional photos with the drama and dimension that you saw with your eyes, and here I’ll explain six of them.
When we observe landscapes in person there are natural cues that indicate the distance, structure, size and mood of what you see. Imagine standing before a towering mountain range with a lush green pasture in the foreground. You intuitively know how big the mountains are by how far your eyes tilt up to look at the peaks. Objects of known size like barns and cattle in the foreground reveal scale. Eagles soaring as if in slow motion indicate the mountain’s distance and towering height. Swirling clouds, moving shadows and ambient sounds like thunder are further indicators of scale and distance. As you look around, slight differences in perspective between your two eyes allow your binocular vision to see subtle elevation differences on the mountains’ surface.
You take the shot, expecting the resulting photo to convey the grandeur that you witnessed.
Surprisingly, your photo turns out flat and boring. The mountains look like a single gray mass with no dimension. This happens when photographing similarly colored objects from ground-level with no defining shadows or light to separate them. The contours on the mountains are lost in the photo because your eyes’ binocular vision can’t see relief on a flat image. You also can’t tell in the image whether the peaks are 2,000 or 10,000 ft tall. This is because your wide-angle lens minimizes size and skews scale between objects. Scale is also hard to discern in the absence of objects of known size at various distances. Furthermore, the environmental cues that stimulated all of your senses are missing in the photo.
The following techniques can help reconstitute your photos with the depth and drama that you witnessed.
Use Layered Foreground Elements to show Scale in Photos
Showing a single object of known size in the foreground doesn’t work to show the scale of distant subjects. You need to include many elements of known size, starting at the near foreground and going up to the subject. For example, photographing a desert peak with layers of cacti in front of it. The cacti in the foreground appear life size, and reduce to mere dots at the base of the mountain, thereby showing scale. Using layered elements works well with any objects of known size that extend from your position to the subject like houses, trees or livestock.
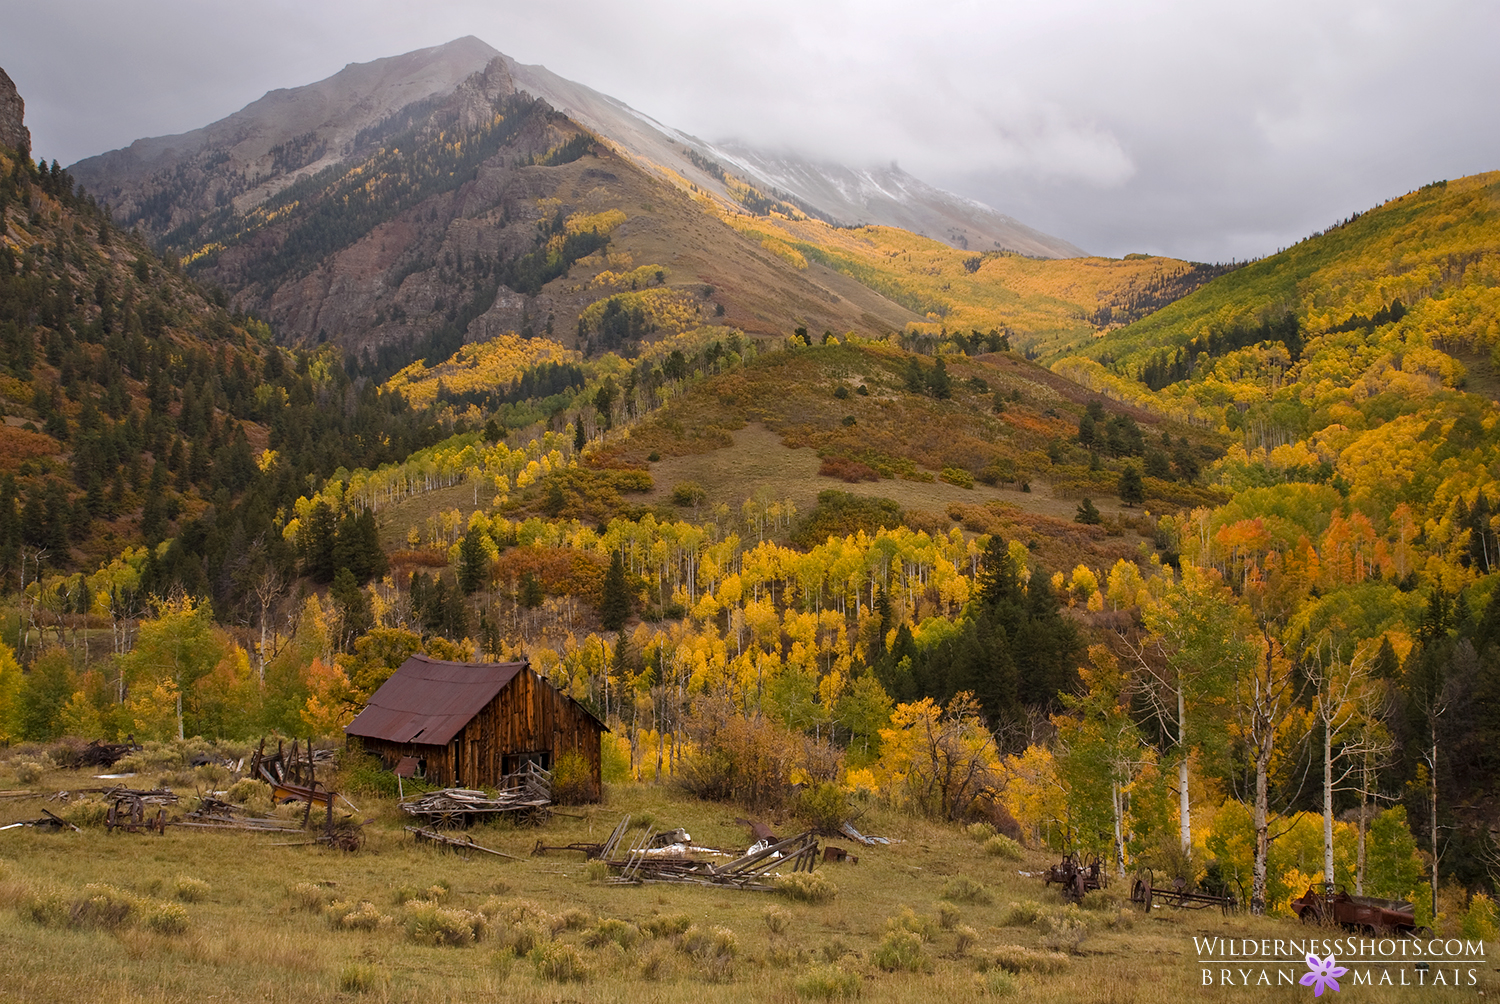
Layered objects of known size like Aspens that begin in the foreground continue up the mountains let you accurately judge the size of the mountains.
Shoot a medium Panorama instead of a Wide-angle single frame
Wide-angle lenses exaggerate the size of objects in the edges of the frame while making objects in the center appear disproportionately small. This effect is reduced by zooming in. However, you usually can’t zoom in because you need the whole field of view to ingest the scene. Instead of shooting a single wide-angle photo, you can use a higher focal length to shoot several frames for a panorama composite. For example, shooting several frames at 35mm and merging them can give you the same field of view as a single frame at 16mm, but without the extreme distortion.

Grenadier Mountains, Silverton, CO. I shot each frame of this 5-image panoramic at 100mm, which preserved the size of the mountains. Using a wide angle lens to fit the whole scene into 1 frame would have minimized them. Sidelight at sunset added further depth and so did shooting from a high vantage point.
Use a Telephoto Lens instead of Wide-angle
Sometimes we’re not necessarily trying to convey honest scale, but BIG scale to deliver maximum impact. You can make objects appear disproportionately large by backing way off and shooting them with a telephoto lens. Including foreground objects further exaggerates scale because the lens magnifies objects at all distances constantly, not proportionately. For example, if you walked up to a cactus surrounded by mountains, the cactus would appear to become much larger while the mountains would remain relatively unchanged. However, if you viewed the same scene from far away through a telephoto lens, the cactus would increase in size and the the mountains would be magnified by the same factor, making them look like the Himalayas.
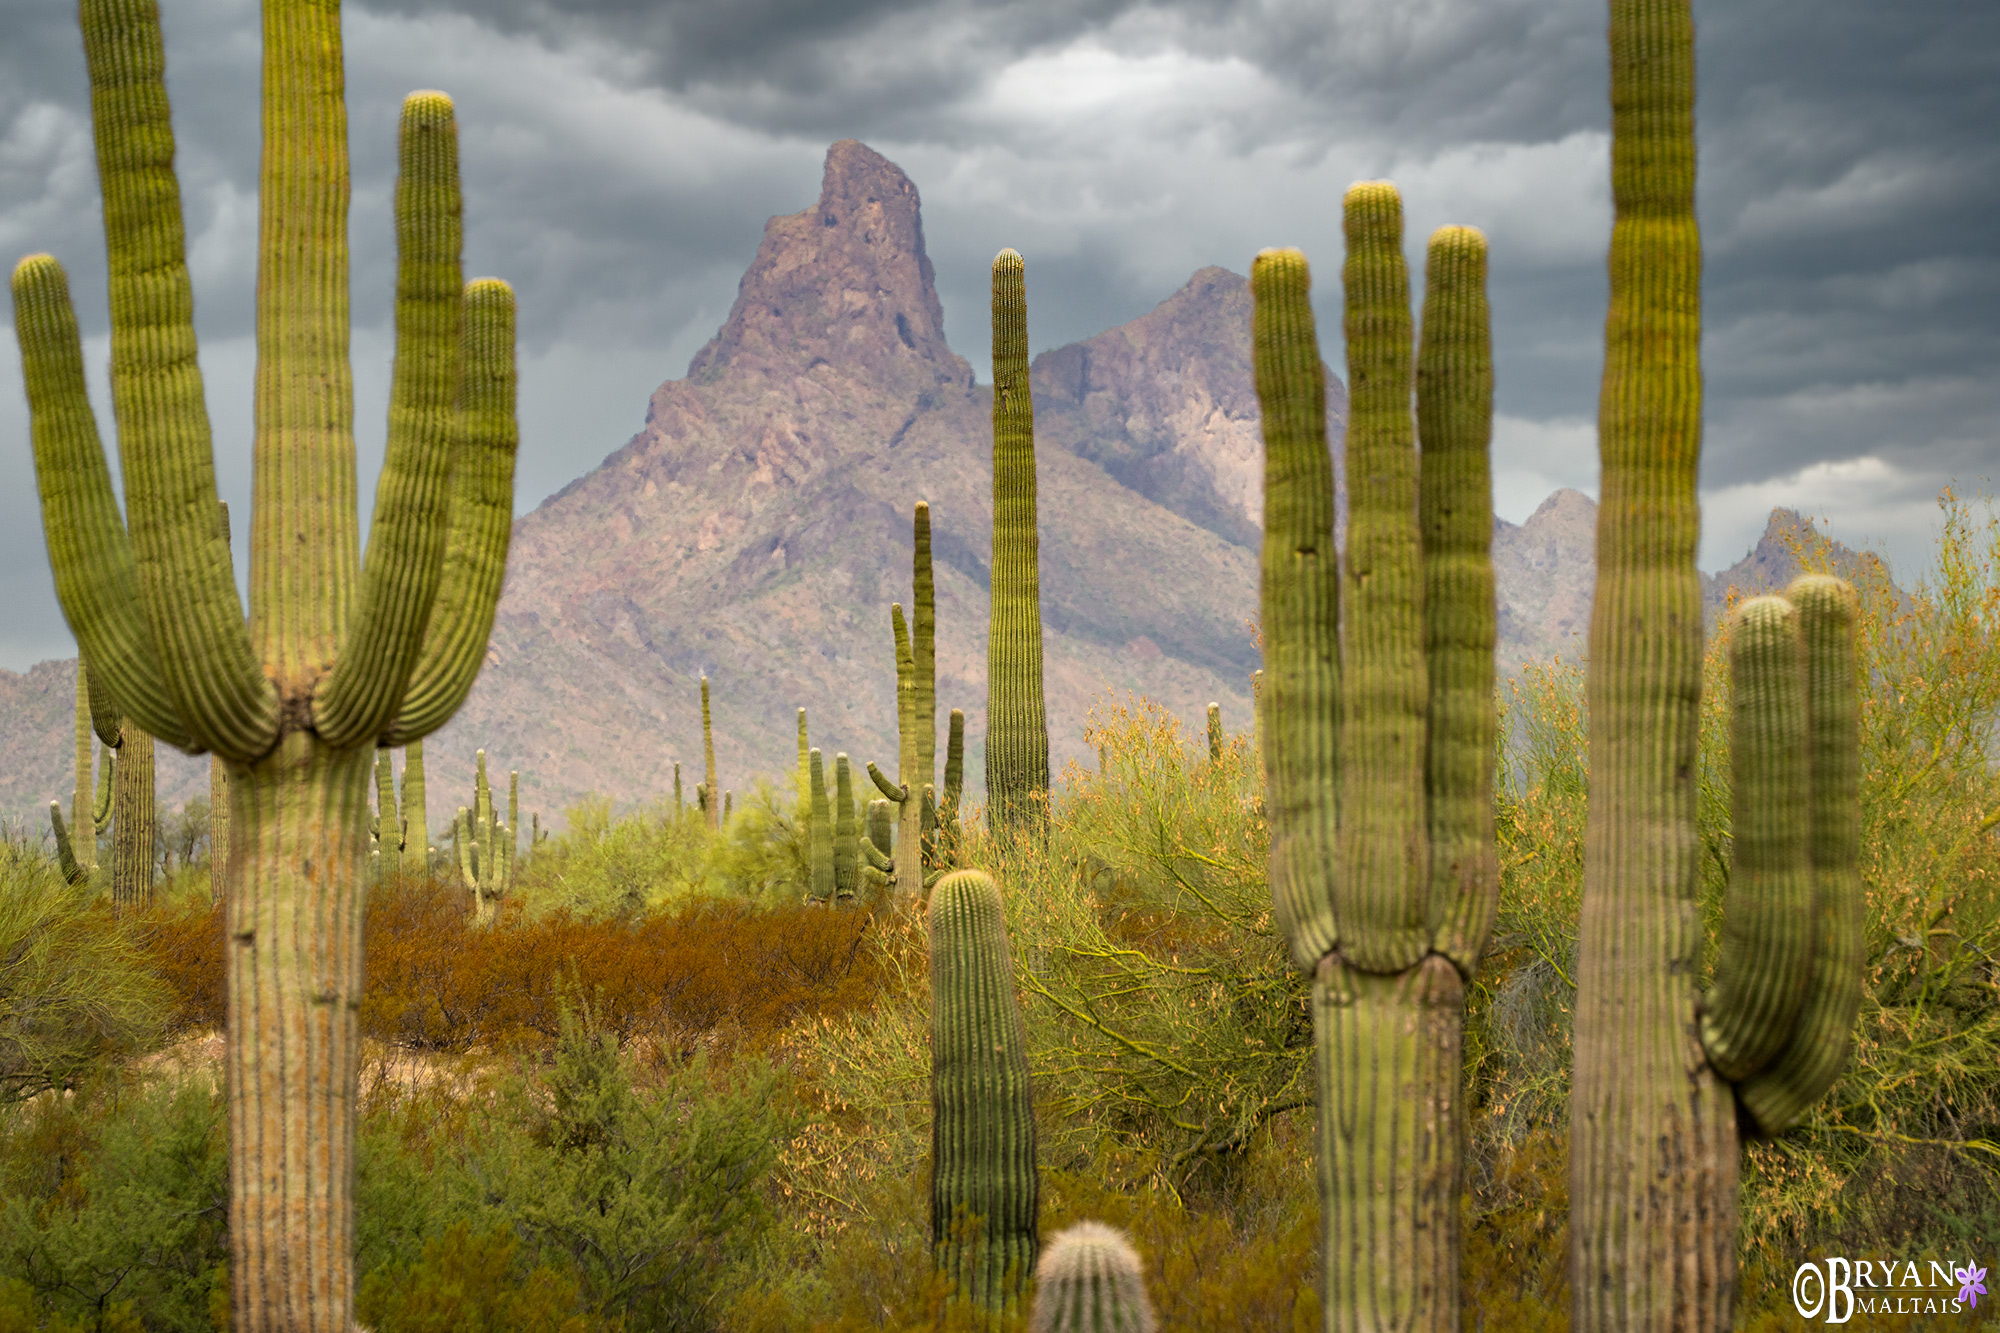
Picacho Peak, Tucson, AZ. To the naked eye, which has a field of view equivalent to a 50mm lens, Picacho Peak looks like a small spire off in the distance. After-all, it only rises 1,500 ft above the desert and it was 2 miles away in this shot. However, photographing it at 400mm makes it look like a fourteener rising out of the Saguaros.
Shoot from higher Ground for more Depth in Photos
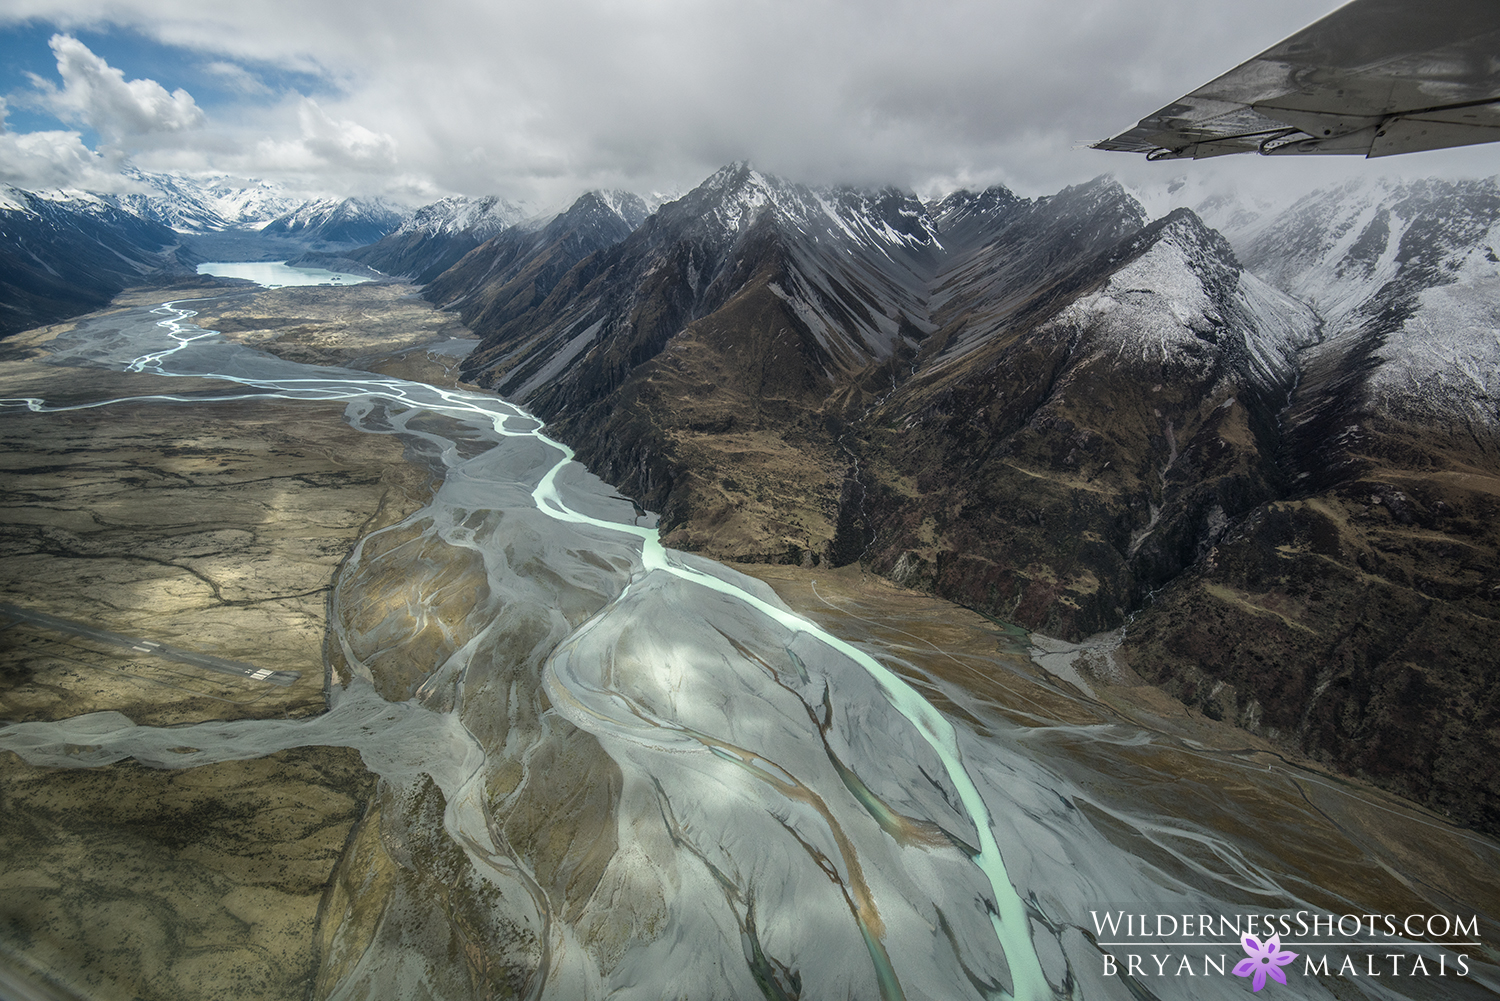
When shooting a scene head-on without the aid of side light and shadows, it can appear flat with no dimension. Shooting from a higher vantage point down on the scene can restore its depth. When you shoot from up high, the arms of the landscape stretch out and separate from the rest of the terrain. Another problem with shooting from ground level, especially if close to the base of a subject, is that angling the camera up can cause the keystone effect. This makes the top of the subject disproportionately smaller than the base. The next time you shoot at eye level, look around for nearby high ground to gain an elevated view.
Humboldt Mountains, New Zealand. Shooting this mountain from a high vantage point looking across at it captured the depth of its spurs and draws.
Use Light, Shadows and Atmosphere to Separate Layers
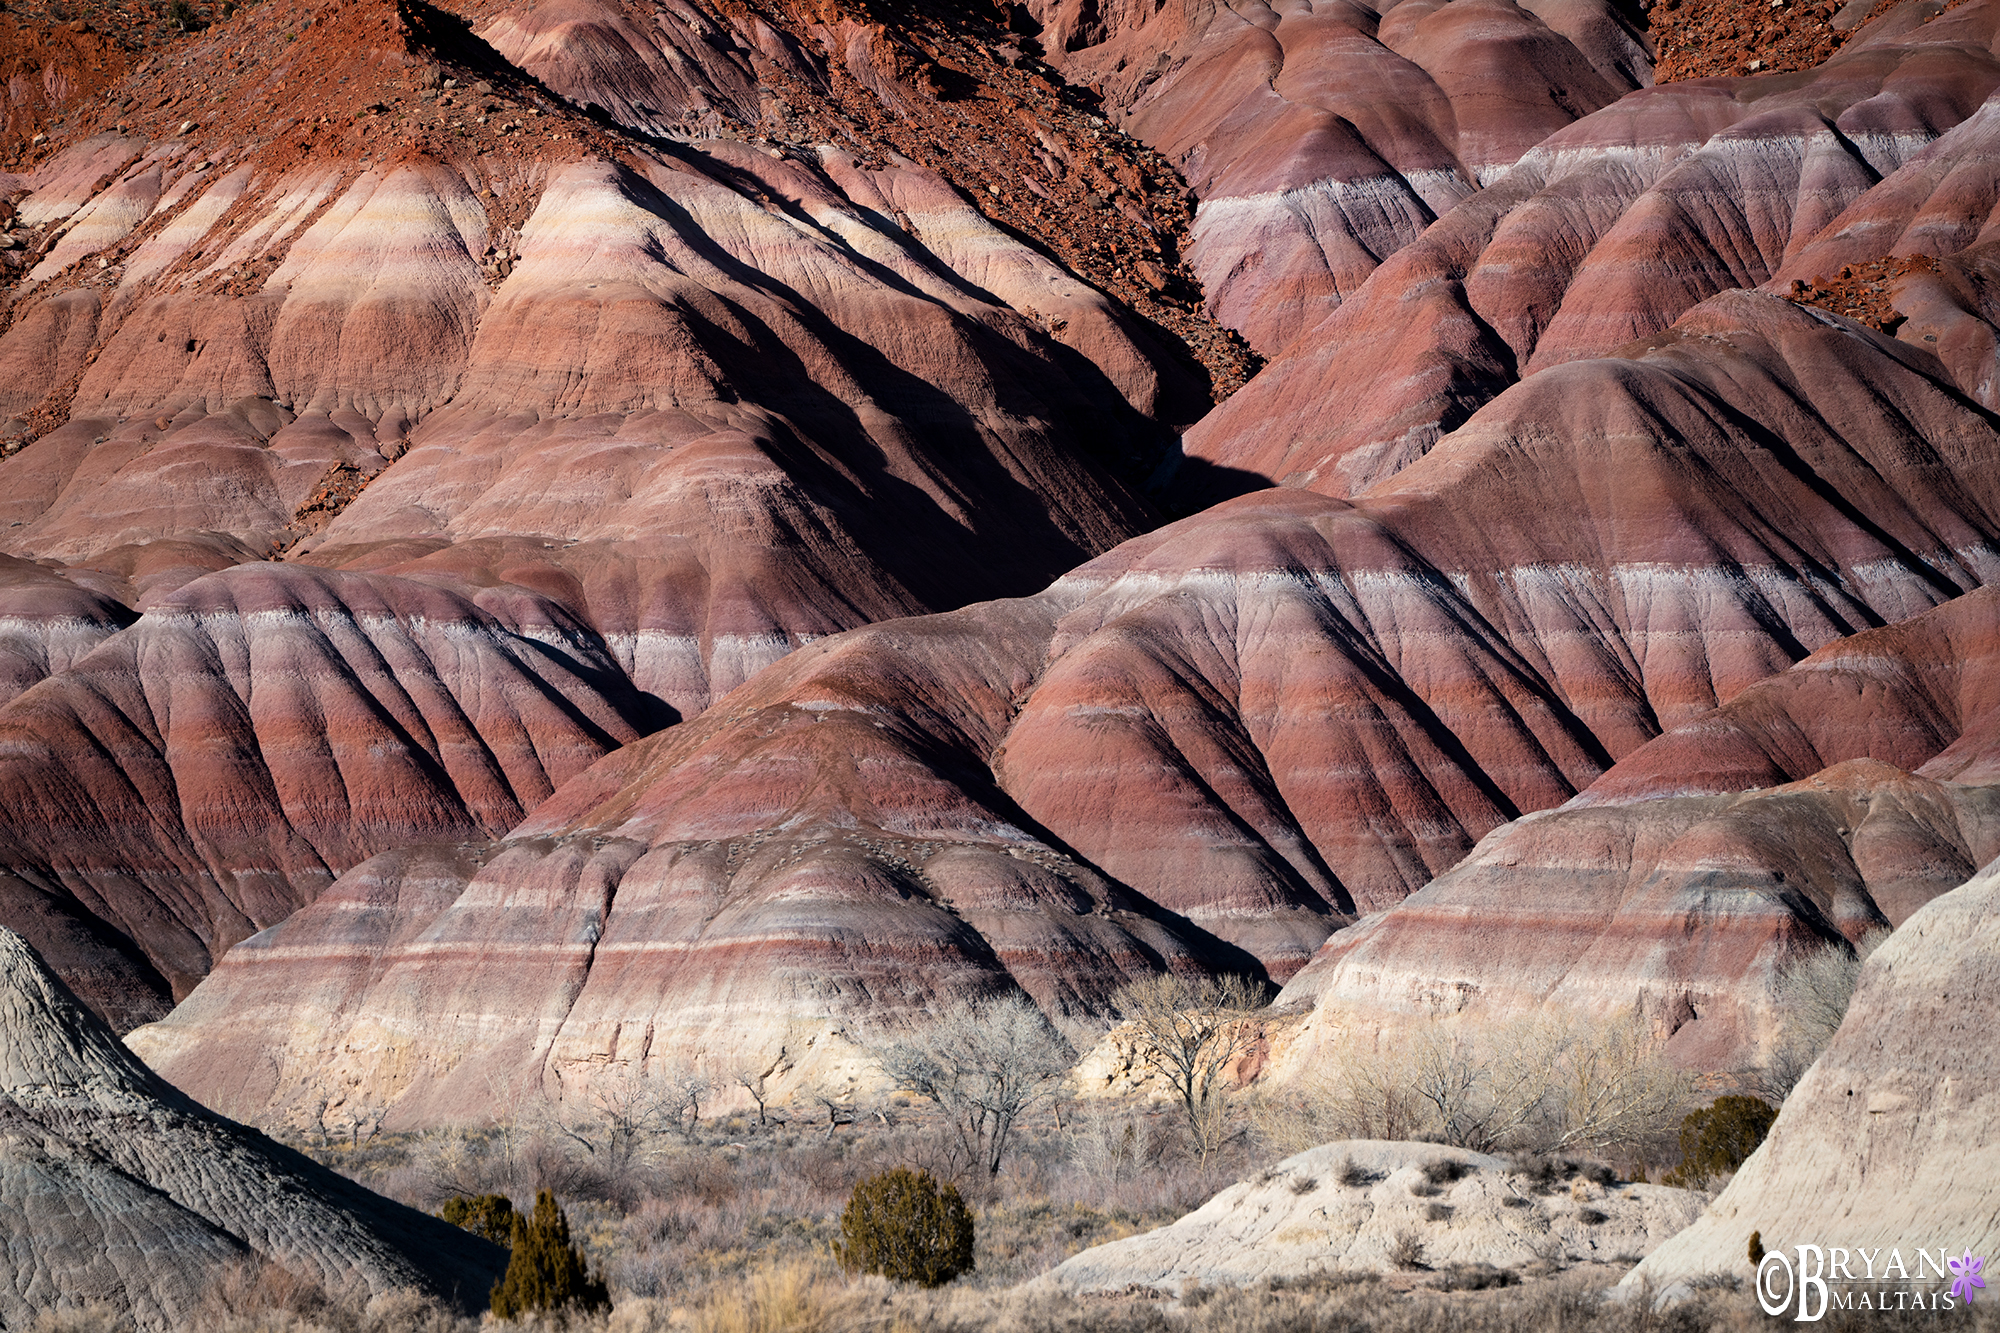
Paria, Utah. The shadows cast by side light separated each spur of these rainbow hills. Direct backlight would have evenly illuminated the hills, making them appear as a flat plane.
The right type of light, shadows and atmospheric conditions can separate landscape layers that otherwise appear to blend together. Light shining from one side of an object creates shadows, which reveals depth. Sidelight is strongest during golden hour when the sun is at a low angle and shines horizontally. Fortunately this is when you’re probably out shooting anyway. Rather than shooting due east or west, moving off to one pole can capture sidelight. The shadows from sidelight accentuate crags and contours in the landscape. Haze is another natural condition that can be used to show distance. Further objects appear bluer and less clear than near ones. Uneven shadows cast by clouds can also create separation and depth when some parts of the scene are illuminated and others are dark.
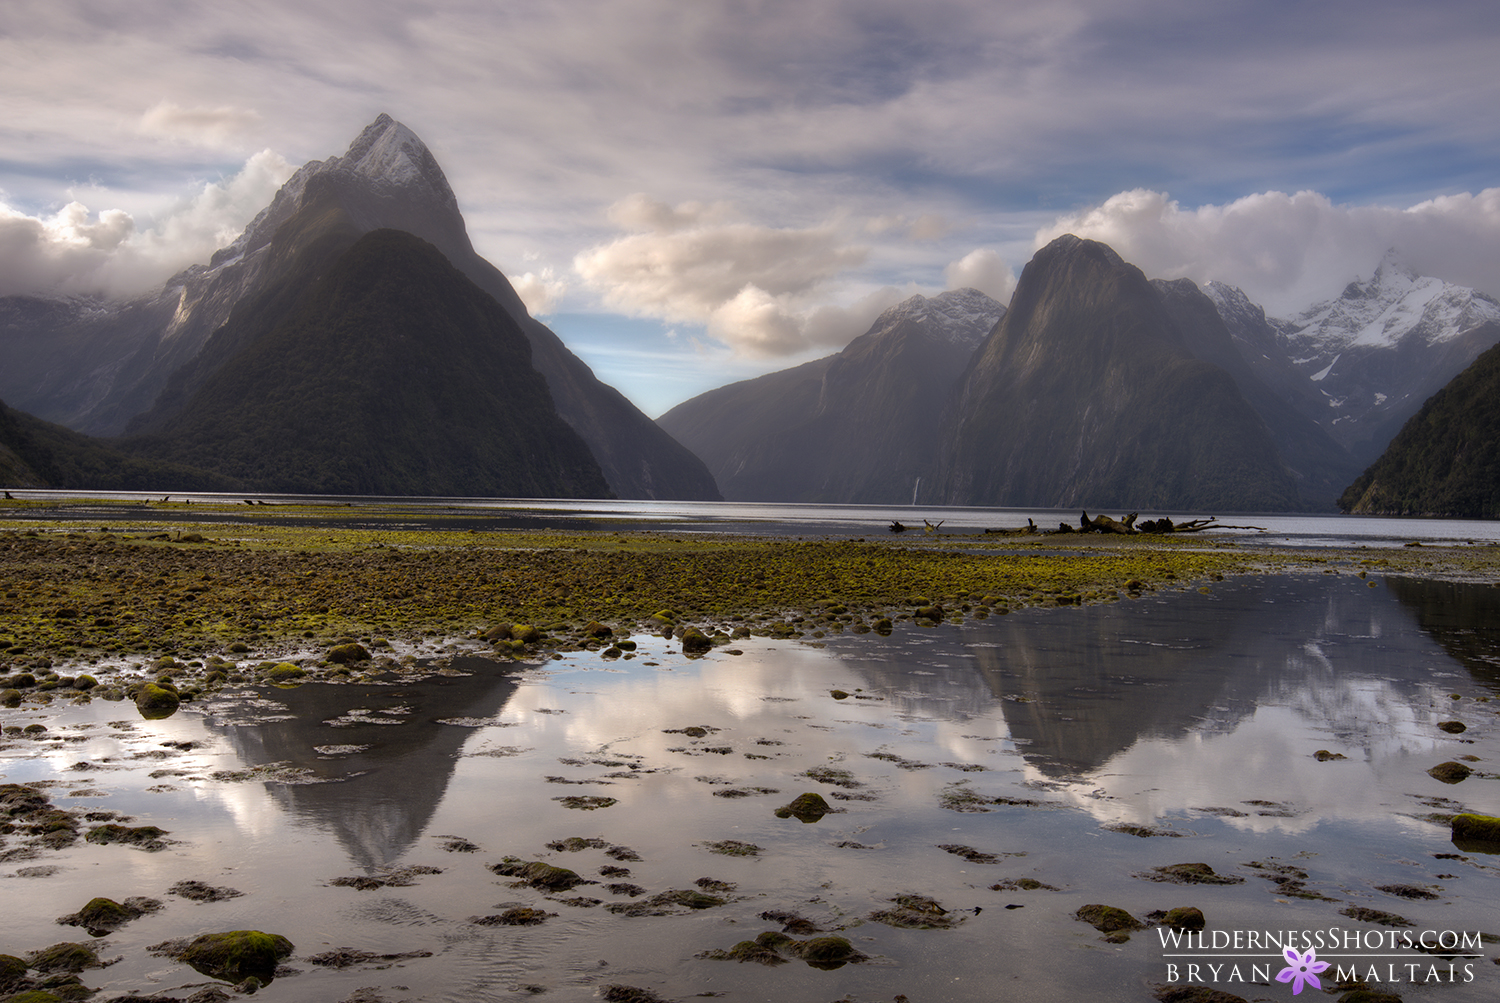
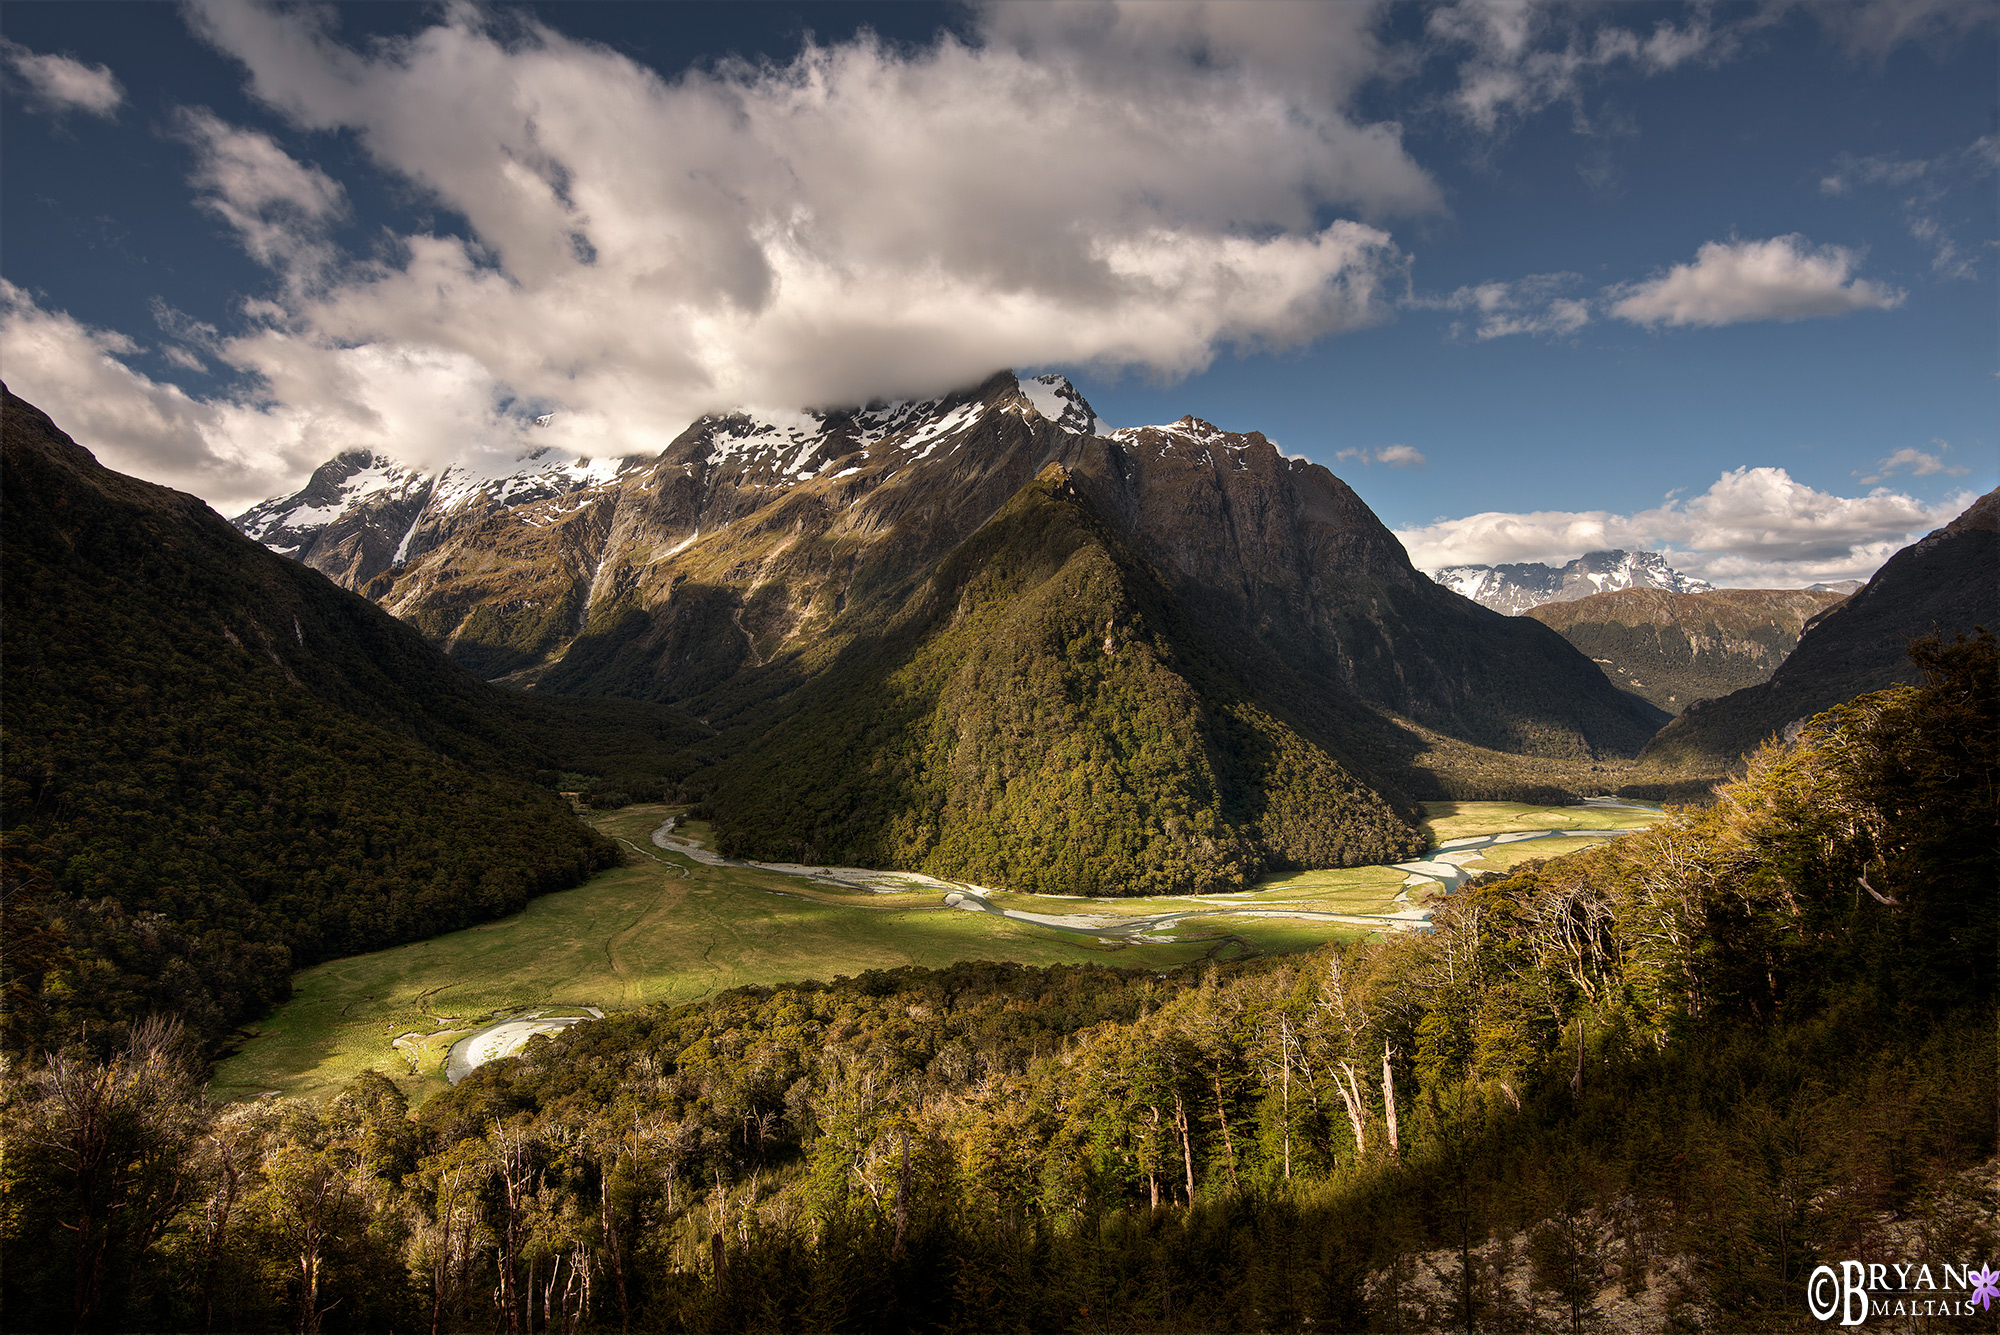
Milford Sound, New Zealand. In this photo you can tell that there is a second layer of more distant mountains behind the front because mist separates them. Without it, and because there’s no sidelight separating them, the mountains would all appear as one, dark mass.
Creating Depth with Diagonal Lines
Lines that travel away from your vantage point naturally appear diagonal. Where they converge or meet the horizon is the vanishing point. Including a vanishing point conveys scale, depth and direction. This effect can be observed by looking down a road with buildings along it. The straight lines of the road form a triangle that meets at the vanishing point on the horizon. The buildings decrease in size as they get further away, providing a sense of scale. Framing this in a photo creates a strong feeling of depth, akin to a portal that you could fall into. This isn’t a compositional rule to strive for in every photo, but can add impact when available.
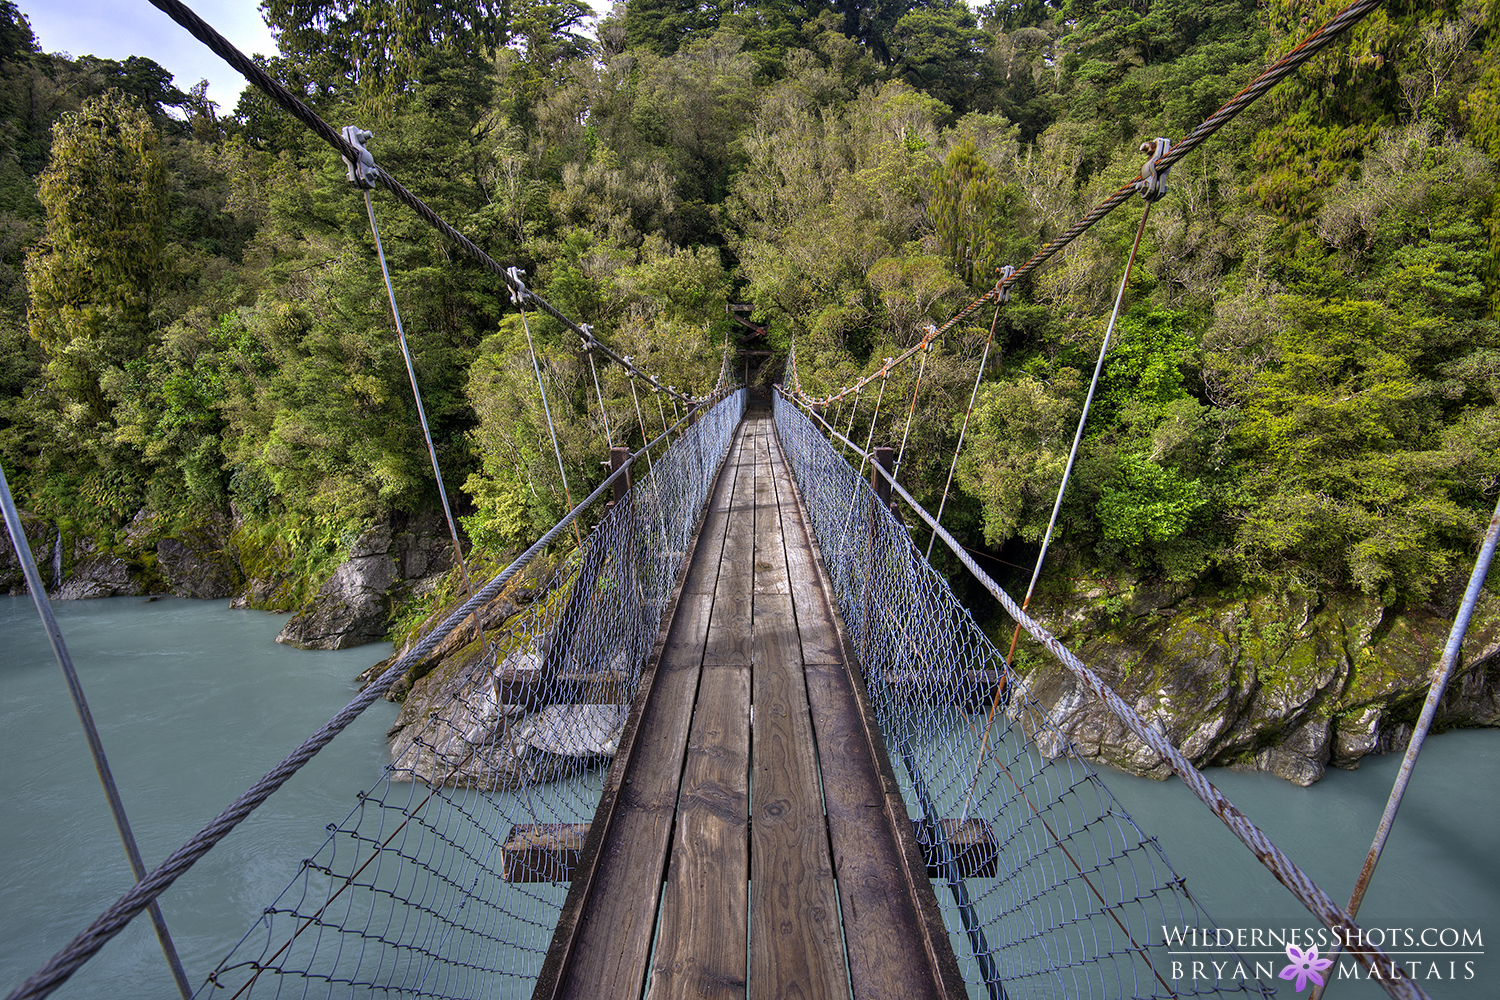
You can transform flat lines that run horizontally across the image into diagonal lines that add depth simply by moving towards one end of the lines. For example, a bridge that spans horizontally across a river appears as a straight line. But when you walk to one end of the bridge, it becomes diagonal with a vanishing point at the far end. Diagonal lines mustn’t always vanish-they can also lead the viewer to a focal point.
Look for disguised natural lines like rivers, tree rows and mountain ranges. You can even create diagonal lines out of the clouds if they’re moving toward or away from you. You can turn them into diagonal streaks by blurring them during a long exposure using a neutral density filter. Diagonal lines don’t even need to be straight as long as they run in the same direction like the shoreline of a wavy river.
Exposure in Photos looks different than in Real-life
The human eye sees far more dynamic range than the camera. In other words, even when a scene contains both bright and dark areas, we can see detail throughout. In unedited images, shadows appear darker, and highlights appear brighter than they actually were. Clipping can occur in images with a large exposure difference between highlights and shadows. This is when shadows appear black with no detail, and highlights (like clouds), appear white. This situation of overly dark shadows and bright highlights causes unnaturally high contrast in photos.
Correcting exposure to match the actual scene is fairly easy. Modern cameras capture up to 15 stops of dynamic range in RAW images. Shadows and highlights that initially appear clipped may store enough data to be recovered simply by moving the “shadows” and “highlights” sliders in Lightroom. However, sometimes there might be too much exposure latitude between lights and darks for even RAW files to capture in a single image. For example, when there’s a bright sky with a deeply shadowed foreground. In this case you can use bracketing to take 3 (or more) shots that are underexposed, properly exposed, and overexposed. You can them manually blend them (using masking), which I recommend, or merge them into a High Dynamic Range (HDR) photo.
My backyard, Ft. Collins, CO. The darker image is unedited. While the sky is properly exposed, the foreground is much darker than how the human eye would have seen it. In Lightroom, making a foreground mask and increasing exposure in the shadows restores the image to how it actually appeared.
Don’t try to force all of these techniques into your photos if it doesn’t happen organically. Sometimes you have to make due with what nature gives you. It won’t always be possible to find a higher vantage point or move way back to shoot the scene with a telephoto lens. Sometimes side light won’t be practical because the scene looks best with golden light coming directly from the east or west. However, understanding what can cause photos to look different than reality and having these tools in your quiver will help you avoid coming home with flat looking images.
