What are the most useful filters for Landscape Photography?
Though simple, filters are necessary for landscape photography because they impart photos with visual effects that the camera isn’t capable of on its own, and can’t be convincingly faked in editing. There are only 2 types of filters that you need for landscape photography; the polarizer and neutral density filters.

Left with polarizer filter, right without. RMNP, CO
Circular Polarizer Filter
The Circular Polarizer (CPL) is the most frequently needed filter for landscape photos. Its two main effects are removing glare from reflective surfaces and darkening the sky. They also remove haze and intensify rainbows. The polarizer filter is no different than polarized sunglasses.
By eliminating shine on reflective surfaces, the object’s true colors can show through, which increases color saturation. For example, leaves have a smooth, shiny surface that subdues their color, especially when wet. Slapping on a CPL can make their colors pop, which is why it’s so useful for shooting fall colors. The CPL also removes the reflection on water to show rocks and plants beneath the surface. The same principle applies to all shiny surfaces like windows and metal.
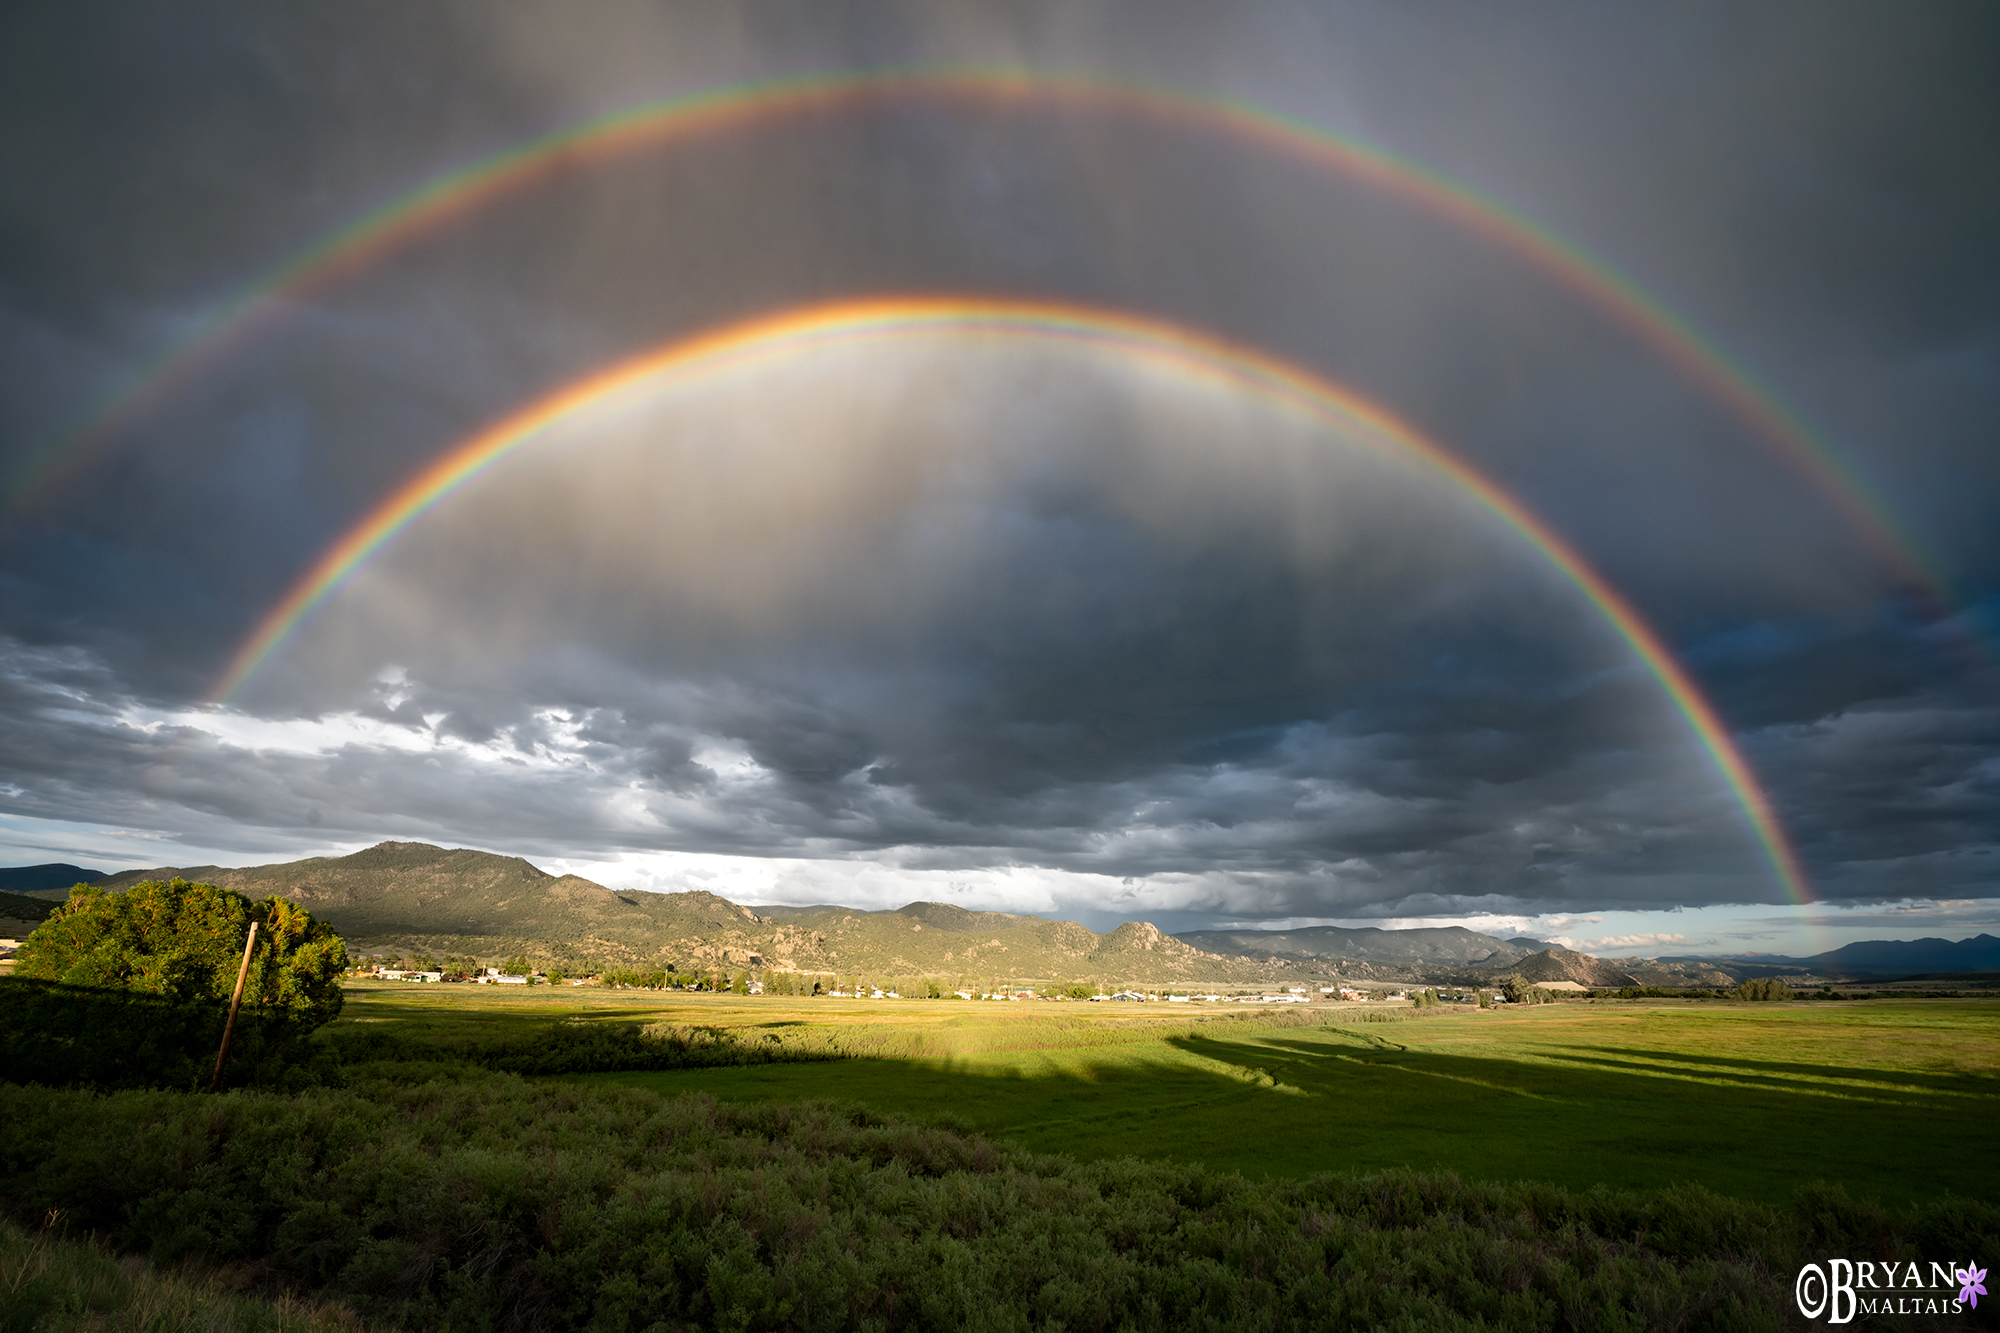 CPL filters intensify the brightness and saturation of rainbows. Buena Vista, CO
The other effect of the CPL is making the sky darker blue, thereby increasing contrast between sky and clouds. However, this effect only works 90 degrees in either direction from the sun. In other words, if the sun is setting in the west, the CPL will only darken the sky to the north and south. Sometimes you’ll have to face partially toward or away form the sun, which causes a dark center of the sky with brighter corners. This is common with wide-angle lenses because they include a wide swath of the sky. This artifact can be fixed in post.
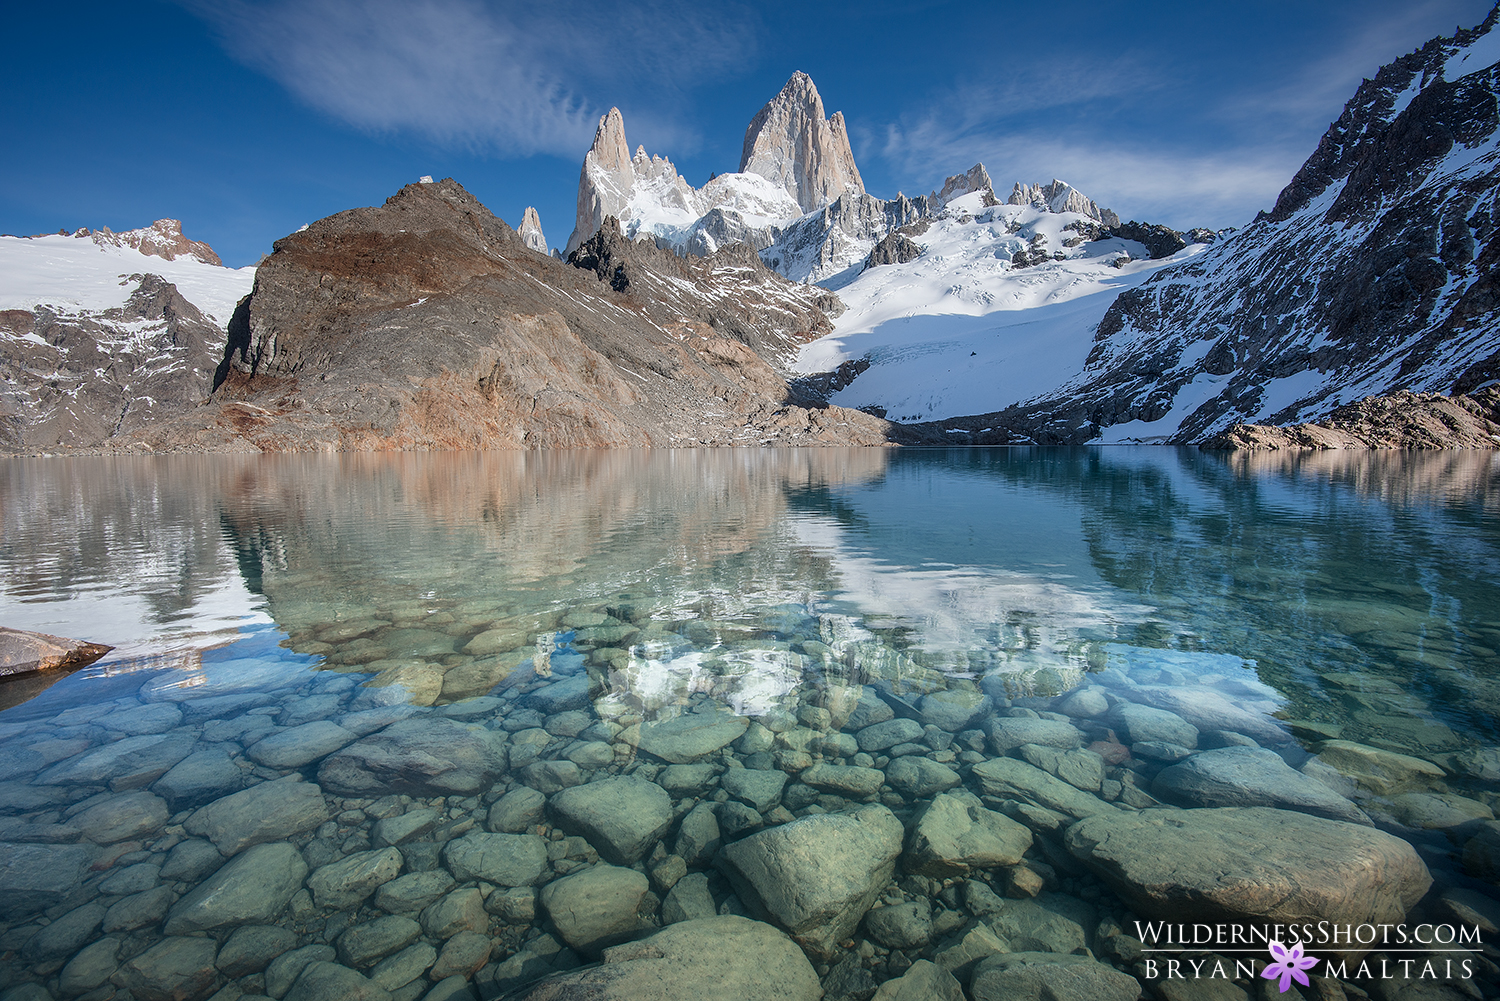
 It’s a common perception that you shouldn’t use a CPL if you want a strong reflection on water. However, this composition aligned so the reflection of the mountains was preserved while still showing the beautiful sunken logs. I did this by rotating the polarizer filter’s effect on the bottom of the frame. RMNP, CO
A CPL is made of a fixed glass element, and a second element that you rotate to change where the polarization effect is strongest. When switching your shot between horizontal or vertical, always remember to readjust the CPL.
Despite needing the CPL often in landscape photography, you shouldn’t leave it on your lens for every shot because it reduces light transmission by 1-2 stops. This forces you to use a slower shutter speed, wider aperture or higher ISO than needed. Only use it when you need to reduce surface reflection, reduce haze, or darken the sky. Furthermore, a CPL is another layer of glass that can potentially degrade image quality, albeit, insignificantly with good brands.
Neutral Density Filters
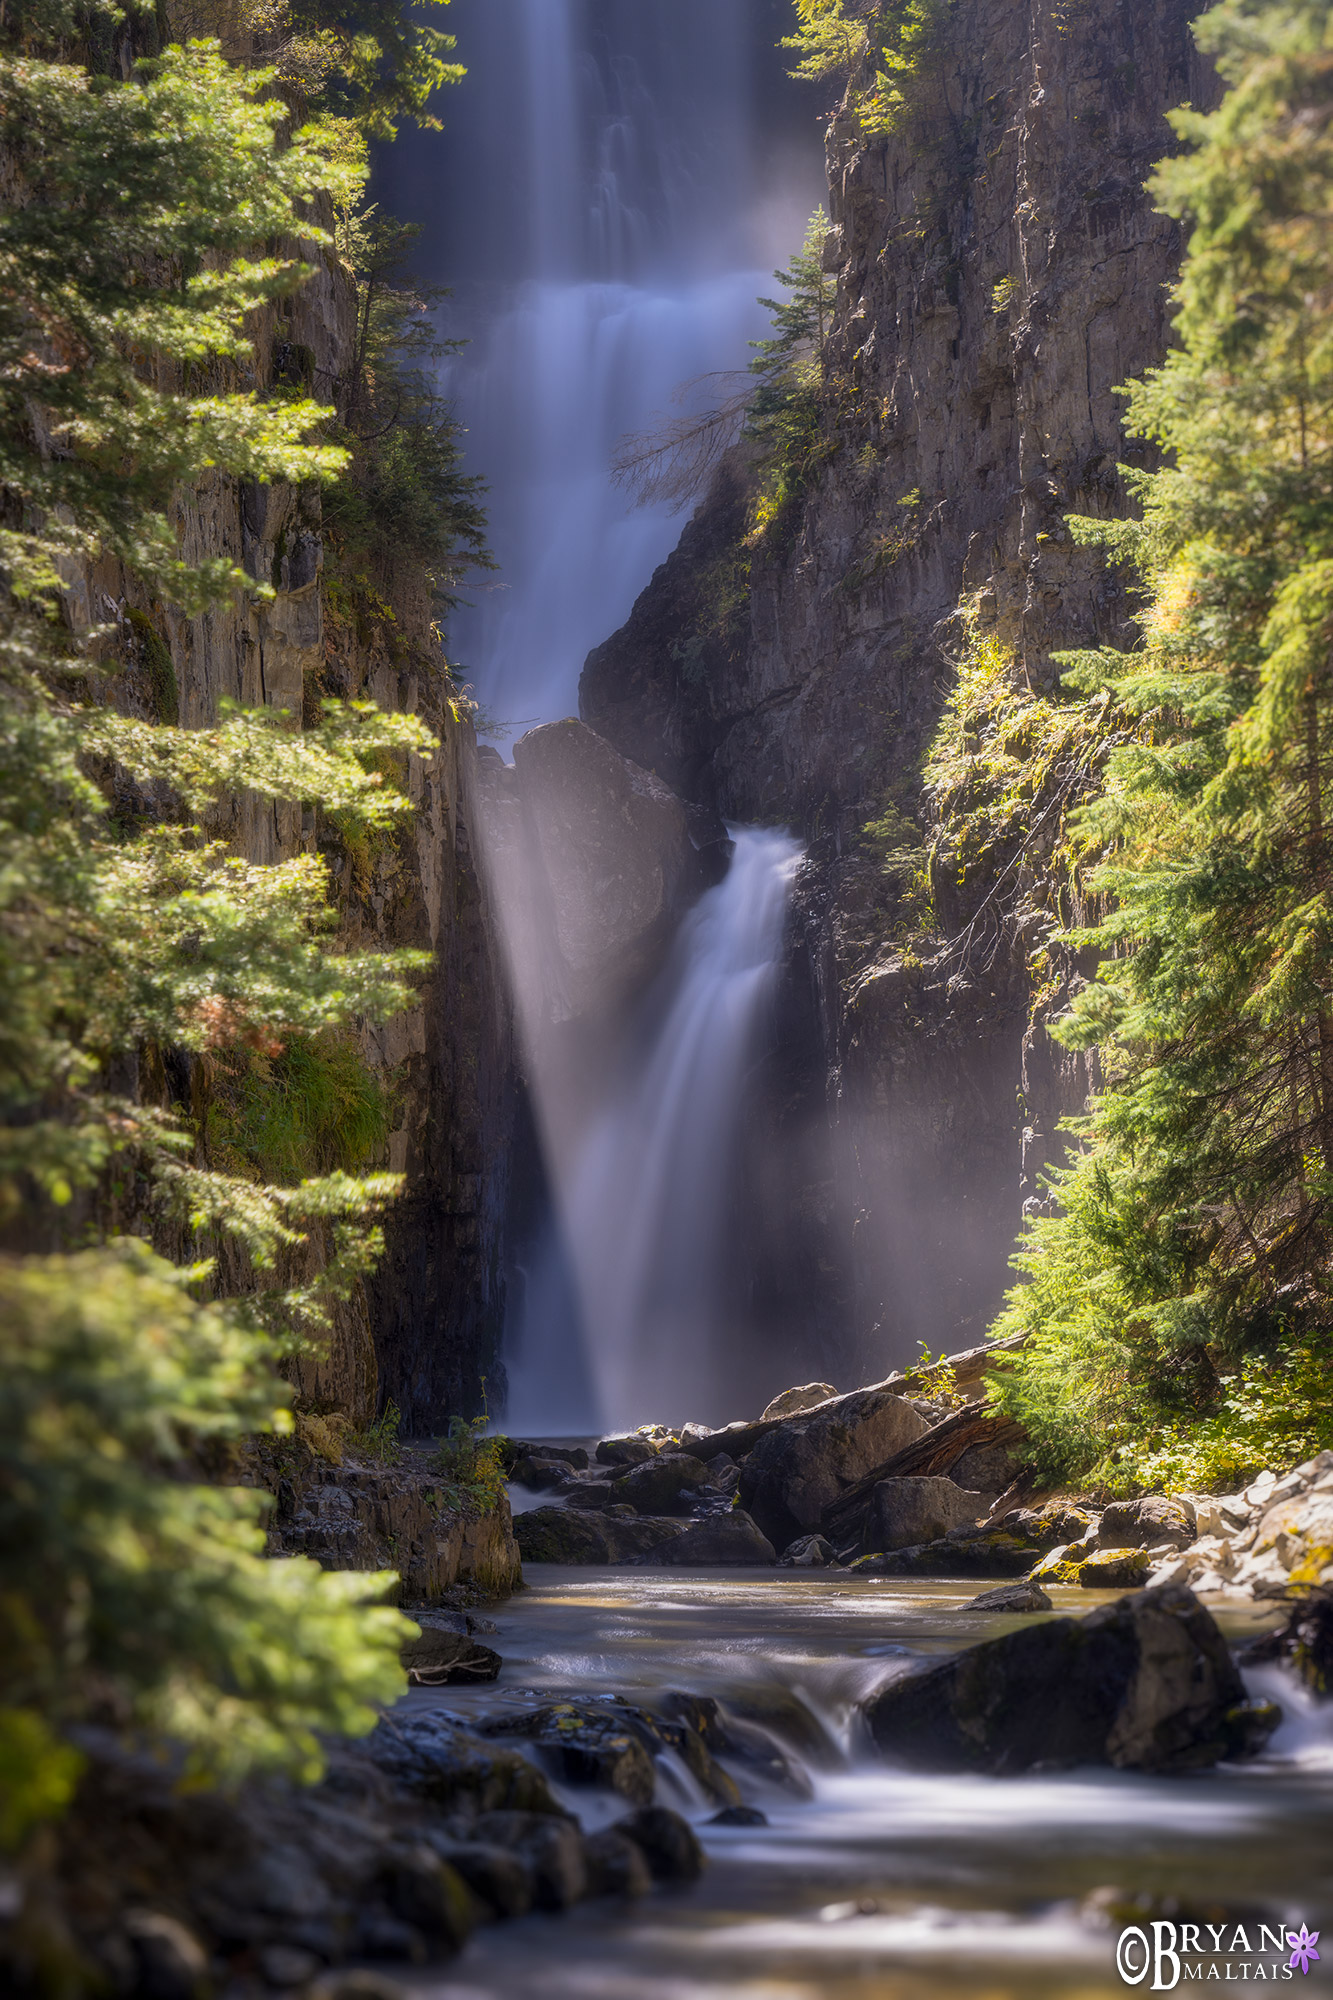 I used a ND64 (6 stops) to render this 15 sec exposure. Not only did it silken the water, it captured enough mist in the light to record the distinct beam of light. Telluride, CO
The neutral density filter is a dark piece of glass that blocks light, thereby increasing exposure time. When you block light reaching the sensor, you can use a longer shutter speed to deliberately cause motion blur like silky water and blurred clouds.
Imagine photographing a waterfall at dusk when it’s nearly dark. You would need a long shutter speed like 15 or 30 secs to expose the scene. During the long exposure, the rushing water becomes smooth and blurred in the photo. The neutral density filter achieves the same thing; it forces a long shutter speed as if it’s dark out.
ND filters are available in 1 to 15 stops of light blockage. Their naming convention reflects the fraction of light that’s transmitted. A ND2 transmits ½ of the light, ND4 ¼, and so on. Here’s a list of ND filters:
ND2 (1 stop)
ND4 (2 stops)
ND8 (3 stops)
ND16 (4 stops)
ND32 (5 stops)
ND64 (6 stops)
ND128 (7 stops)
ND 256 (8 stops)
ND512 (9 stops)
ND1000 (10 Stops)
ND32000 (15 stops)
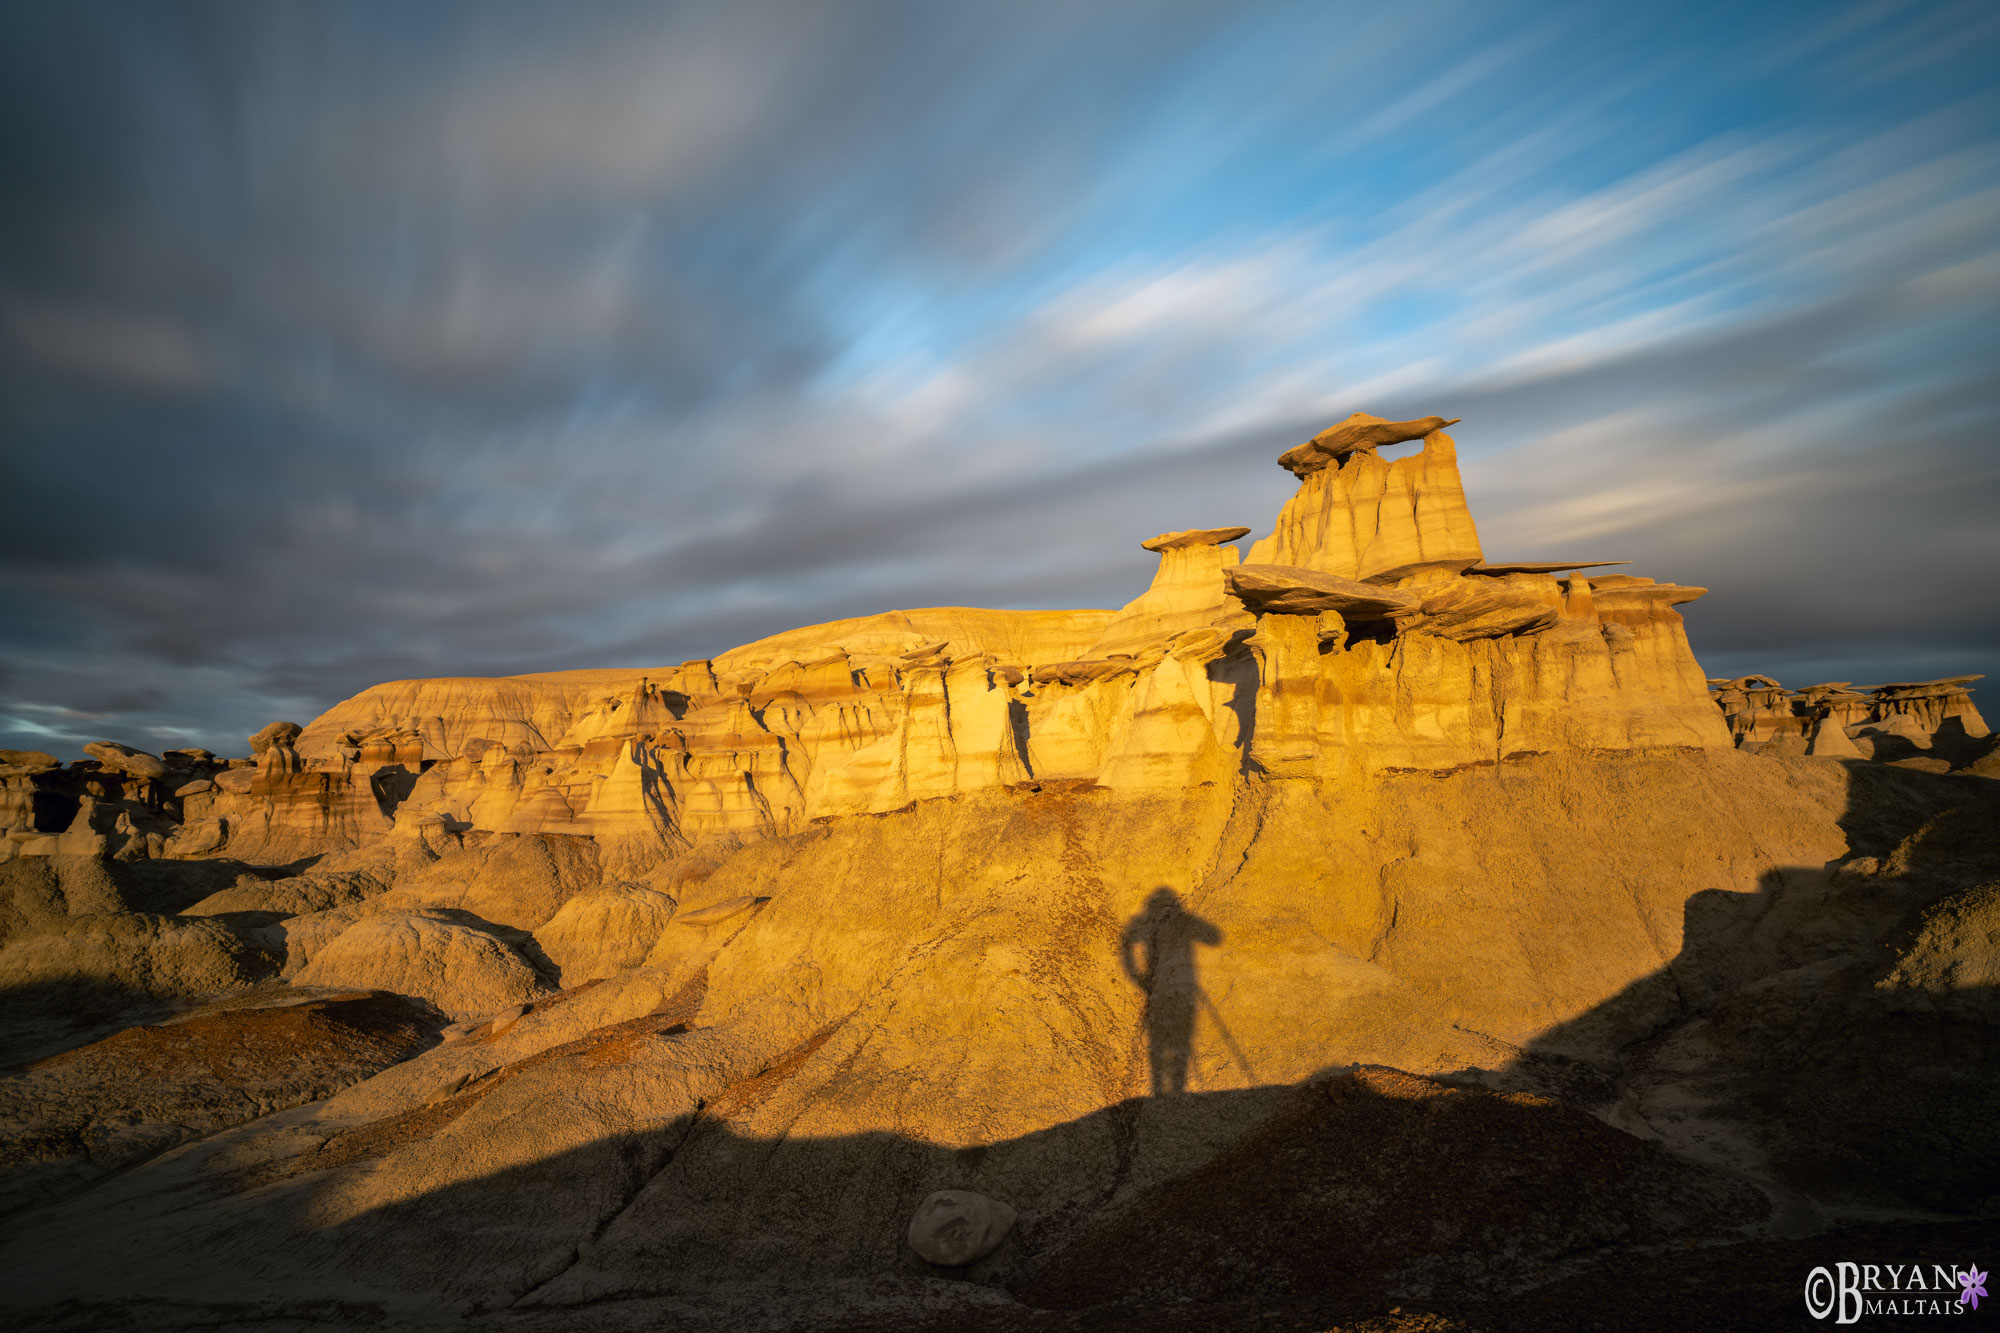 An ND1000 (10 stops) rendered this 30 sec exposure with significant motion in the clouds. I also had to hold my pose through the exposure. Bisti Badlands, NM
In choosing ND filters, it’s best to get a set of them to cover all lighting situations. The brighter the ambient light, the darker the ND filter you need. I most frequently use ND16, ND64 and ND1000 filters. The ND 1000, in particular, blocks 10 stops, which can render 15-30 sec exposures in bright daylight. This is enough to capture blurred clouds on a bright afternoon.
To achieve motion blur using an ND filter, first frame your shot without the filter mounted. Otherwise, they can make it too dark to clearly see the scene, especially with DSLR’s. Set WB to auto because some ND filters have an unpredictable color cast. Finally, set a low ISO and a small f/stop. ND filters are also used to photograph lightning during the day because a long exposure is more likely to capture strikes.
Stacking Filters
You can also stack filters to multiply effects. Stacking 2 ND filters yields a longer exposure. When shooting water, you can use a CPL to reduce reflection and an ND filter for longer shutter speed. You can also stack ND filters to photograph the details of the sun’s surface. Stacking a ND 64 and ND 1000 works well for the sun because this provides 16 stops of light reduction.
There’s a risk of the filters getting stuck together when stacking them, which can ruin the rest of your shoot if you need to use one of the filters that’s now stuck. The way to avoid this is to thread the bottom filter on to the lens firmly, then thread the second filter only tightly enough that it just stays on.
It’s also worth springing for “slim” filters. They cost a bit more, but have a thin frame that helps avoid vignetting. Vignetting is when the corners of the image darken or become cut off. This can be severe when stacking lenses.
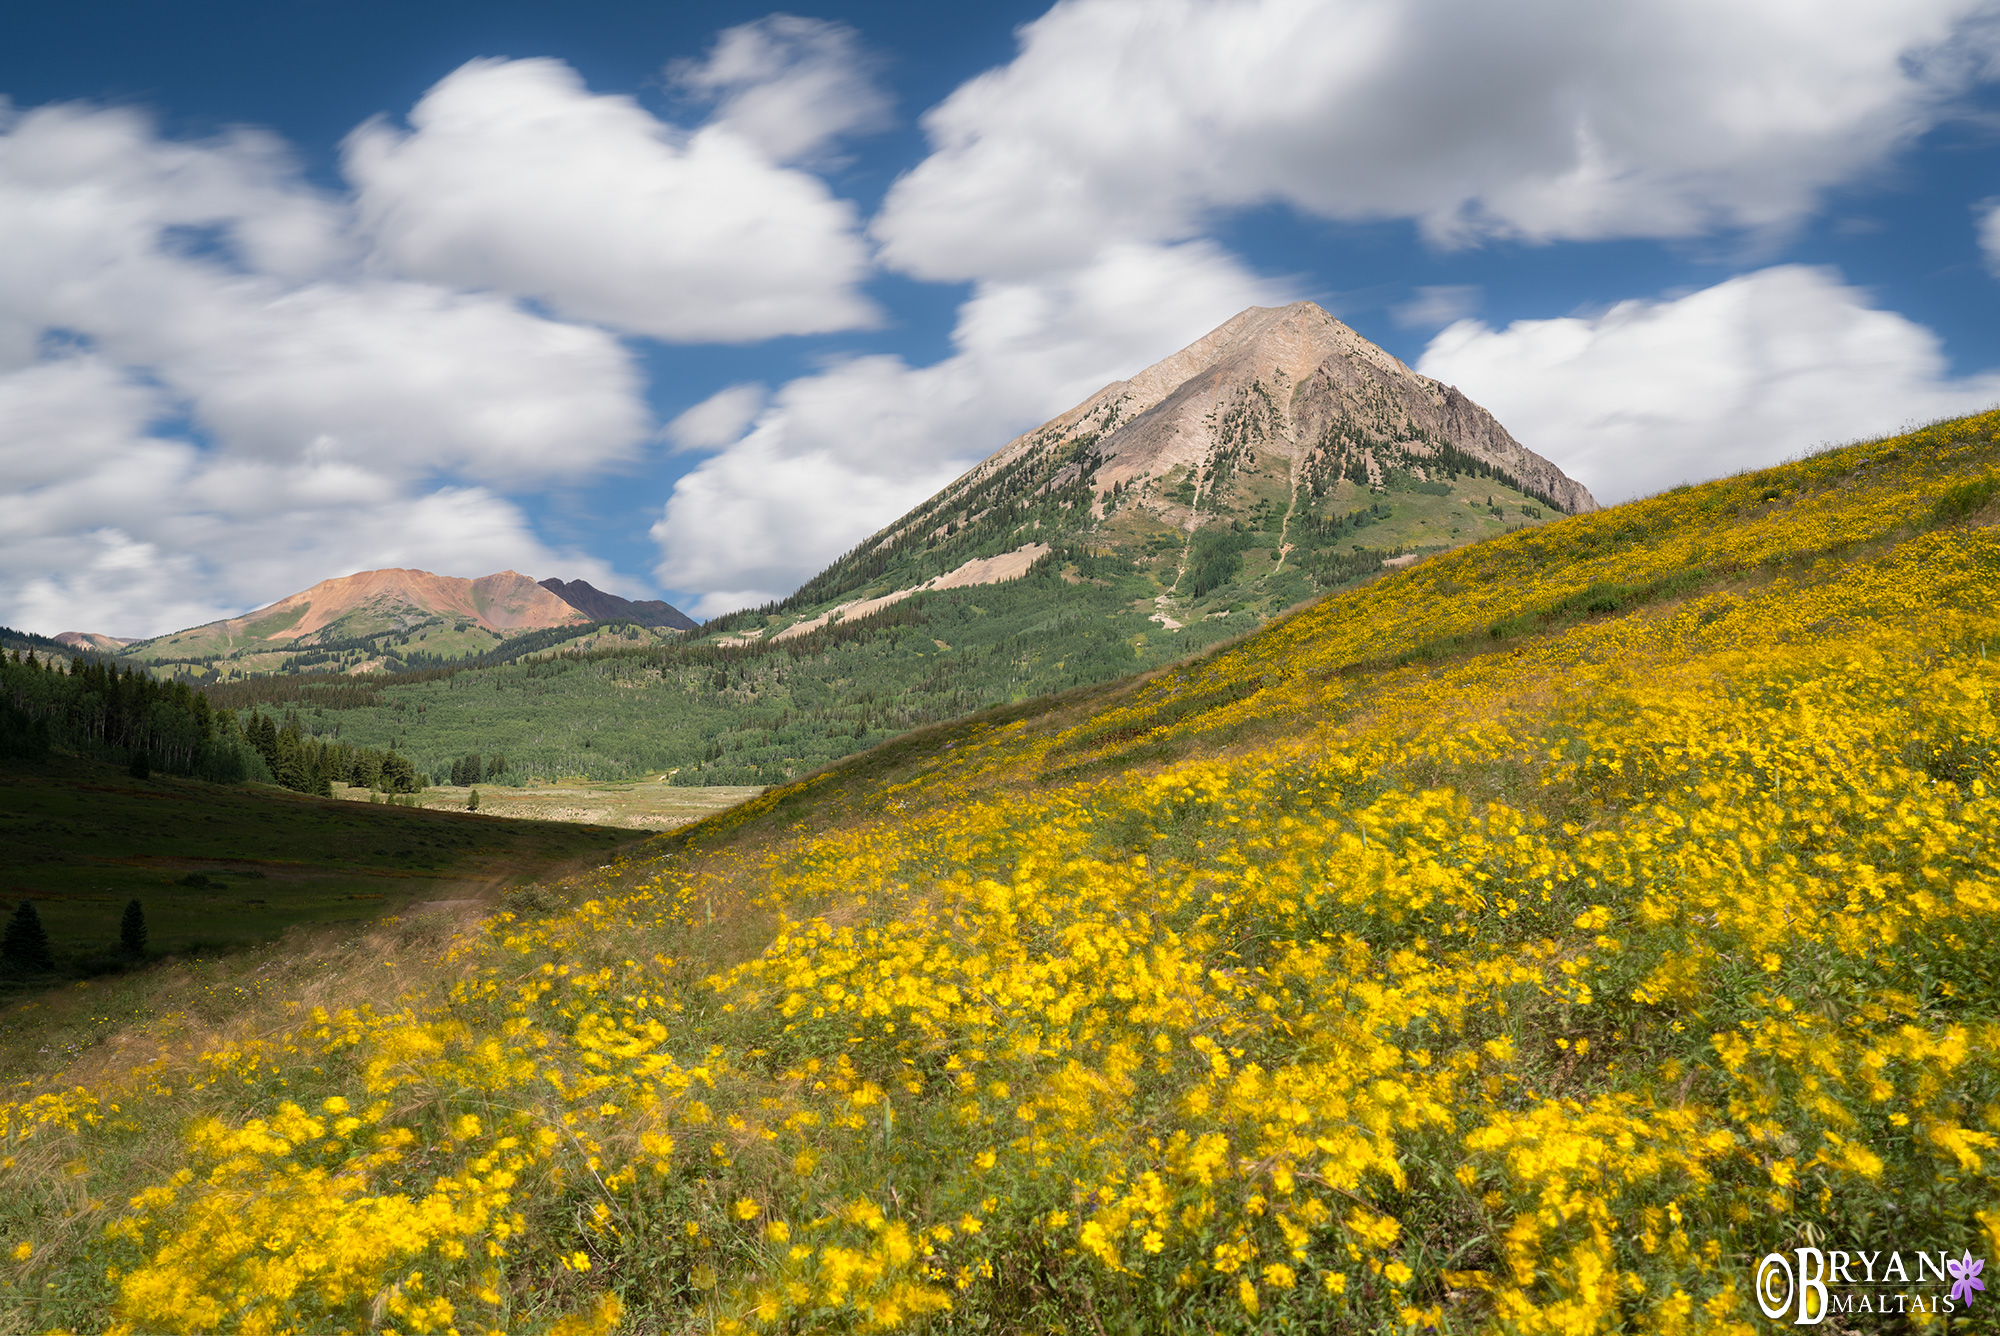 A ND 1000 (10 stops) allowed a 30 sec exposure, which blurred the flowers swaying in the wind and the cumulus clouds. Crested Butte, CO
The Step-up Ring Hack
If you own lenses with different filter sizes, you don’t have to buy filters for each of them. Instead, just get one set of filters in a standard size and attach step-up rings to each lens. I recommend using at least 77mm filters because this is the standard size for professional filters. You can also future proof yourself by using 82mm, the largest standard filter size.
Unnecessary filters for Landscape Photography
Graduated Neutral Density Filter
The GND filter has a shaded top part of the filter to equalize exposure when the sky is much brighter than the foreground, which is often the case in landscape photography. This was essential gear in the film days when you had to capture good exposure in all parts of the photo in a single shot. Today, better results can be achieved by bracketing shots, then blending the sky exposure with the foreground in Photoshop. Sometimes there’s even enough dynamic range in a single RAW file to recover the sky without needing to blend two images.
The drawback of the GND filter is that the shaded area is often misaligned with the foreground. This causes mountains or objects that protrude into the sky to have telltale “burnt tops” that reveal that a GND filter was used. The GND isn’t altogether useless. They’re useful when shooting video, and when the sky and foreground do align. The GND is also coming back into service with the resurgence of film photography. However, blending and bracketing can spare you having to carry the additional gear for the few instances that a GND would be useful.
UV/Clear Filters
UV and clear filters are primarily sold as protection against scratching your lens, and are often bundled as freebees. Optically, they add nothing, but can detract. They can pick up flare when shooting directly at lights, including when shooting the night sky. The extra layer of glass can also cause aberrations and degrade image quality, especially the cheap ones included with lenses. The notion of filtering UV rays is antiquated. Modern digital cameras and lenses are already UV calibrated and don’t require a UV filter. In lieu of protective filters, it’s better to trust your lens cap and nurture your equipment. High-quality cameras and lenses render such sharp resolution that adding unnecessary glass can degrade it.
Warming and Cooling Filters
These were another staple of the film era, but are now useless with digital photography. It’s better to adjust the color tone in post processing than adding a layer of colored glass to your lens.
